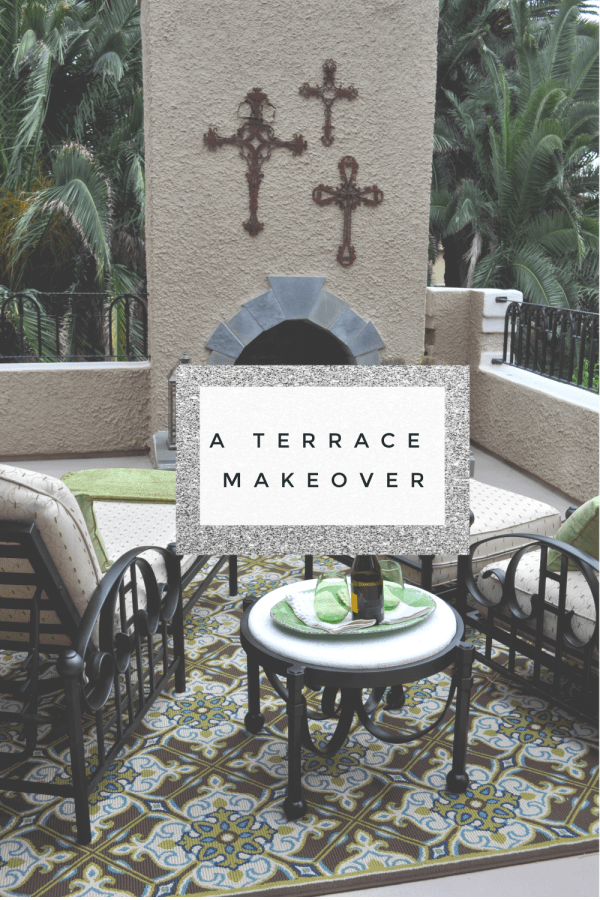
The Back Terrace Project is Complete

House Projects
View to the back terrace

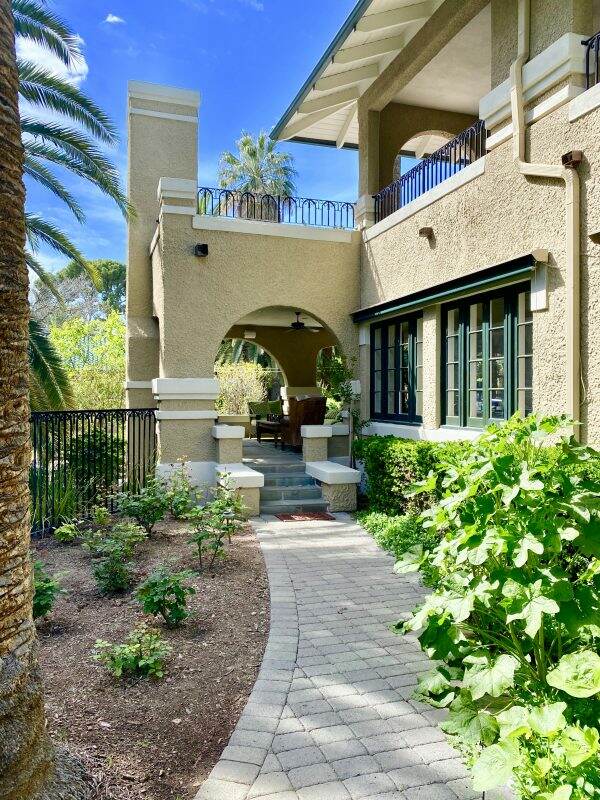
Back in March, during the lockdown, we created a list of home projects to tackle. As I was washing all the windows in the house, my husband started working on the back terrace. Like most projects, the work on the back terrace morphed into something bigger…..yet better. To see that post of lockdown projects, click here.

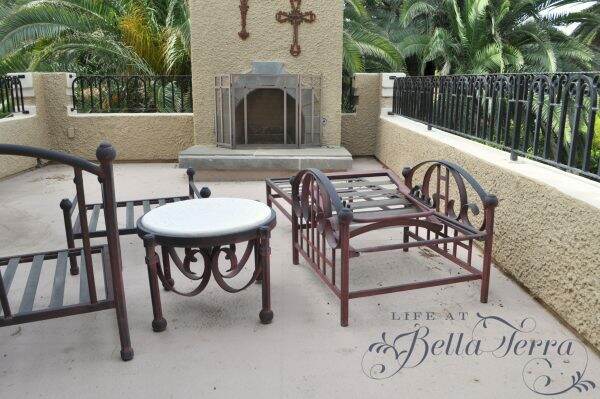
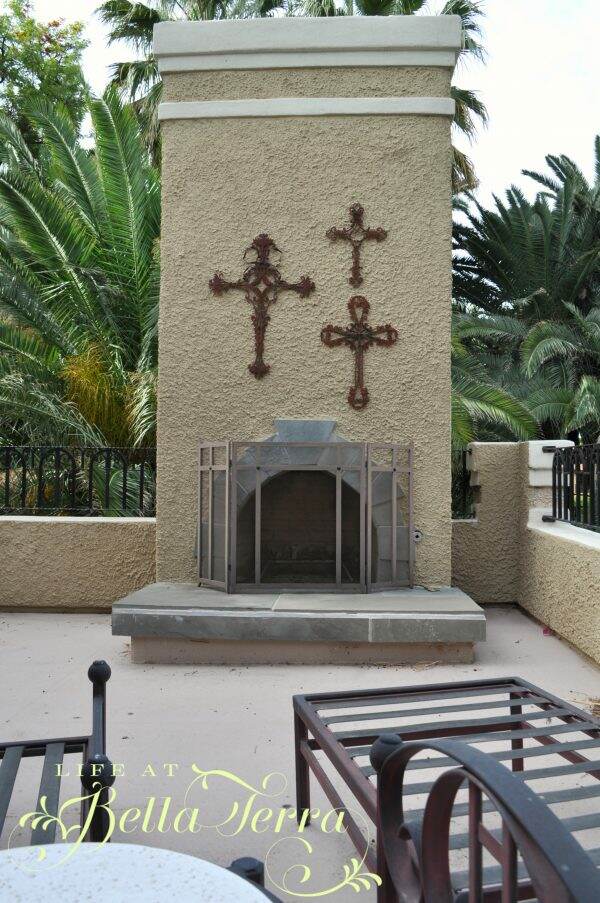
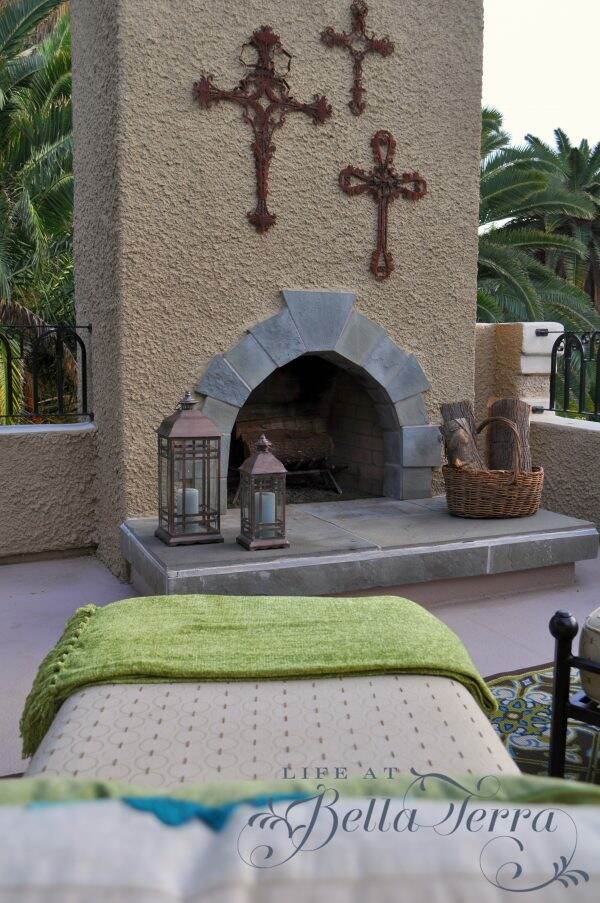
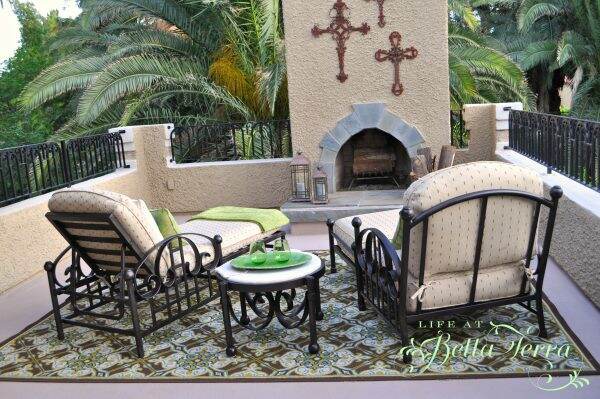
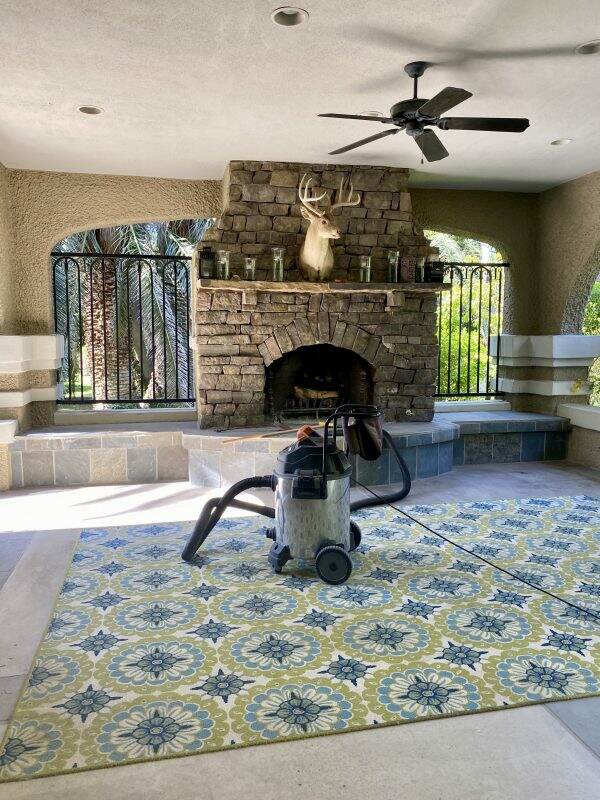
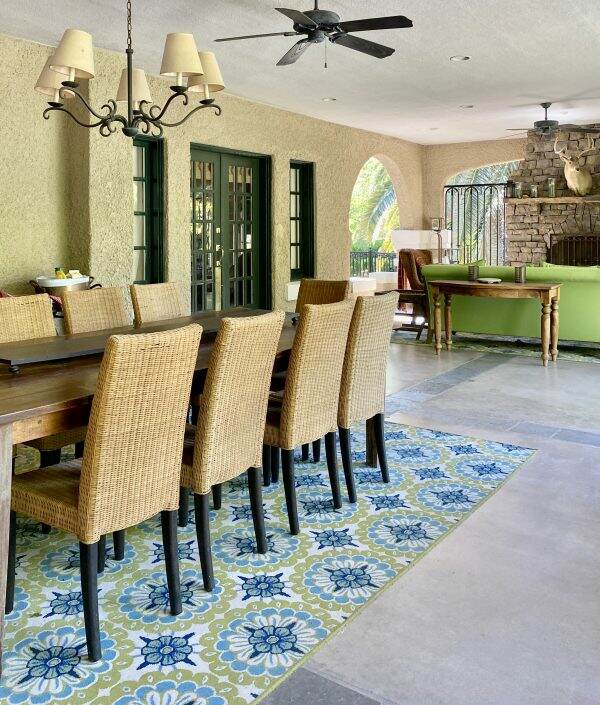
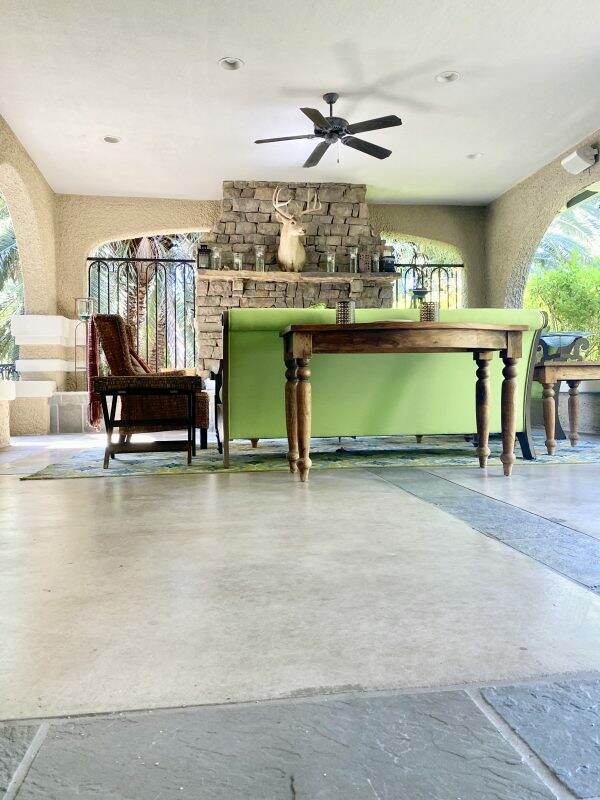
The back terrace or porch is a rather large space and has a cooking area (the BBQ), a dining section and a place to gather around a stone fireplace.

The Barbecue Area

Before view of the BBQ area

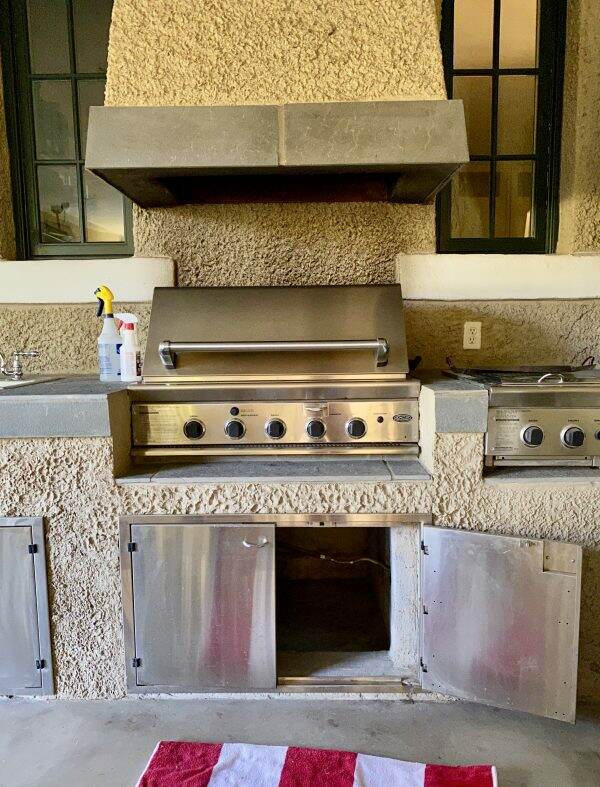
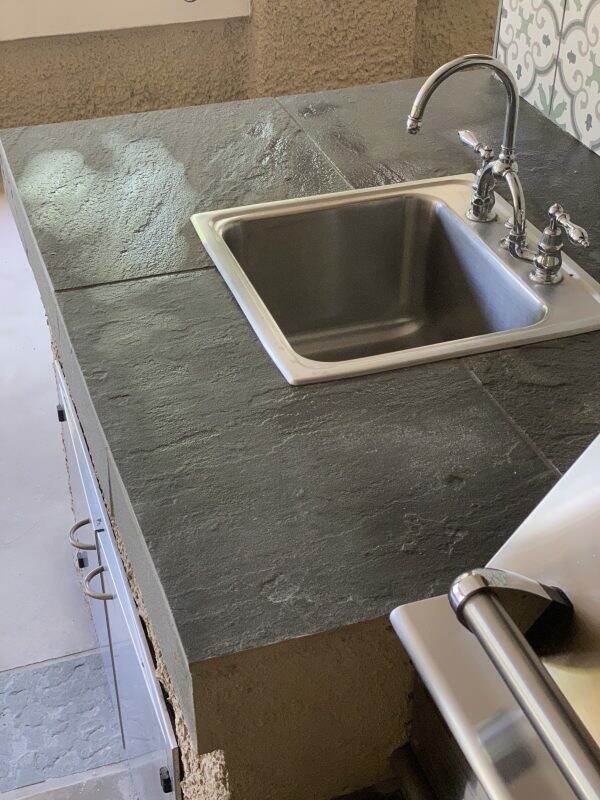
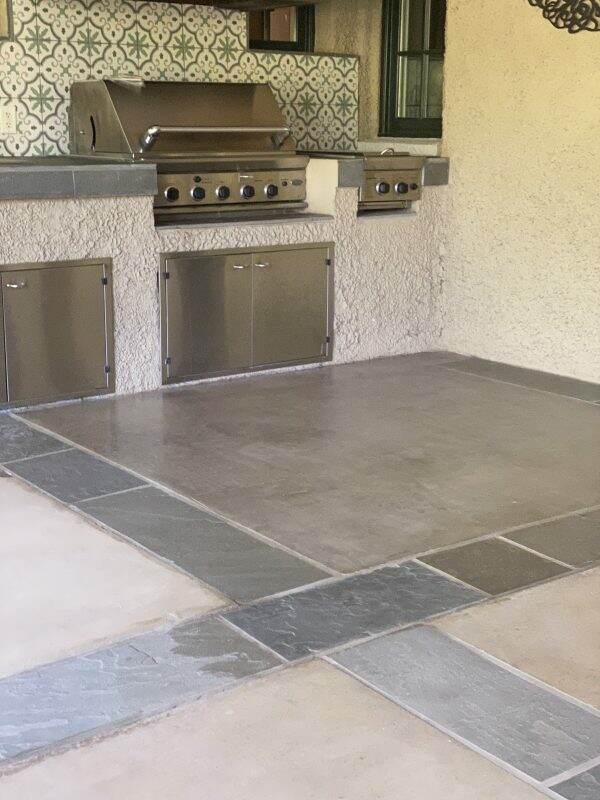
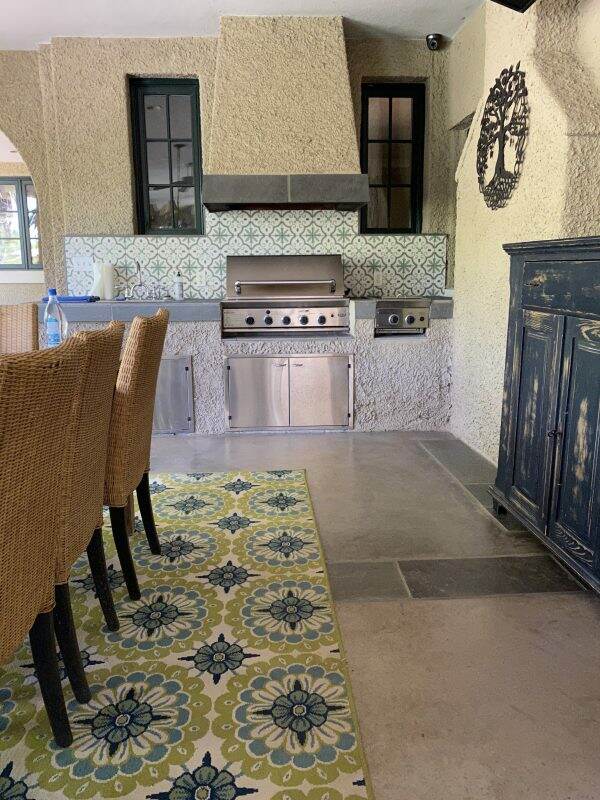
At the north end of the terrace is the barbecue area. In addition to our gas grill and vent, there are 2 gas burners, a sink and storage areas below. The countertops are covered in slate, which match the stone intersections on the concrete floor.

After view with a new tile backsplash

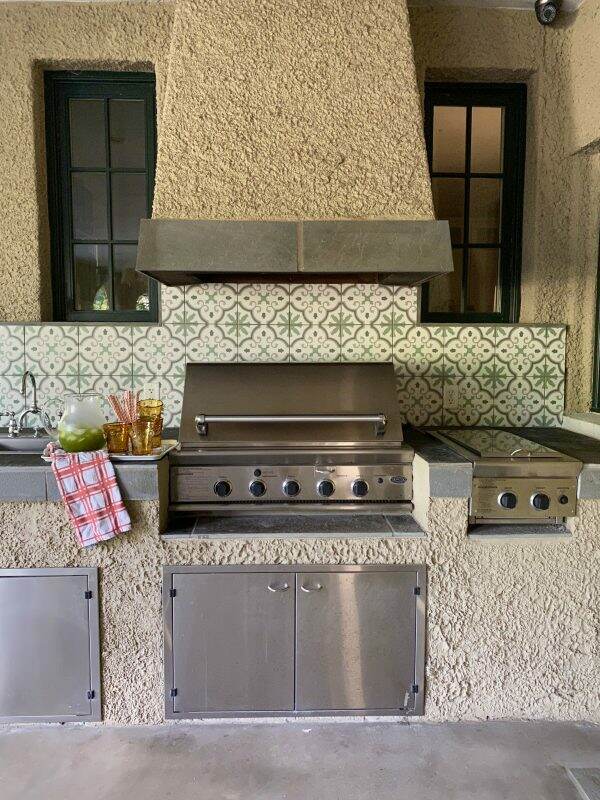
The barbecue needed cleaning, especially the stucco wall behind the gas grill. Years of cooking = years of grease build-up. Due to the bumpy texture, which is an architectural feature of our historic home, it is impossible to clean.

Adding a tile backsplash

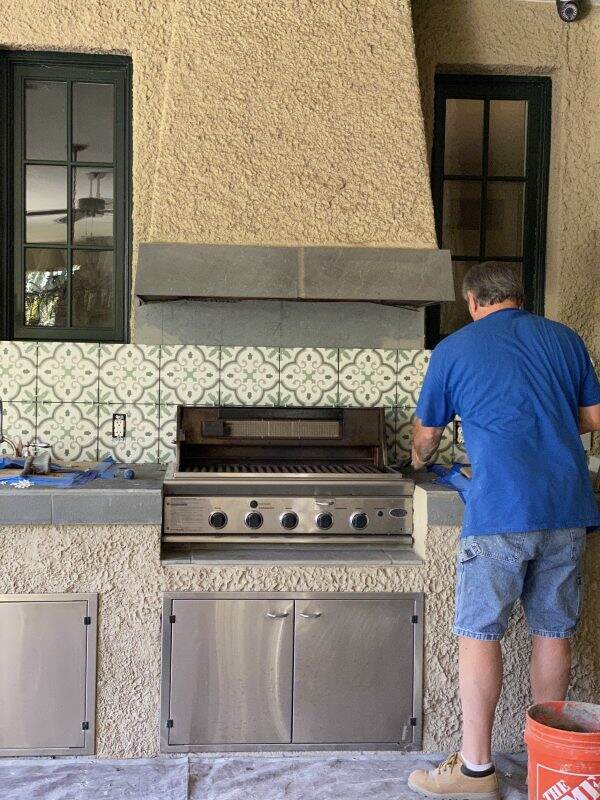
Instead, we decide to add tile as the backsplash, which is much easier to maintain. After the tile installation, we seal the tile and grout with a protective coating. This prompts us to also seal the slate countertop. To learn more about the new backsplash installation, click here.

Sealing the slate countertops

The Floors

Now that the countertops look so good, the floors paled in comparison. So if we sealed the backsplash and countertops, why not the floor too?

But before sealing the floor, they need a good cleaning. Pressure washing the concrete/slate floors significantly helps to remove the dirt and stains. My husband did this one half of the terrace at a time. We own the Subaru Pressure Washer which is a handy thing to have, but you can rent one too.

Pressure washing the back terrace concrete and slate floor

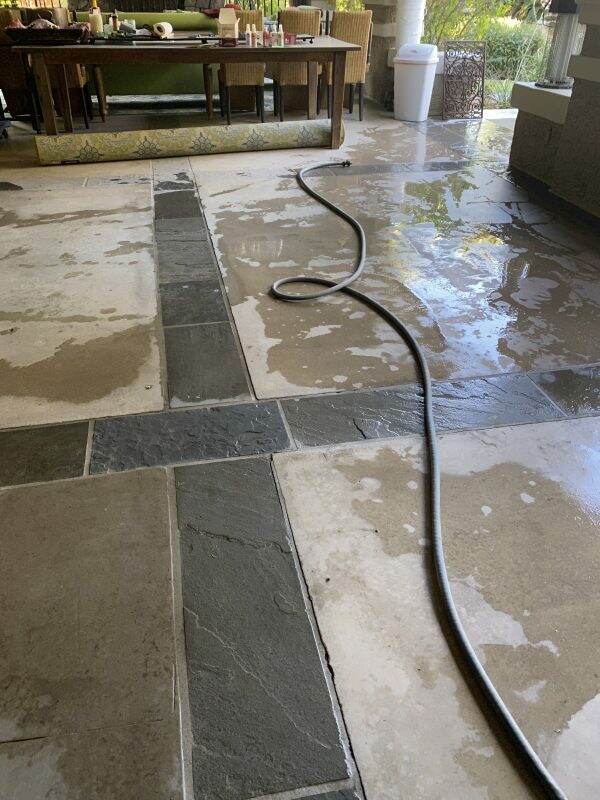
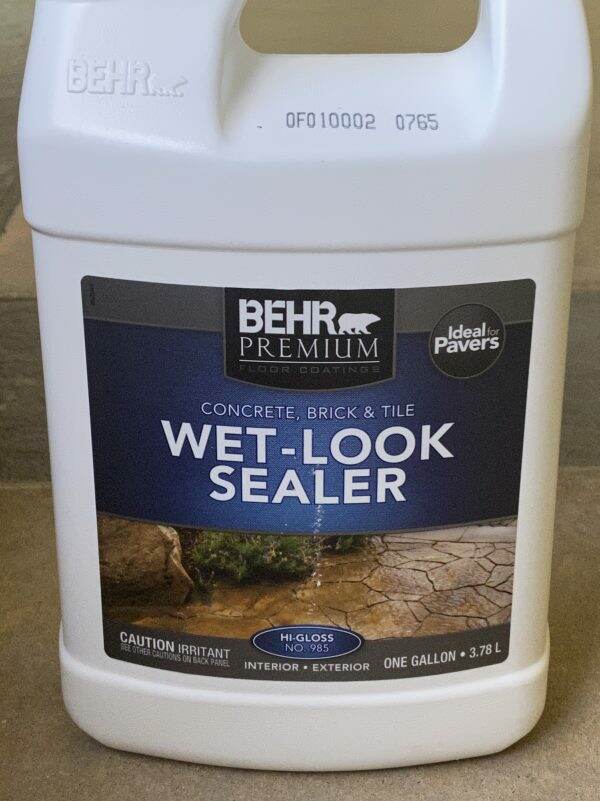
After the floors are clean and dry, sealer is applied to both the slate and the concrete. We tried a satin finish first and didn’t like it. So we decided on this Home Depot Behr Premium Wet-Look Sealer for $36.98 a gallon. If you don’t have a Home Depot nearby, you can find a similar product here on Amazon.

Floor Sealer

Using a long handled roller, the sealer spreads easily on the floor.

Applying sealer

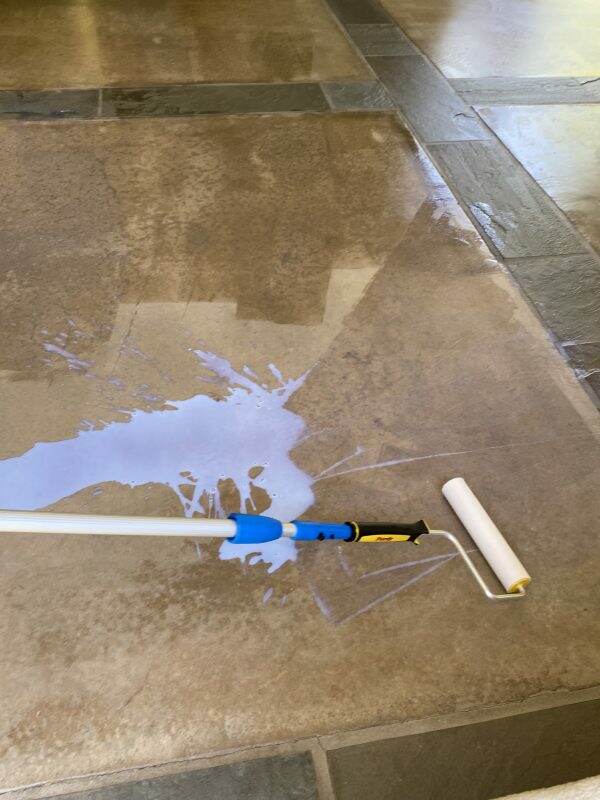
Here is one completed section and you can see how the appearance is vastly improved. As an added benefit, over time this sealer helps prevent stains and truly protects the concrete floor.

After half of the terrace dries, we moved the furniture and began the process on the other half.

Moving the furniture as we go

The Rugs

The outdoor rugs have never been washed so this is a great opportunity to vacuum them and pressure wash to remove several years of dirt. Depending on your needs and budget, here is a link to wet dry vacuums. Ours is a heavy duty Shop Vac since we use it frequently. It is amazing how just a good, deep cleaning can improve your outdoor space.

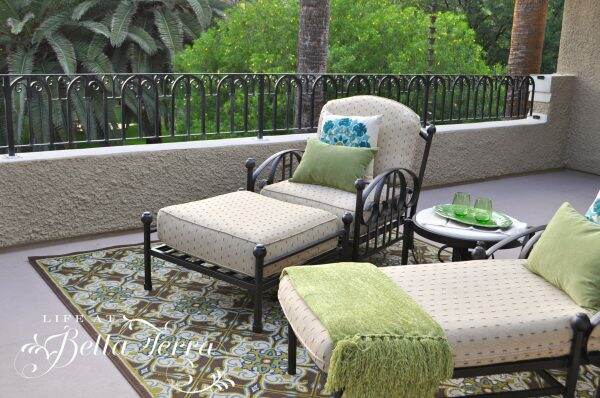
Two 8′ x 10′ outdoor rugs were purchased from Rug Studio several years ago and are SO affordable. I just checked and they are still available online. Click here for the link. Prices are a bit higher, but not by much. I am so pleased with how these rugs are holding up outside all year long and especially in our hot summer heat and brutal sun.

Shop Vac Wet ‘n Dry vacuum

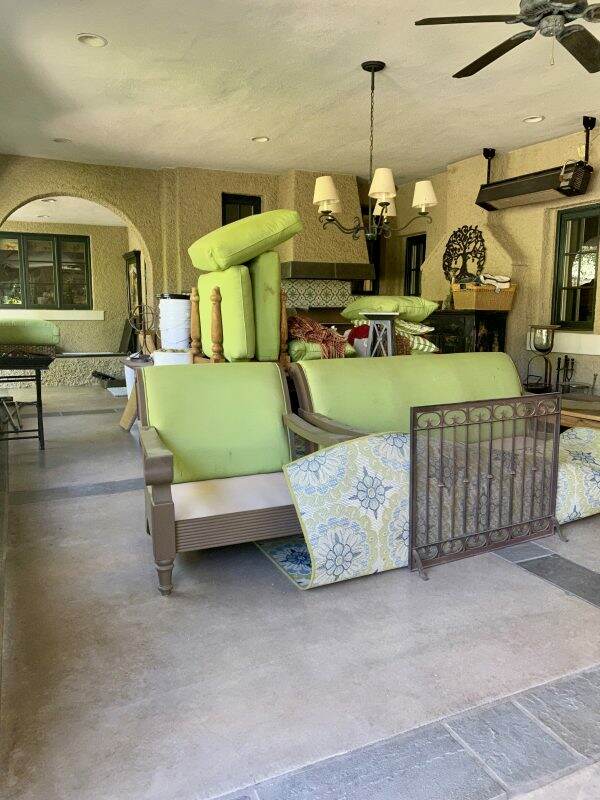
Now the floors are cleaned and sealed, the barbecue area is complete, and well, the upholstered furniture looks like the ugly sibling. Truly, we have used this furniture outside for years. The cushions however, other than spot cleaning, have not been deeply cleaned….ever.

The Furniture

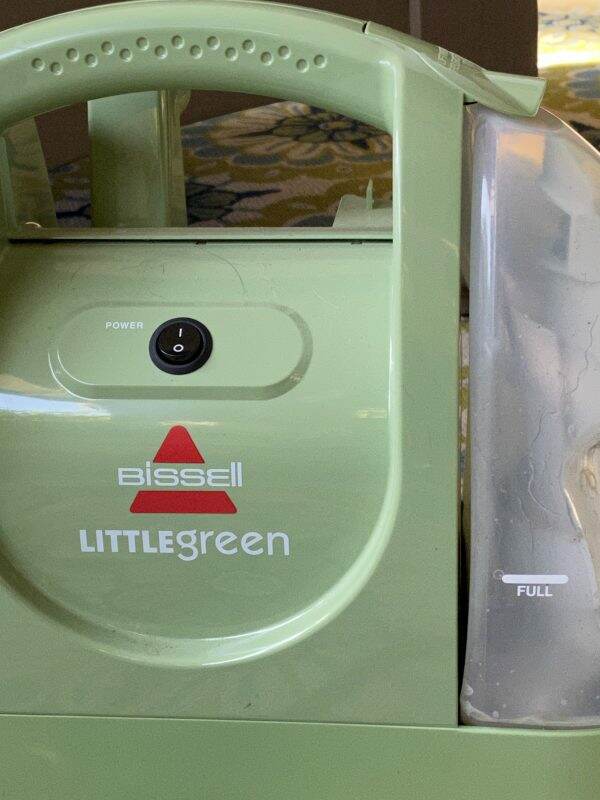
This Bissell Little Green is one of our best purchases. This little spot and stain cleaner is great for both upholstery and carpeting. If you have pets or families who spill, this is the toy for you! Being small and light weight, it is so easy to haul around. It’s approximately $125.00 and can be ordered online through Amazon. Click here for link.

Best little carpet and upholstery cleaner

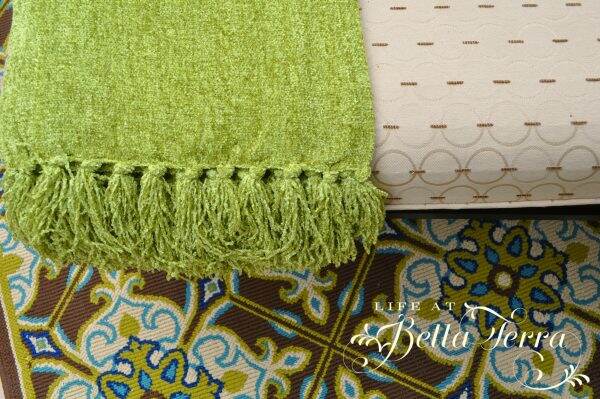
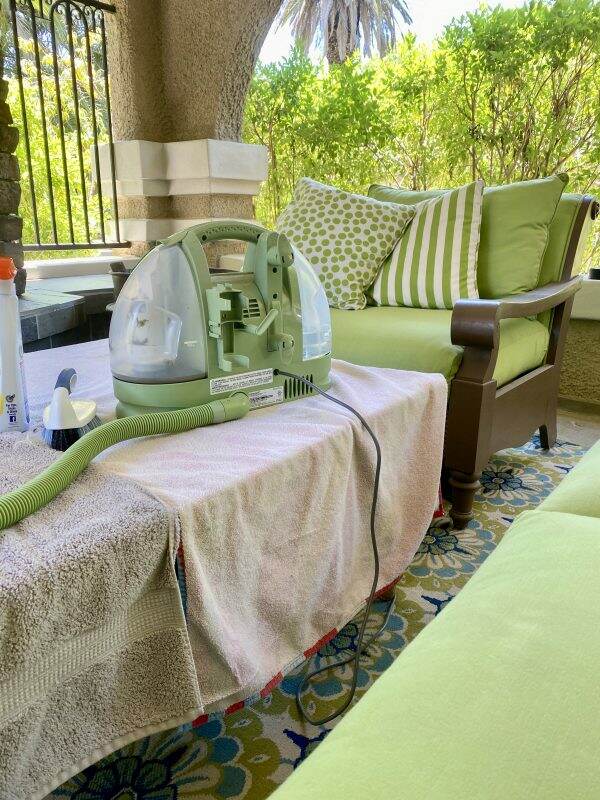
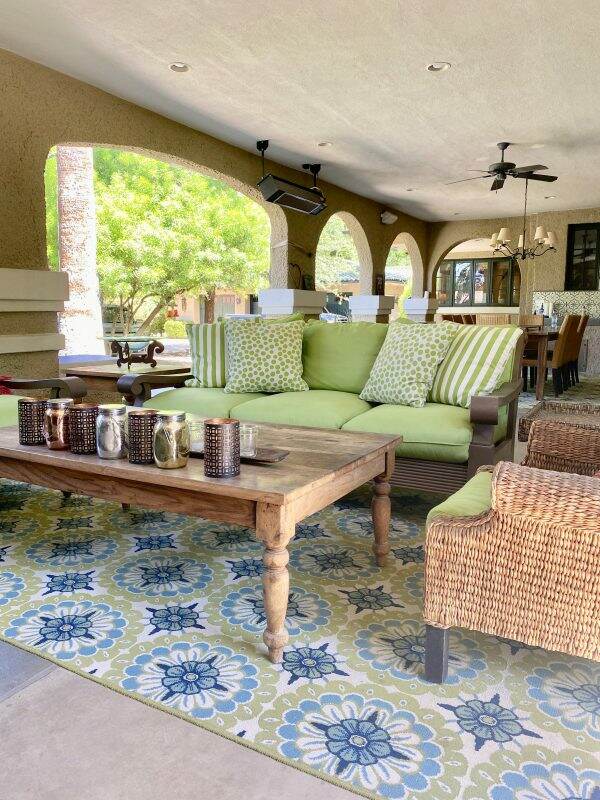
All furniture cushions and decorative pillows are Sunbrella fabric and clean easily with the Bissell.

Even though the terrace is under roof, the furniture still gets dusty. But here in Phoenix, our outdoor spaces get used the least during the very hot summer months. But the rest of the year, the back terrace is the main destination where we gather with friends and family.

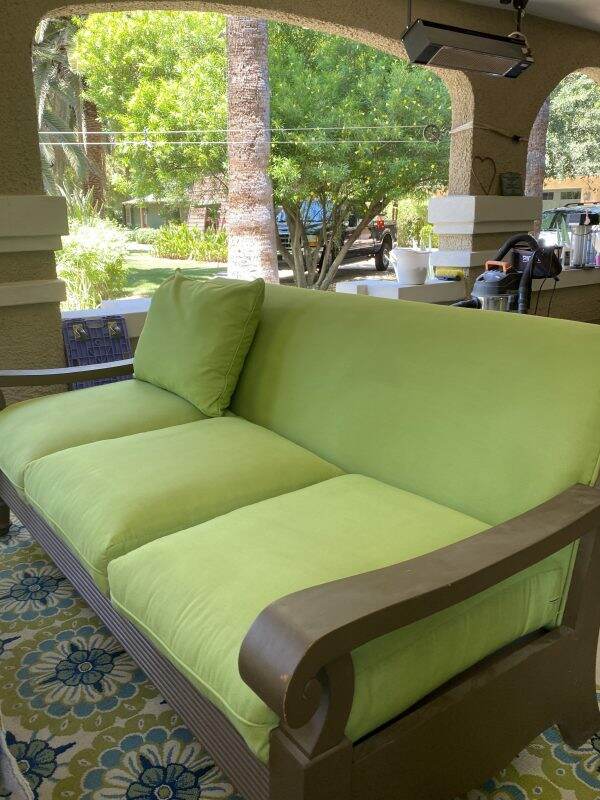
What a huge difference a little cleaning will do! The cushion look fresh and clean and all stains are gone.

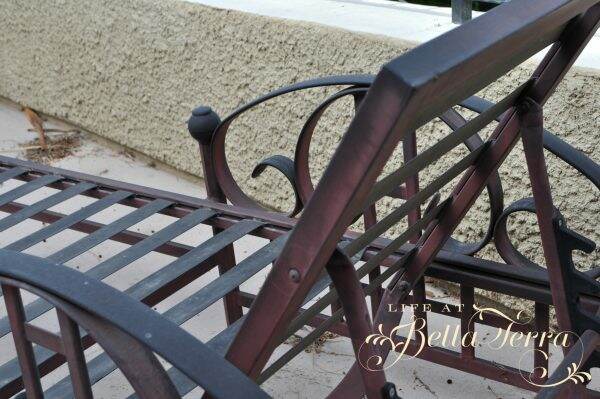
The wood furniture was purchased from Crate and Barrel many years ago. It is not considered official outdoor furniture, but the wood is mahogany and has survived rather well on the covered terrace.

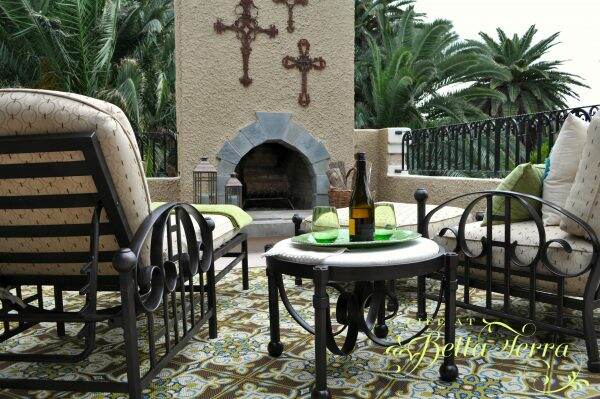
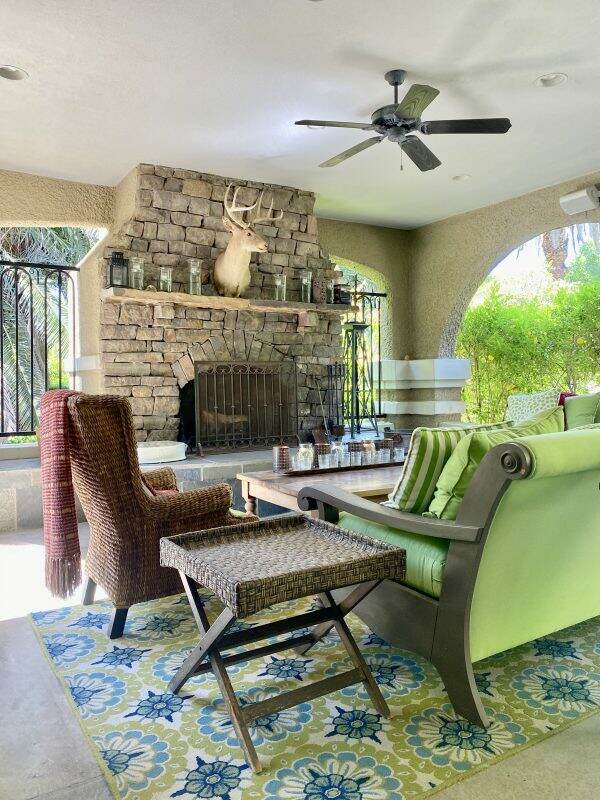
The Finished Product

Here is the finished terrace. It sparkles and even smells clean. The black weathered cabinet on the right side of the photo is a new addition. This piece used to be in the family room but will now store placemats, candlesticks, vases and other outdoor entertaining items.

I will at some point need to refinish the mahogany dining and coffee table, but not until the weather cools down a bit. The chandelier over the table needs replacing too. Also, I am still debating whether the outdoor rugs clash with the new tile backsplash. Unfortunately when I selected the tile, I didn’t even consider the rug design. Let me know what you think.

We are so pleased with how the sealed floor looks.

Custom covers are made for all the outdoor pieces and we will cover all the furniture before our dreaded summer dust storms arrive.

It feels SO good to get these projects checked off the list. Extra kudos to my husband for doing all the work on this space. We host so many gatherings here on the back terrace, from large sit down dinners to cozy evenings in front of the fire.

Thanks for stopping by today!

To see the actual restoration/construction project of the back terrace, click here.

Sometimes in my posts, I provide links to the products. Sometimes I get a stipend at no cost to you. Other times I don’t get anything but want to share my resource.


A Sorely Needed Terrace Makeover

We have a lovely space outside of our master bedroom that has been sorely neglected.  The terrace is located on the second story so when outside, it feels like it we are up in the tree tops. It is very private and surrounded by lush foliage. There’s a wonderful view over to the pool house and is ideal for watching sunsets. Since this space is not in a main traffic area, it doesn’t receive the regular maintenance and love.

Pompeii Outdoor Furniture, Miami

After a bit of research, it appears this outdoor furniture is made by Pompeii Furniture Industries in Miami, Florida. However, I don’t believe they are in business. When I googled them, their furniture was being sold in avenues such as Chairish and Live Auctioneers.com.

Great views from this terrace

Assessing the Mess

The outdoor furniture is aluminum with a powder coat finish that is clearly faded from the sun. You can see where the finish has a reddish/purple cast. Not very attractive.

Since this is a lightly used deck, debris and dried plant material is collecting in the corners.

Faded chaise frame

The entire terrace and fireplace were added during the massive restoration of the house (see that post here). Typically this space gets used during the non-summer months, when the weather is more appealing.

Do you have a place in your home that doesn’t get enough attention or remain unused most of the time? Naturally since this isn’t a very inviting space, we didn’t want to spend time here.

After purchasing 5 cans of Rust-Oleum spray paint in Metallic Oil-Rubbed Bronze, I am ready to tackle painting the furniture. If you have ever used a spray can for any length of time, you know how much stress it puts on your index finger.

Aerosol can tool

I am very happy to find this tool. It is very inexpensive and well worth it. No more stiff index fingers. The handle clips onto the spray paint can and all you have to do is squeeze the handle. It is the best $6.00 you will spend.

Prepping the Site

I confess to being a messy DIYer. But when using spray paint, make sure you cover EVERYTHING in the surrounding area. Using drop cloths, I protect the terrace floor. I also did this project barefoot and thankfully I did not take pictures of the overspray on my feet. What was I thinking!

Also, wipe the furniture with a damp cloth to remove any dust or cobwebs.

In order to get paint coverage everywhere, tip the chairs over and on their sides. Spray while sweeping the area so the paint does not puddle. Allow the paint to dry, and then tip the chair again to make sure you don’t miss a spot.

With only one coat of paint, look at the transformation! It’s hard to believe that a simple can of spray paint can make your outdoor furniture look new again.

The table top has a stone insert that was not removable so I covered it with paper and used Scotch’s blue painters tape to protect the stone from overspray.

Blue painter’s tape protects the white stone top

After the paint dries, remove any painter’s tape and do another once over to make sure no spots were missed.

The After Photos

And here is the AFTER. The cushions are covered with Sunbrella fabric and it is amazing how well they hold up being outside all the time.

Freshly painted furniture

The rug I ordered online through Rugs Direct.  I’ve had rather good luck with this company and have been very happy with their selection, their prices and the speed of their delivery.  This 8′ x 10′ Caspian (1005D) outdoor rug cost $199 (with free delivery) and it defines the space. I’m not sure they have it in stock any longer, but check out their selections for the rug, style and color you want. Oh! I just found this same rug on Amazon and you can find it here.

Rugs Direct outdoor 8′ x 10′ rug

It’s all in the details.

The throw, pillows, lanterns and acrylic glasses and tray are from Pier One Imports.  Their retail shop closest to us is closed, but I found similar acrylic glasses on Amazon here.

Here is a similar green throw for $14.99, which is perfect for cooler spring and summer evenings.

Outdoor Lanterns

Lanterns can be found at places like Home Depot or Lowe’s or even online. Pier One has such a nice selection of outdoor trays and dinnerware.  Look at this tray-the details are so pottery-like but unbreakable!

Tray from Pier One

Now the terrace is a welcoming place to gather in the morning for a cup of coffee, or at the end of a long day to watch the stars.

Adding seasonal, playful pillows pumps up the color on the chair and chaise.

Pillows from Pier One

Transforming this terrace from a neglected one to this took a bit of work, but certainly worth the effort.

Some key learning experiences regarding this project:

  1.  Wear gloves unless you want to scrub off your first layer of skin to get the paint off.
  2.  Wear shoes or socks.  I was barefoot and yes, I had to scrub and scrub to get the paint off my feet.
  3.  Make sure you put down an appropriate amount of protective sheets or drop cloths.  Mine were a bit small and yes, there was overspray.  Thankfully I was able to scrub that off the deck.  Lots of scrubbing after this project!
  4. Check the paint color before you start.  I didn’t dislike this paint enough to stop and purchase more, but I do wish it was a bit lighter.

If you enjoyed this post, please feel free to share it on Pinterest.

This post shared with Between Naps on the Porch Metamorphosis Mondays #604


How to Make a Tulip Wreath

If you recall, last year I added a new paint color to the front door. It is the perfect color for Spring and Summer. Surprisingly this shade of blue also works well for Autumn and Winter. Since tulips are currently blooming in the bulb garden, it seems appropriate to hang a tulip wreath on the front door. Join me today to make a tulip wreath.

To see the front door color post for details, click here.

Grapevine wreath frame

Michael’s is having a great sale on faux flowers and I scored 4 bunches of pink tulips for less than $20.00. See here or you can get them from Amazon here. Initially the goal is to make an all pale pink wreath.

The challenge with our front door is that it is 48″ wide. Standard-sized wreaths tend to look a little dinky. So when I do create a wreath, abundance is the key. Naturally I did this DIY project out of order. It would make the most sense to start with your wreath frame and then determine the quantity of flowers you need. However, I didn’t want to buy another wreath frame and did some digging in the garage to find this 26″ grapevine one…..after I purchased the pale pink tulips.

My old glue gun

All you need are a few simple supplies.

  • A Wreath Frame
  • Faux Flowers
  • Glue glue (if you don’t have one see here)

For a nice selection of grapevine wreaths of different widths, click here.

Realizing that I may not have enough pink tulips to fill the wreath frame, I find some darker pink tulips that I had on hand from another project. With 4 bunches of light pink (14 stems each) and 2 bunches of dark pink (also 14 stems each), I have a total of 84 tulips. Before I start a project I want to make sure I do not run out of materials. Been there. Done that.

Using wire cutters makes this easier

Having wire cutters makes this job a lot easier to get through the plastic covering and the wire underneath. These are super affordable and you can order them through Amazon here.

Use glue when necessary

I start working on 1/4 of the wreath, knowing I can use 21 stems in that portion. This gives me a sense of what density of flowers will work. Most stems tuck easily and securely in between the grapevines.

Tucking in the flower stems

Don’t discard the leaves as they can be added to the wreath for fullness or just another pop of color. I hot glue the leaves randomly. Personally, I really don’t like using a glue gun because I tend to burn myself far too much. On this wreath, I use minimal gluing.

Adding leaves

As I am styling it, darker tulips are added for contrast. If you follow me on Instagram, I try to post a story daily and show these types of DIY projects in action.

As posted on IG

Continuing to add tulips around the entire wreath, I leave a space for a ribbon. Using the leftover bow from Valentine’s Day, I find that I don’t like it. The pink in the ribbon looks a little flat to me.

Bow or no bow?

Instead, I remove the bow and continue adding more tulips to fill in the gap. Much better!

Cheerful and pretty wreath

So here is the finished tulip wreath! I think it looks so cheerful on the front door. I believe you could use any faux flowers. Wouldn’t lavender and white hyacinths or yellow daffodils look terrific too?

Since the wreath looks so nice, and goes with the thriving pink geraniums from Valentine’s Day.

Door Color is Sherwin Williams 6479 Drizzle.

Happy Tuesday! Spring has sprung and hopefully, everyone’s weather is improving. We are, of course, in the midst of our beautiful season so every day seems better than the one before.

If you enjoy this post, please share on Pinterest.


Growing Roses

Who doesn’t love roses? Personally, I envy those who are knowledgeable about growing roses, and extra envious of those who know the names of all the different roses. Can roses grow in Phoenix? Fortunately, even in our withering heat, many varieties can thrive here. The key is knowing where to plant, when to plant, and how to maintain them. But often in neglected conditions or without tender care, roses are resilient plants. And in most planting zones, now is the time to consider planting roses.

Rose in bloom

Know your Planting Zone

It is very easy to find your USDA Plant Hardiness Zone by clicking here. And then just type in your address and you will find your zone~here is it 9b, where we experience low temperatures between 25 to 30 degrees F.

USDA Plant Hardiness Zone Map

Once you know your specific hardiness zone, then you can internet search what you can grow and when. For example, I absolutely love hydrangeas and lilacs but they do not grow in 9b. Having this information will save you lots of money on plants and seeds that you love, but the environment may not be suitable.

Rose Season Starts in January

While it may seem counterintuitive to be pruning roses in January, this is the month that we heartily whack our rose bushes. Why is this important? It allows you to remove dead and diseased branches (also called “canes“). This rejuvenates the plant and encourage blooming. Pruning allows airflow through the shrub, while controlling the size and the shape of the plant.

In most hardiness zones, the best time to plant roses is early Spring. This is between late February (after the last frost) and early April.

Freshly cut roses from the garden

Here is the last bouquet I cut before a hard pruning in January. This pruning is done for shape and to foster vigorous spring growth. Care of roses can be as complicated or straightforward as you care to make it, depending on the varieties you are growing and the zone in which it is grown. Remember to always select roses that are well suited to your area.

Planting New Rose Bushes

Each year we seem to lose one or two rose bushes, especially on those years where I am not paying attention to their monthly care.

One of my gardening friends always had the most beautiful rose bushes. When I asked her to reveal her secret, she shared this trick each time she plants a new bush.

Handful of iron nails

Items you will need:

  • Rose bush
  • Hand full of iron nails from any hardware store
  • A whole fish~found 6 frozen fish in a package at Food City as our regular grocery store only sells fillets
Whole fish found in freezer section of Whole Foods

Dig your hole to the proper width and depth. Place a whole fish and a hand full of iron nails at the bottom of the hole. Slightly fill with a good mulch soil. Place the rose ball on top and fill in the rest with soil.

Place fish and nails in planting hole

Depending on how long the rose bush has been in the container, I sometimes leave them in the container for a few weeks to establish a good root system. However, if the rose is root bound it’s important to get it out of the pot and into the soil.

Rich Soil, Fertilizer, Water

Screening compost

Roses grow best in rich, fertile soil that is kept evenly watered throughout the year. In March, I add new compost soil around the beds of the roses, removing weeds and turning up the dirt. In addition, I check the watering system and add a rose fertilizer. This rose food can be found at Whitfill Nursery. The dogs LOVE it so you need to be extra careful that they do not ingest it.

Whitfill Nursery Rose Food

Creating small berms around each plant helps with water retention.

Berms help retain water

There are multiple rose locations on our property. On the south side of our home, a rose garden is planted, with approximately 20 rose bushes.

Rose area on the south side of our home

New varieties this year include: Queen of Elegance, Julie Andrews, Julia Child, Scentimental, Perfume Delight, Touch of Class, White Licorice and Gold Glow.

Queen of Elegance Floribunda

Heirloom Roses

During the lengthy restoration of the house and property, we were able to save 10 original heirloom roses that are on the periphery of the orchard. To read more about our house restoration, click here.

Quatre Saison rose

After researching many rose books, I believe these are Quatre Saisons (known as “Rose of the Four Season). This rather gawky, prickly rose produces the most fragrant blossoms. To read another story about these heirloom roses, click here.

Ramblers

Lady Banks’ rose hedge

In the front of our home, we have an additional 8 rose plants in front of the large Lady Banks’ roses. This old rambler, Rosa Banksiae is native to central and western China, and was introduced to Europe in 1807. It is very tolerant of the hot and dry conditions, which is perfect here.

Since we are growing it up the existing fence, Lady Banks’ provides a thick privacy hedge to the busy road. It is just now beginning to bloom with its small, yellow flowers. Soon this hedge will be one solid row of yellow.

Rose Hedge

Mysterious rose hedge

The last of our roses is an enormous shrub rose. I do nothing to this because it is so huge. To give you an idea of its size, the wall behind it is 6 feet tall. It is approximately 12 feet x 10 feet by 12 feet tall. The bush is so thick with cane too, creating the perfect habitat for birds.

Unknown rose bush

Just starting to bloom, this shrub produces these delicate pink blossoms with a faint fragrance. If anyone knows anything about this rose shrub, please let me know. I imagine it has been here a very long time.

So all in all, we have 40 rose bushes, several Lady Banks’ bushes in both white and yellow, and this mysterious hedge above.

Each year I remind myself to tend to the roses monthly, and I will be rewarded throughout the year. And it is important to also be equipped with the right tools and clothing (like a long sleeve shirt) while doing rose work.

Wear a long sleeve shirt!

“Death offers you thorns, eternity offers you roses, and life offers you both.”― Matshona Dhliwayo

Happy Tuesday to you! Do you grow roses? I’ve always wanted to be an official rosarian. However, if I can have success with my little knowledge, so can you. I hope this post will inspire you to try growing roses. Roses are heartier plants. And right now, at Home Depot, you can buy a healthy rose bush for under $25.00. I guarantee you that this small investment, will bring you great joy throughout the year!

This post shared with Between Naps on the Porch Metamorphosis Monday #684


Saturday Meanderings

Well, I’m a little late on posting this today but thanks for being here with me! Have you ever had one of those weeks where the minute you open your eyes until your head hits the pillow your day is chock-a-block full? That was my week! Every single day. So little time for blogging and beautiful things, but now we get a chance to look back at the week’s events and cherish the good stuff. It’s time for another Saturday Meanderings.

Daffodils

Daffodils at Safeway

Check out your local grocery store to see if they have daffodils. Here at Safeway, you get 2 bunches for $5.00 (10 stems each) and quite honestly, they look a bit dead. It’s hard to even notice them as they are in a large cardboard box sitting next to the floral displays.

But after a quick stem trim and an overnight in water, look how they perk up and show their gorgeous yellow faces! Now where can you get such a cheerful bouquet for just a few dollars these day?

Also, if you are feeling blue, yellow is a wonderful healing color. Just having these in a vase that I can view several times per day makes me smile.

Another Target find

Threshold Boxwood Wreath at Target

Even though I am trying to downsize, there are just some things at Target that I cannot resist. In searching for a new wreath look for the front door for March, this Threshold this preserved boxwood wreath is a winner. And it’s priced at $45.00, which seems reasonable to me. It is approximately 22″ wide and you can find it here. What is nice about this wreath is that it is so versatile for multiple seasons.

For March, I did add a leprechaun, a pot of gold and a few shamrocks (carefully as I did not want to damage the boxwood). I am hoping it is not too juvenile, but perhaps whimsical?

Moss flocked bunnies from Target

In the dollar section by the entrance, you will find these adorable moss flocked bunnies in various sizes. It will be fun to use them in Spring or Easter decorations.

Nothing says spring like cherry blossoms and these stems are so life-like. And you can’t beat the price at $5.00 per branch.

New Netflix Series

New Netflix documentary

This new Netflix documentary is one everyone should watch. Especially those of us who are very trusting. Definitely something I want my children to watch and learn not to seek a roommate from Craig’s List.

It reminds me of the Netflix series Dirty John and The Betty Broderick story, both true stories and a 2-part series. Some people are not who they portray. Those are must sees too!

Flowers

White, peaceful petunias

In light of all the terrible news and strife in the world, here are some pictures of what is blooming in my yard. I find joy and peace in knowing that nature continues to provide us with gifts of hope.

Don’t you feel like petunias and pansies don’t get the attention they deserve? Right now, I have various colors of both flower showing their delicate petals. There is something about their softness that radiates a sense of calm.

Pansy

When walking by the bulb garden, you can sniff the intoxicating scent of the hyacinths. To me, they are the first sign of Spring here.

I hope to do a post on my rose garden as it beginning to be so beautiful this time of year. Here’s just a glimpse at the Julia Child yellow rose that is blooming.

Julia Child yellow rose

Chicken Mentality

Chickens

Our hen house has four large nesting boxes for the hens to lay their eggs. Help me understand why the chickens need to fight for the same box? Here are 3 hens trying to lay their eggs on top of each other. They aren’t happy and peck at each other, but it must be a hierarchy thing? Go figure.

Fun New Shoes

Cole Haan

Buying shoes is a bit of a challenge for me as I have a bunion on my right side. Narrow shoes pinch and hurt so it’s a bit of a gamble to buy shoes online. However, I like the look of these Cole-Haan, feather-weight shoes. The color combination is fun and so far, they are comfortable with the right socks.

An Amazing DIY

Rachel from The Ponds Farmhouse

My friend, Rachel from The Pond’s Farmhouse, is so incredibly talented and seems to have endless energy. Look how she transformed this thrift store lamp into something that resembles a lamp you would spend hundreds of dollars on at Pottery Barn.

I only wish I had an ounce of Rachel’s talent. Her post will make me look at thrift store lamps in a different way. You can see it here.

Well, that’s another wrap up of Saturday Meanderings! We are heading to the opera tonight, compliments of my daughter, Julianna. This was one of my Christmas presents and we are looking forward to going out.

Have a wonderful weekend. I hope it is filled with relaxation and peaceful moments.

If you missed my posts this week, you can see them below.

How to Dry Roses here
Removing Candle Wax here