Italian Fountain Project is Complete!

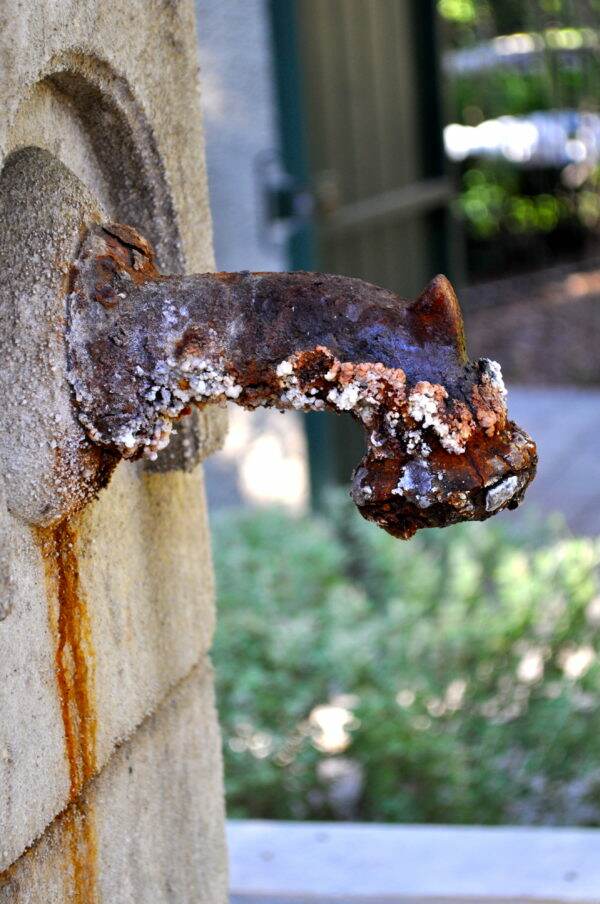
Our Italian stone fountain, which is located in our front yard, was beginning to show signs of deterioration. The iron spouts had completely rusted and the stone was covered with crusty lime that was leeching from the stone. You may recall, this project is on my New Year’s list of home maintenance needing attention (see post here).
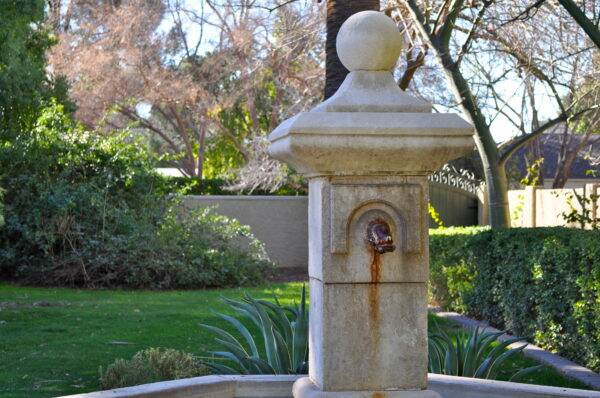
It didn’t make sense as to why the lime was leeching out of the stone as the plumbing system inside the blocks was supposed to be self-contained and not leaking.
However in taking the fountain apart, we found a jury-rigged system using PVC pipes. The entire inside of the stone fountain was filled with water, hence causing the lime to leech out and form a white crusty mess on the outside of the stone.
I contacted Relics where we had purchased the fountain nearly 20 years ago to find out where we could get new spouts. Unfortunately, the initial style they sent to me was too contemporary for this type of fountain. Thanks to the internet I began my search looking for replacement copper spouts.
As a result, I discovered Black Oak Foundry in California. They were extremely helpful and asked that I send pictures and dimensions to them.

In the meantime, I was unable to remove the rusted spouts to find out the size of the male NPT (National Pipe Thread~~see what you can learn here?) and needed the assistance of a plumber. It took two men with big wrenches to get them out.
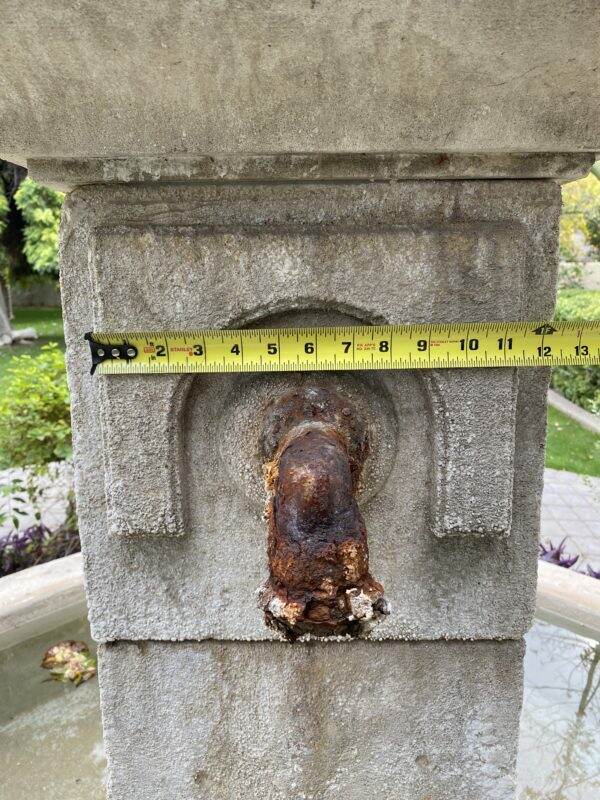
Once we had the parts out, then we had to determine the proper size of the replacement. Since there are no local stores or vendors who supply this, we had no choice but to buy spouts online. Black Oak Foundry recommended 2 sizes, with wide pricing differences.
Using an old pizza box, I roughly designed the dimensions and then I cut out mock ups of the two different size spouts available to us.
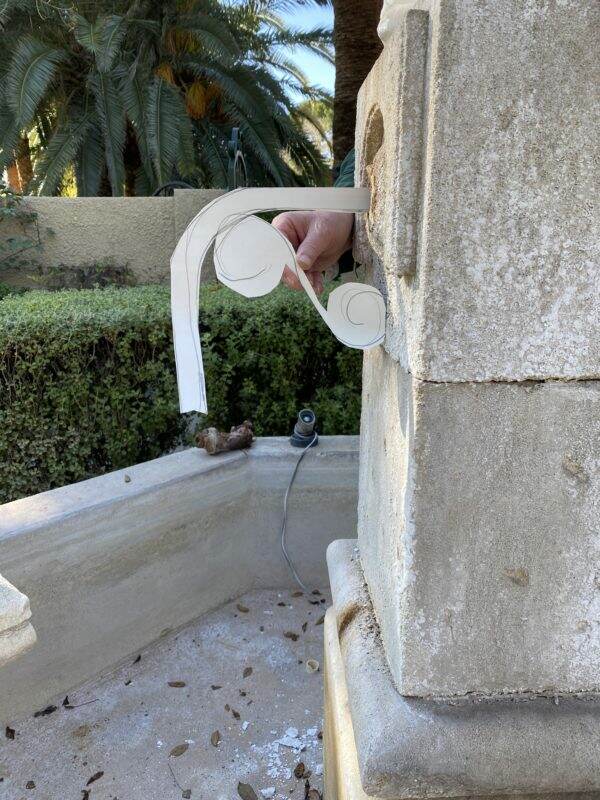
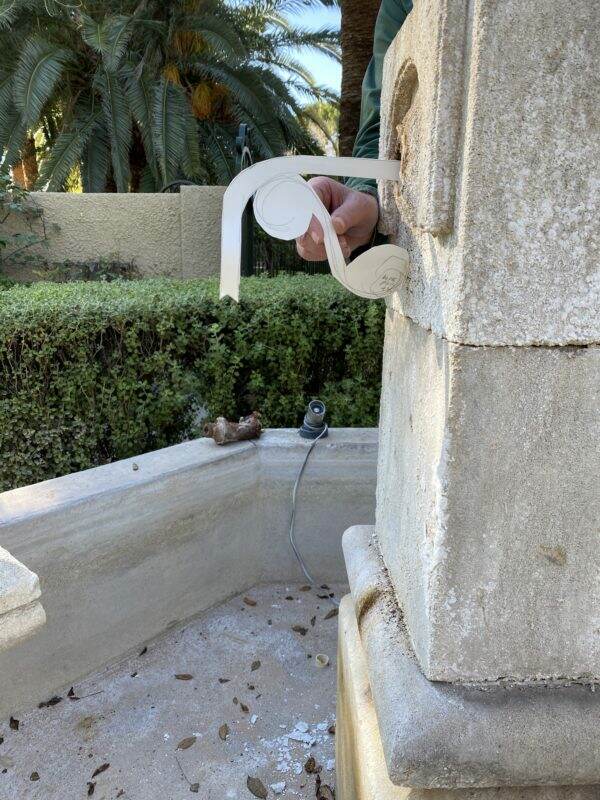
This was a mathematical challenge because we had several factors to consider. Obviously the size of the spout was important from an aesthetic perspective. But the fountain serves a purpose. Not only is it decorative but the running water drowns out some of the road noise. We had to take into consideration the distance from the spout to the basin, the dimension of the spout hole, and the speed in which the water would flow. We didn’t want the water to splash up or out of the fountain.
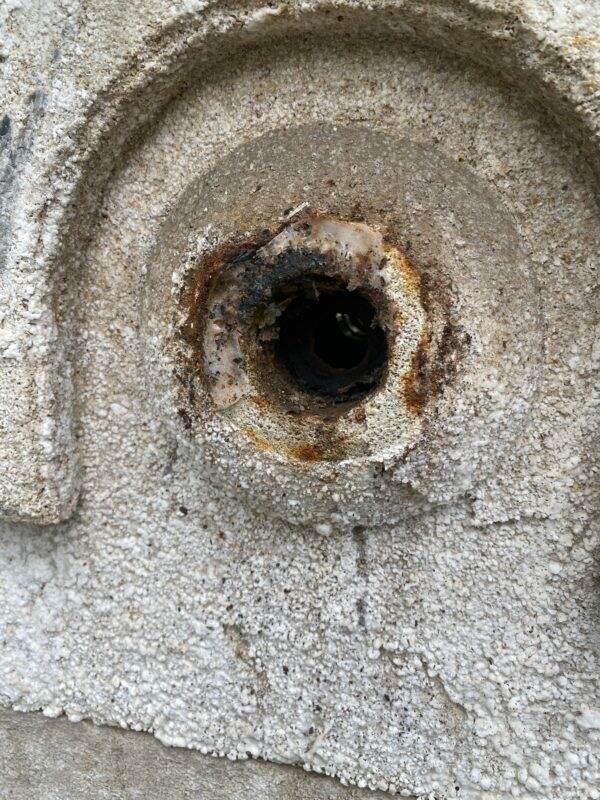
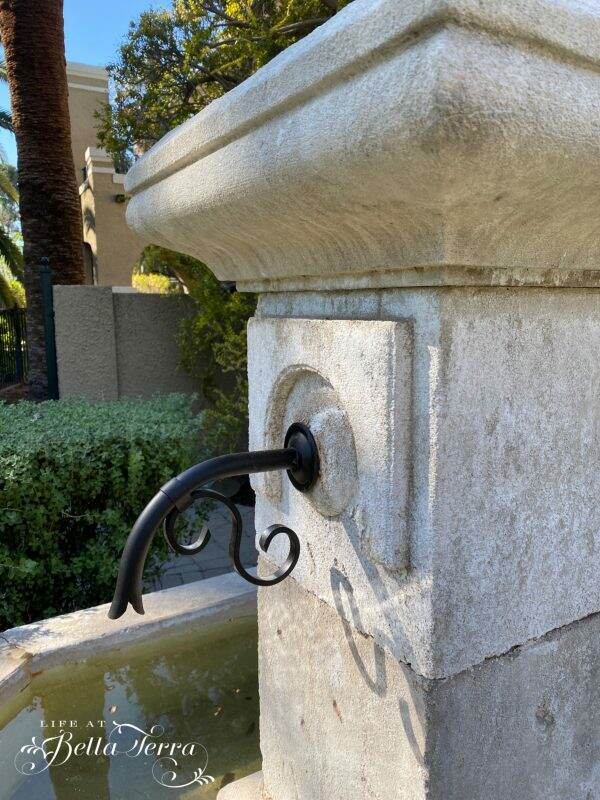
Since we had a bit of rust staining, this spout needed a custom escutcheon to cover the rusted insertion hole. So once I placed the order, if it was wrong, I couldn’t return them for a refund.
Aesthetically, the smaller spout seemed to be a good choice and our plumber said he could make it fit to the new plumbing. We ordered two spouts with an oil rubbed bronze finish.
The spouts arrived and I was very happy with the quality. I ran out and held them up to the fountain, hoping and praying they would fit!

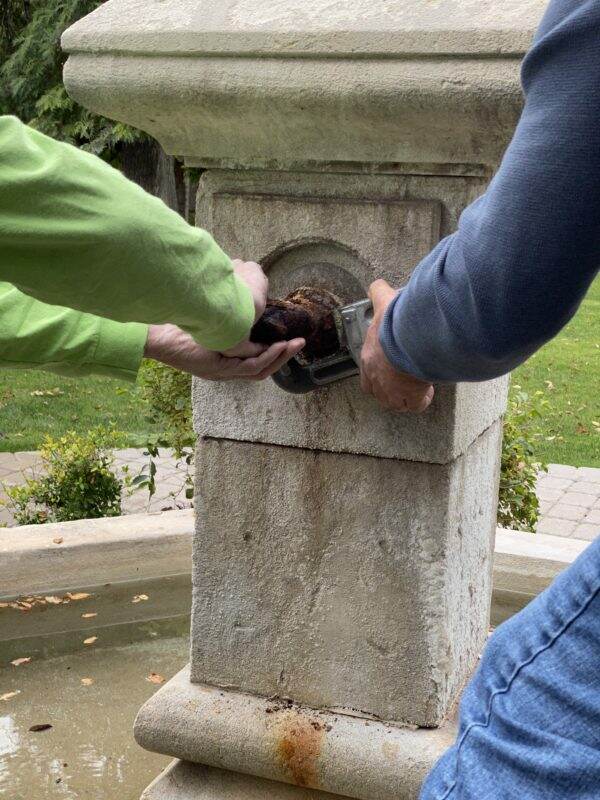
The plumber installed new copper plumbing guts so it will not leak anymore and attached the new spouts.

What I didn’t consider is that the tip of the spout is flanged so the water makes a bit of a helix as it falls to the basin.
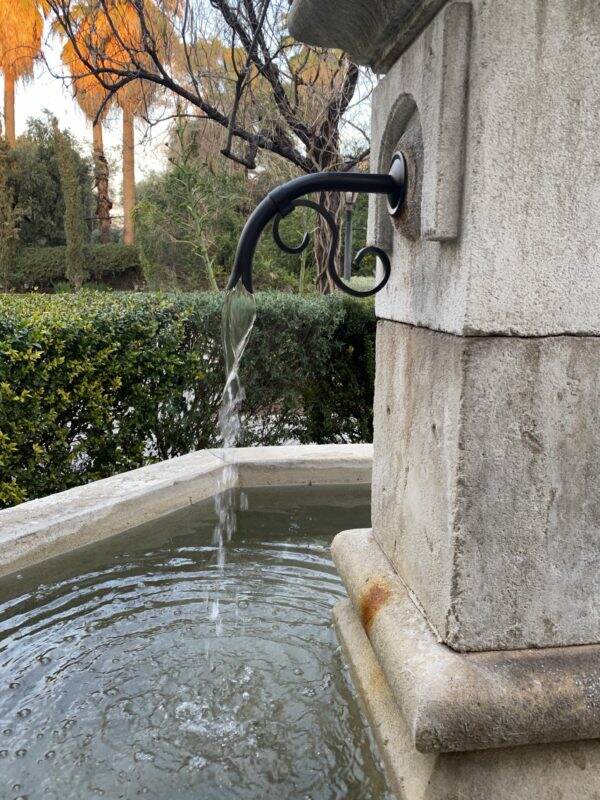
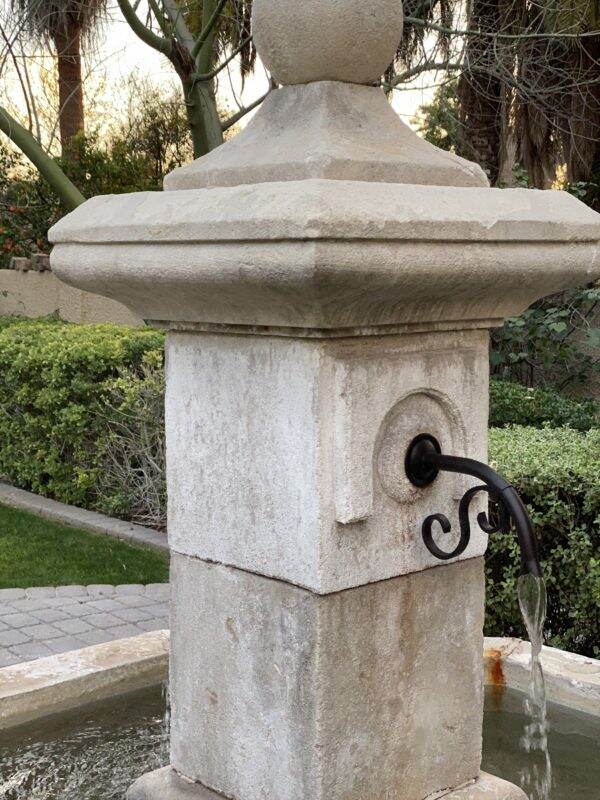
It is a bit unsettling to order something sight unseen while spending lots of money at the same time. I am delighted these spouts look beautiful and create a lovely water sound. I still need to clean up a few rust spots, but it feels good to get another project done!
Are you crossing any projects off your list?

Now for some more DIY backyard projects! If you are visiting from one of these fabulous women, thank you for stopping by today.
Andrea of Design Morsels should be the Cliff notes to all things home related. She is the master at evaluating products, creating design solutions and just being resourceful. Check out her blog post on refinishing teak furniture. I need to put this on my list of things to do.

Chas from Chas’ Crazy Creations has yet again found a way to make another interesting DIY project. Her ingenuity is endless and today she shares not one, not two, but 3 ways to use solar lights outside.

Tarah from Grandma’s House DIY has story after story about her renovation of a 100-year old farmhouse. She has done an incredible job on her outside deck. Now she is making her own bar top deck railing with this amazing piece of oak.

My new friend, Kippi from Kippi at Home, is a chef but also does everything else from home decor, crafts, sewing and gardening. Her outdoor project is this obelisk that you can make yourself.

Thank you for joining all of us today at our monthly home DIY blog hop.
