decorating and design | DIY | Entertaining | furniture | historical homes | holiday decorating | Organizing | Uncategorized | Upholstery
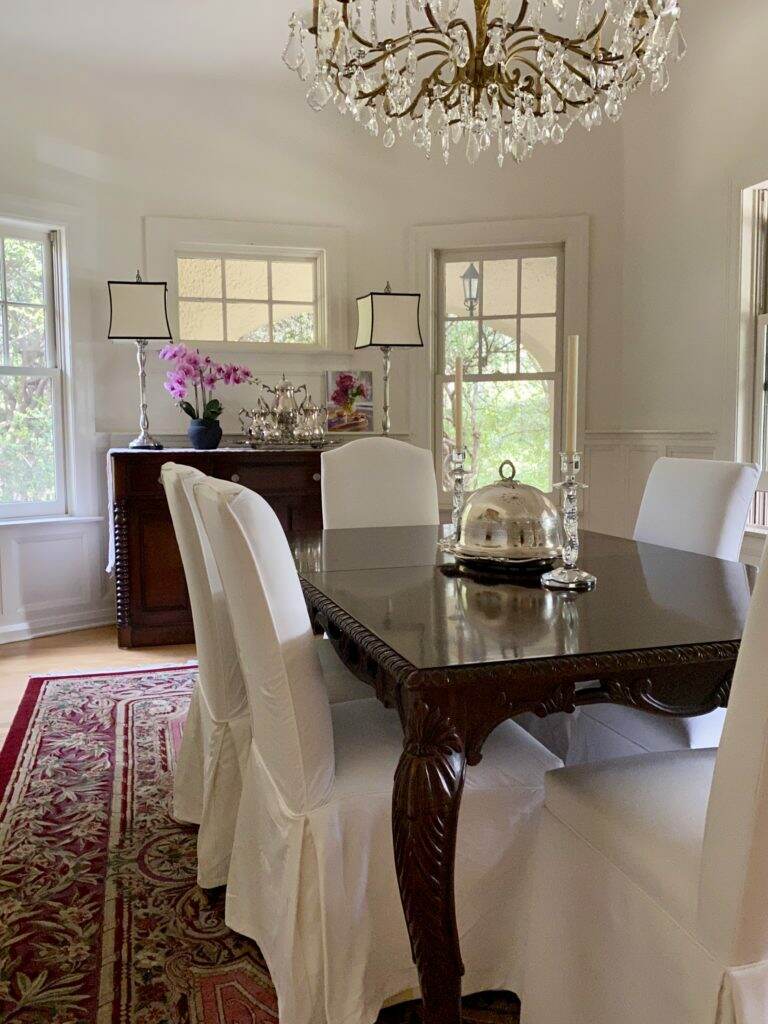
Dining Room Update
As you may recall, last January (2019) I had a group of friends over for lunch and asked for their critical feedback on some of the rooms of my home. See luncheon post here. Their recommendations for the dining room was to “lighten it up”. The larger wall of this room is facing east and…