
Saturday Meanderings
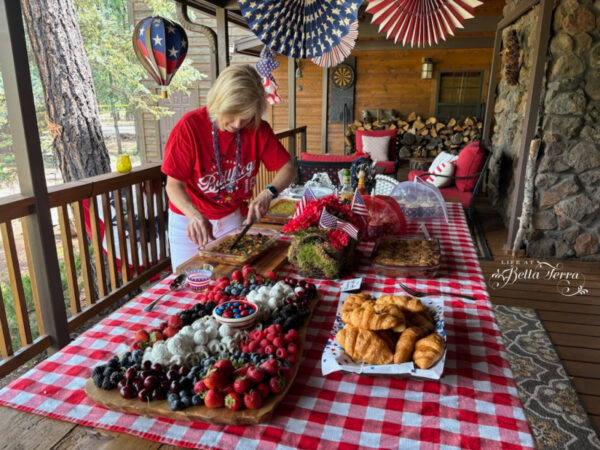
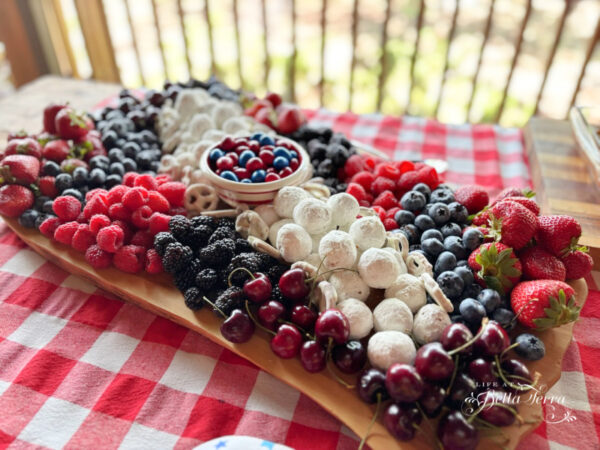
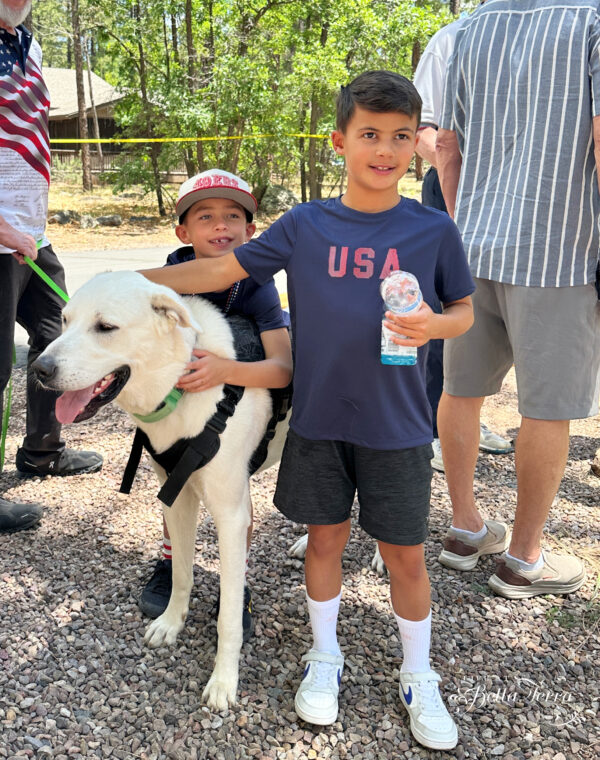
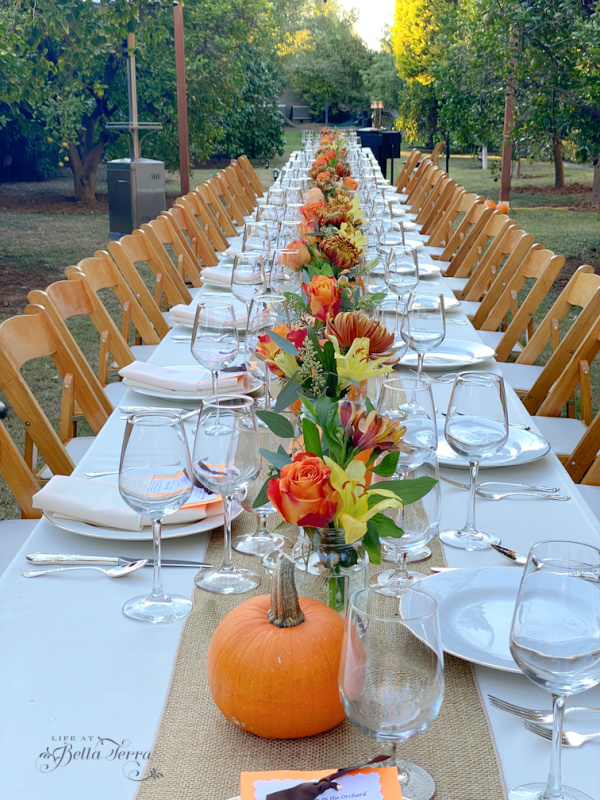
Happy July 4th weekend! We had a marvelous time yesterday hosting a pre-parade brunch for about 25 people. The Bullfrog Loop parade is a slice of Americana, with homemade floats, decorated golf carts, parents, children, young and old participating. With the parade starting at 11:00 a.m., our guests start arriving beforehand to grab a bite, set up their lawn chairs and watch the show.

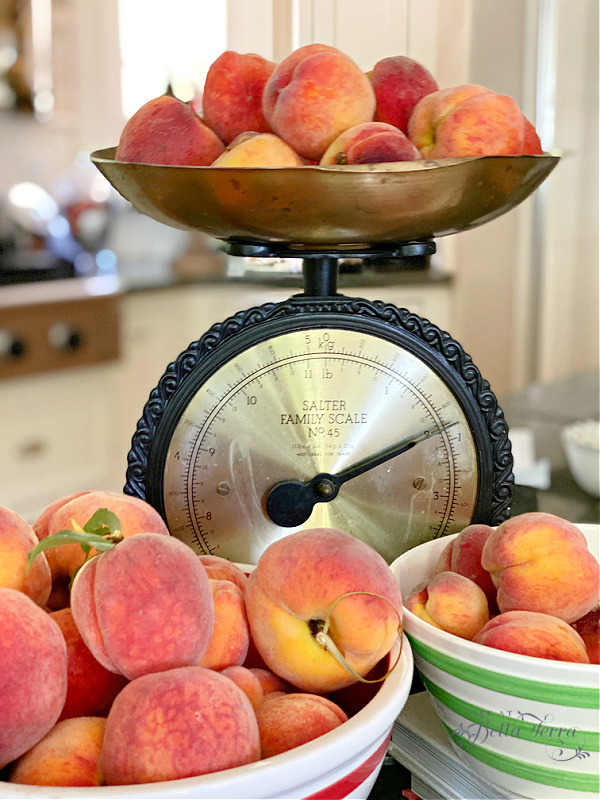
For the breakfast buffet, in addition to making my Green Chili Egg Casserole, I also added a Roasted Veggie Breakfast casserole recipe from Kim’s Craving. It is a cheese-less dish and you can also make it dairy free (I did not). Seems to be a hit! Recipe below.
Here are some photos from the day.
Zucchini cupcakes with a cream cheese frosting is a good way to add a vegetable to a treat.

Look at the impressive balloon arch over the beverage tables created by my husband, Scott and our dear friend, Mitch! This kit, from Hallmark has a colorful variety of mylar and decorative balloons. Little did I know you can buy these kits in most places. Walmart has their July 4th one marked down to $6.50!
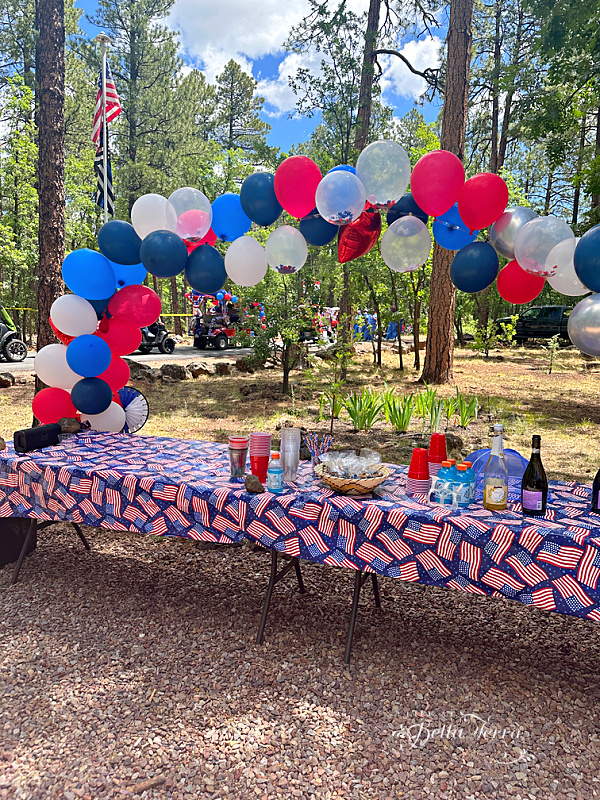
After two days of heavy monsoons storms, the weather on the 4th is picture perfect. Cornflower blue skies, white puffy clouds and a very pleasant 74 degrees. Please let me know what you did on Independence Day!
Prime Days are coming July 8-11!
The few times I have paid attention to Amazon Prime Days, I am always surprised to see such great savings. To me, it’s the perfect time to go through your wish list and see if your larger ticket items are on sale. I will try and do a post on Monday to remind you about this 4-day sale.

I am looking for 10 new chairs for our outdoor terrace back in Phoenix. The wicker-style chairs, originally purchased from Crate and Barrel for indoor use, are nearly 25 years old and are starting to look a bit shabby.
The Annual Birthday Cake
For the last few years, I’ve made a birthday cake for our dear friend Gary, who shares his birthday with the Fourth of July. Gary and his wife, Kathy, live just across the fairway from our cabin. This year, Gary picked a Lemon Supreme cake from my favorite cookbook, Layered—a new recipe I was excited to try. With fresh lemon curd between the layers, and light lemon buttermilk cake brushed with tart lemon simple syrup, topped with a lemon buttercream frosting, make this a lemon lover’s dream.

First hiccup: no 6-inch cake pans at the cabin. Too late to order online, and the nearest kitchen store—30 minutes away—had recently closed (we discovered this in the parking lot). A last-ditch stop at Walmart miraculously turned up the very last three 6-inch Wilton pans on the shelf. Victory?

Not quite. High-altitude baking brought its own drama. My first attempt yielded cakes with sunken centers. The second attempt, adjusted for altitude, was even worse. Thankfully, a generous layer of lemon curd between cakes helped disguise the dip.
But here’s a question: when did they start making cake pans with angled sides? Every pan I own has straight edges—ideal for frosting. The Wilton pans, however, are apparently engineered for “easy cupboard stacking,” which translates to cakes that look like terracotta flower pots.
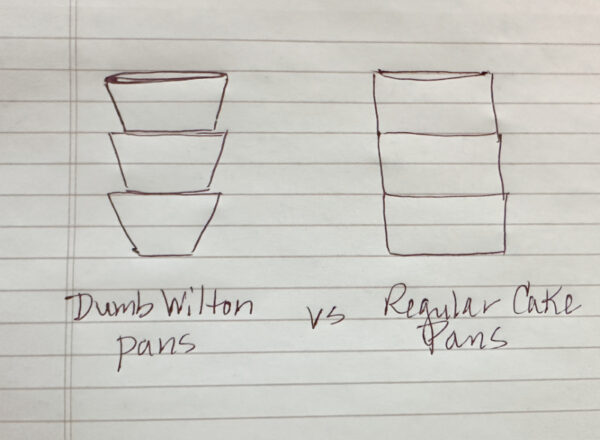
The cakes are rather delicate so trying to trim the sides was out of the question. With all my decorating tools in Phoenix, I relied on a table knife and whipped up a larger batch of lemon buttercream to mask the sloping sides. A few fresh daisies later, and the cake looked—well, surprisingly edible.
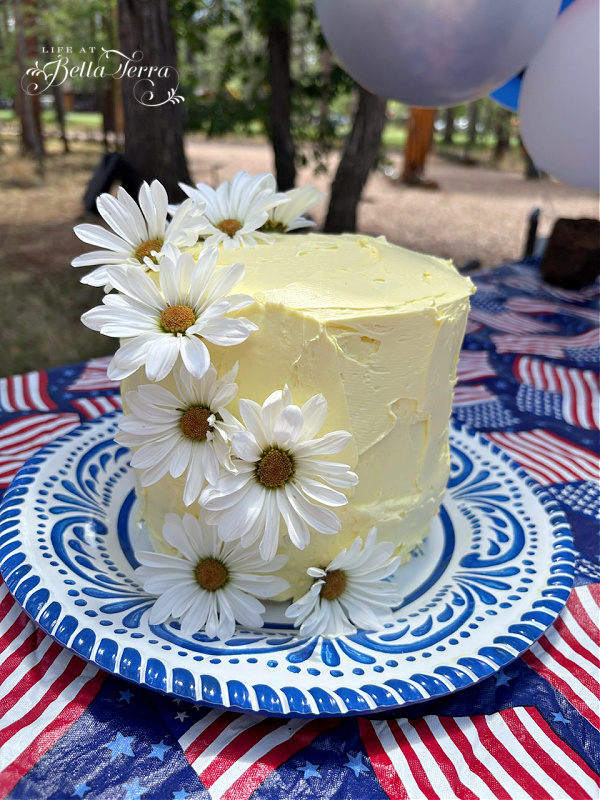
Despite the setbacks, Gary loved it and it did taste rather good. And in the end, that’s what matters most.
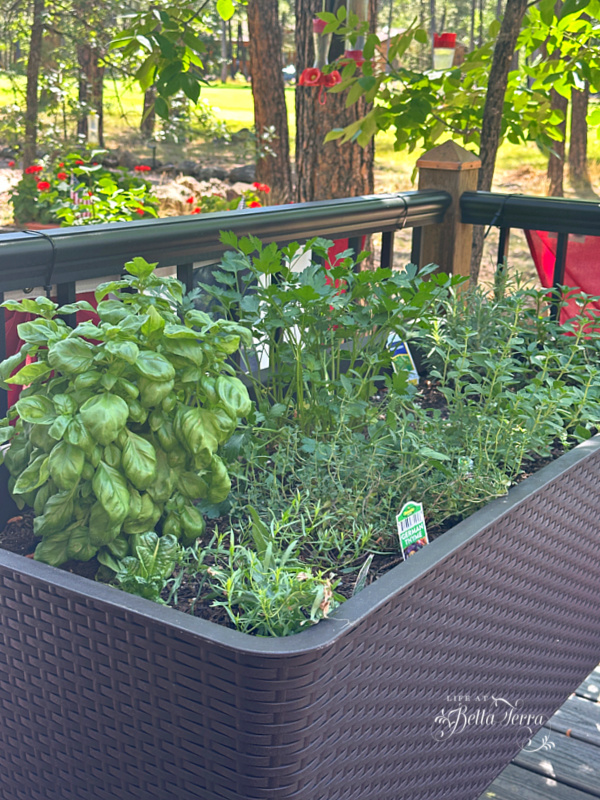
My Little Herb Garden
A few weeks ago, I shared my attempt at an herb garden in a raised planter. Well, here it is today and it is growing beautifully.
In addition, I am experimenting with the ends of the Romaine lettuce we use. Frequently, I just toss the ends in the garbage, however, I am now trying to regenerate it for future use. For a few days, I keep the stump in a shallow container of water.
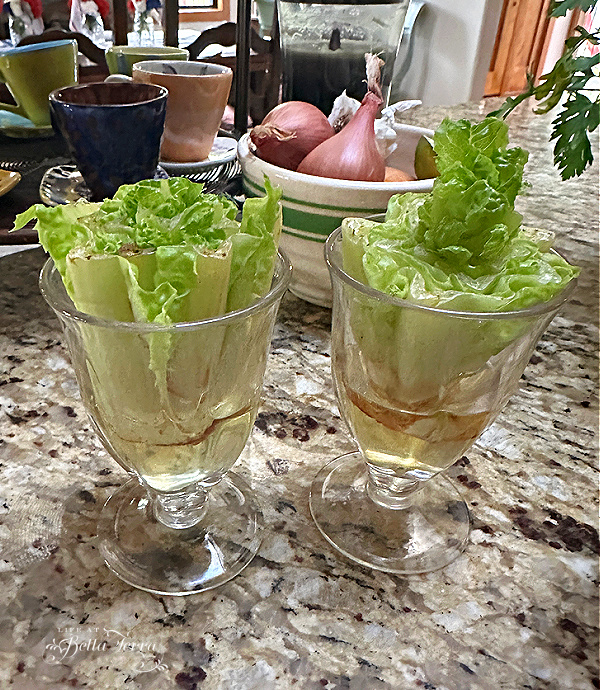
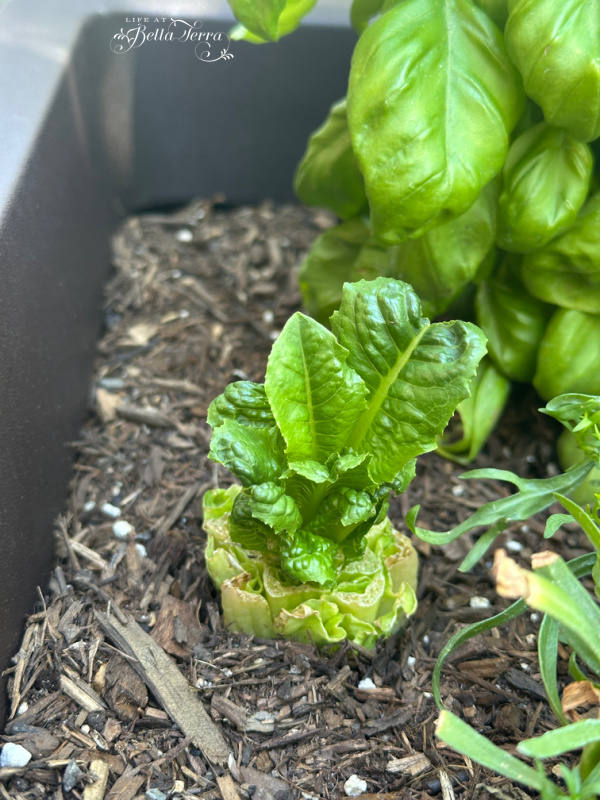
Once the stump shows some new sign of life, I plant it in the herb garden. I am hoping it will continue to grow so we can have fresh Romaine lettuce without buying it at the store.
I must admit, this little garden is really giving me so much joy!
A Satisfying DIY Project
For years, I’ve disliked the plain, unfinished wood mantel above the fireplace in our kitchen/dining area. It always felt too flimsy and ordinary for the beautiful stacked stone beneath it. We talked about replacing it, even considered hiring someone to build a new one—but we could never agree on a style or settle on a price.

Then, back in April, when artist Rick Rowley carved a dead tree on our property (see post here), he began by stripping off the bark. One large, curved piece caught my eye. I tucked it away, wondering if it might be the solution to our underwhelming cabin mantel.
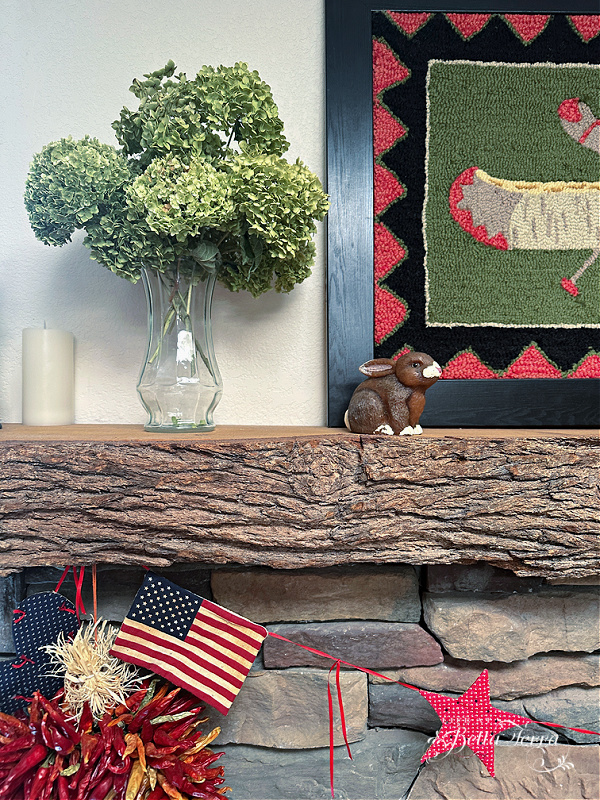
This week, we finally put the idea to the test—attaching the bark directly over the old mantel. The transformation is remarkable. Even though the bark was a few inches shorter than the 7.5-foot span, I was able to piece together smaller sections to fill the gaps. What once looked like a construction leftover now feels warm, rustic, and truly one-of-a-kind. Recycling at its best.
Mary’s Must Haves
I have been waiting to extol the benefits of castor oil until I have verified its uses. Castor oil, derived from the seeds of the castor bean plant, has a history of traditional use for various cosmetic and medicinal purposes. Its benefits and uses stem largely from its rich composition, particularly its high concentration of ricinoleic acid, a monounsaturated fatty acid with moisturizing and anti-inflammatory properties.
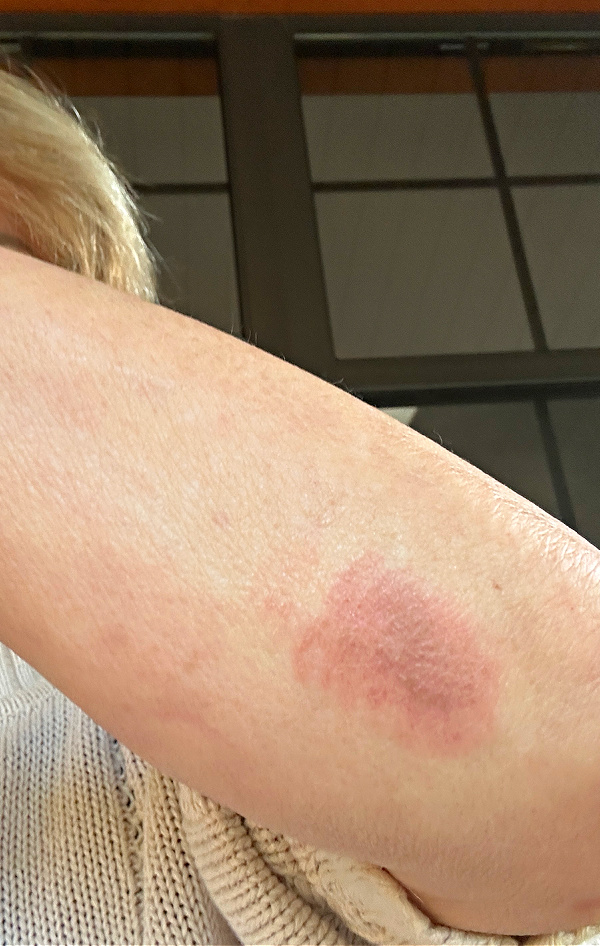
Recently, I unfortunately sustained a good burn from a 500 degree oven on my forearm. As you can imagine, it hurt like the dickens. Applying castor oil directly to the wound provided immediate relief. With daily applications, the burn is nearly gone.
Over the last several months I have used castor oil for the following:
- Reducing swelling in my finger from ligament damage (Finn’s leashed wrapped around it and he went off running)~anti-inflammatory
- Immediate relief from itchy mosquito bites
- Nightly massage on my facial and neck wrinkles
- Castor oil packs on any joint pain (knee, lower back)
- On dry cuticles and skin
I bought this 9 piece organic cotton castor oil pack/wraps as I continue to learn about all the ways to use castor oil. This item is now 14% off on Amazon priced at $18.99

There are so many benefits to castor oil and I encourage you to do your research before using this product. Make sure you purchase organic, cold-pressed and hexane-free castor oil. For $9.99 you get a 16 oz. bottle. It lasts a long time~my first purchase was one year ago and I use it every day. Just reordered another bottle.
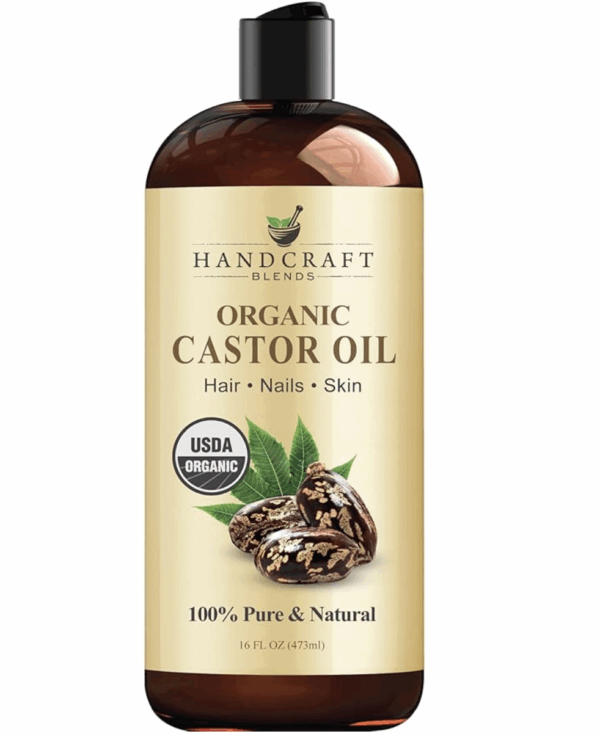
I continue to research the uses for this product but it should be something everyone has on hand. Do not confuse this with cod liver oil.
Well, that’s a wrap! Enjoy the rest of your holiday weekend. Just heard the news about the horrible flooding near Austin, Texas. My daughter is currently there and she said the rains are still coming down. Praying for everyone’s safety.

Roasted Veggie Breakfast Casserole
Ingredients
Method
- Preheat oven to 400 degrees. Use a large (11×17 inch) or 2 smaller sheet pans and set aside. Prepare the veggies: peel the carrots and cut into large chunks, chop stems off of asparagus tips and discard, halve the baby red potatoes (quarter especially large ones), remove ribs and seeds from the red bell pepper and cut into large 1 inch to 1 1/2 inch chunks.
- Place all the prepared vegetables in a large bowl and toss with oil and seasonings. I like to mix all of my seasonings in a small bowl before adding the vegetables to ensure they are all evenly incorporated.
- Place veggies evenly (do NOT overlap or you'll steam the veggies instead of roasting them) on the prepared baking sheets. Add salt and pepper to taste.
- Place on the middle rack in oven and bake for 35 to 40 minutes. You can flip the veggies after about 20 minutes of roasting if you'd like. Not necessary.
- Remove from the oven and allow to cool slightly.
- Preheat oven to 375 degrees F and grease or spray 9" x 9" (or other similar size) baking dish with oil or cooking spray.
- In a medium bowl, beat eggs with milk and add seasoning (if using) and salt and pepper and set aside.
- Place some of the roasted veggies evenly in the bottom of the casserole dish. Pour in egg mixture. Add additional roasted veggies, or desired amount to the top of the egg mixture.
- Bake for about 30-35 minutes or until the center is firm (give it a shake and if it jiggles, it needs more time). Let the casserole cool for 5-10 minutes, then cut and serve.
Notes
Just a reminder that any words that are italicized bring you to the source. If it is a product on Amazon, please note that I am an Amazon Affiliate. If you purchase something through my website, I receive a small (very small!) stipend, which doesn’t affect the price you pay at all. My goal is to make sourcing the items easy for you. Thank you for your continued support.


What an amazing 4th of July! Wow! And the cake turned out great. I’m glad to have that advice about burns. It seems that every time I use the oven now, I get a new burn. I think I’m moving too fast. Have a great weekend!
Pam, so good to hear from you! I’ve been intermittent on checking in on your blog. My apologies. I, too, am burning myself alot. I think it’s just using a different oven from the one in Phoenix. Our cabin one is below the range and Phoenix is a double wall oven. I have been faithfully applying the castor oil and it’s already gone (with some new skin in its place). Have a great week!
Hi Mary,
You put so much into breakfast, everything looked delish. All your decorations and the balloon arch turned out so well. Beautiful cake and adding the daisies a great touch. I’m sure your Pine Top community appreciates all you both do.
Sorry to hear and see your burn. Your oven at 500 degrees I can imagine how painful that was. The healing powers of something organic and natural came to the rescue. What a blessing.
Katherine, I’ve never made a balloon arch in my life so I was really impressed with the two guys doing it! Yes, the healing powers of castor oil are remarkable. I wish I could bathe my whole body in it. However, the first time I used it, I applied it to several areas of my body and did too much~didn’t feel good. And then I read that you have to use it in moderation because it of its detoxification properties. It really did soothe the burn immediately~happy to discover that! Have a wonderful week!
I am so impressed with your raised bed herb garden. Looking forward to seeing how well your Romaine lettuce grows. This has inspired me to root and grow some for myself.
Your Independence Day celebration was pure joyful Americana. Such a wonderful way to celebrate!!
Didn’t know there are so many useful ways to use castor oil. I will be purchasing a bottle to keep on hand. Especially for mosquito bites. Mosquitos terrorize me in the summer. I really appreciate that bit of information!
Mary, thanks for a wonderful, informative packed post!!! I look forward to each and every one.
p.s. Loved the picture of Finn and “people his size”. Got a good chuckle from that one. 🙂
Valerie, yes, I will keep you posted on my Romaine lettuce experiment. Would love to grow my own up here as we eat so much of it. I can relate on mosquitos~they always seem to attack me first, and multiple times at that. Hope it works for you. I just got my second bottle today! Finn was happy to be outside with our little guests after being cooped up and separated from the group. He still is such a puppy and would have loved to have his head in the buffet table! Have a wonderful week.
Mary, I so enjoy your Post’s. You are a very talented lady. Thank you for all your work.
Ann,
Thank you for your sweet comments. Hope you had a joyful 4th of July.
Your story about the cake not rising properly reminded me of when I recently made an angel food cake for a trifle recipe. It didn’t rise at all and was like a solid heavy mass out of the pan. Been making these cakes for 50 years and can’t figure out what happened. I’m practically at sea level, so not altitude issue. Bad mix?
Anyway, my husband ran up to the store and got the last premade cake! Way overpriced and not as good, but I was desperate! The trifle was delicious!
Judy, I am still scratching my head over my cake failure. I checked to make sure the baking powder was not expired; the baking soda did expire but I’m sure I’ve never check the use by date before for other recipes. We are having an appliance repair person check out the oven because the temperature could be fluctuating? I completely empathize with your angel food cake problem. What’s nice about trifle is you can soak anything in those ingredients and they taste great. Thank goodness for store bought solutions.
FUN, FUN, FUN…well, except for the burn… How did we get so lucky to get two nice days the FOURTH & 5th!! franki
Frankie, I know! The weather was beautiful (not so much the two days before). Today is another picture perfect day…just hoping for some monsoon rains in the afternoon as it is extremely dry here. Have a wonderful week!