
Big Style in a Small Space: Our Cabin Bathroom Wallpaper Makeover
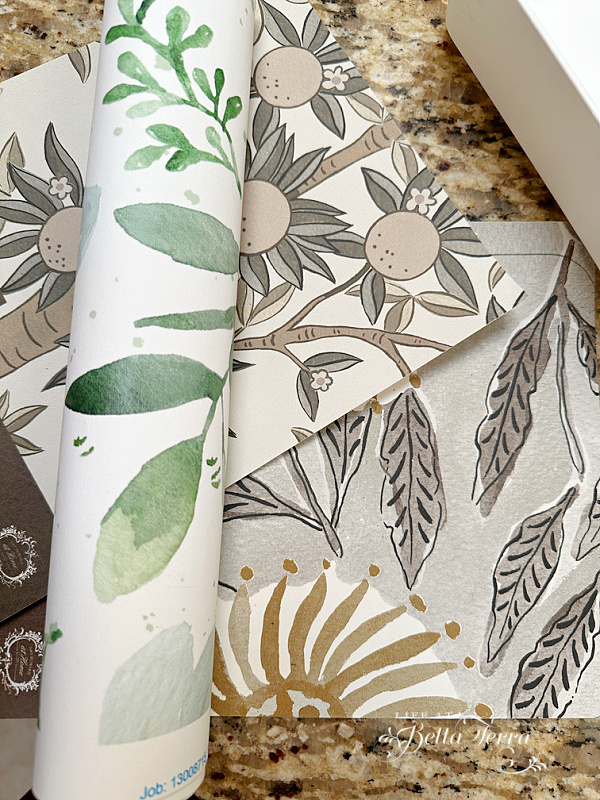
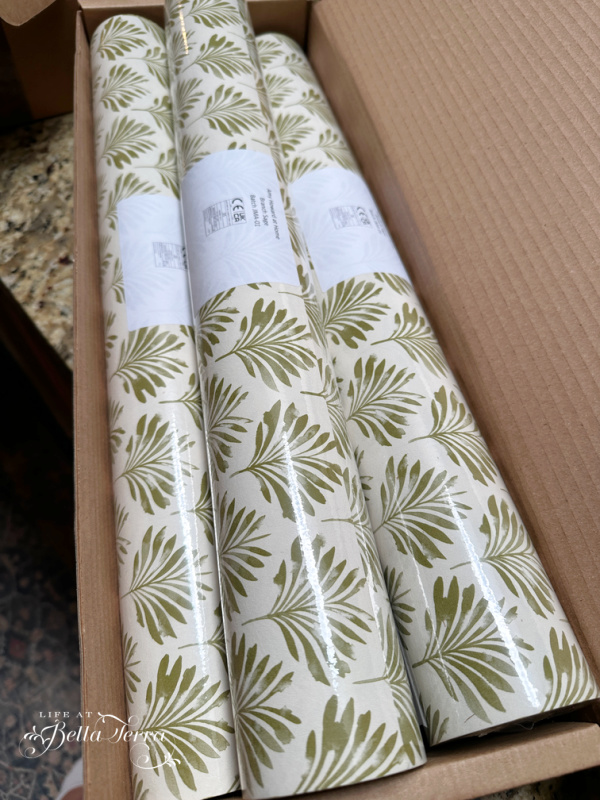
Remember those wallpaper rolls I shared a peek of a few weeks ago? Well, it’s time to reveal where they ended up! Our tiny cabin bathroom — once drenched in a bold, deep red — has traded drama for calm with a fresh neutral-and-sage pattern. The difference is night and day, and I can’t wait to take you from “before” to “after” in this little space that now feels twice as big and infinitely more charming.
The Bathroom-the Before
When we first bought the cabin, every single wall was painted white…and not a warm, inviting white, but a hospital, sterile white. In a moment of insanity, I painted the small bathroom near the kitchen the same deep red to match some bath towels.
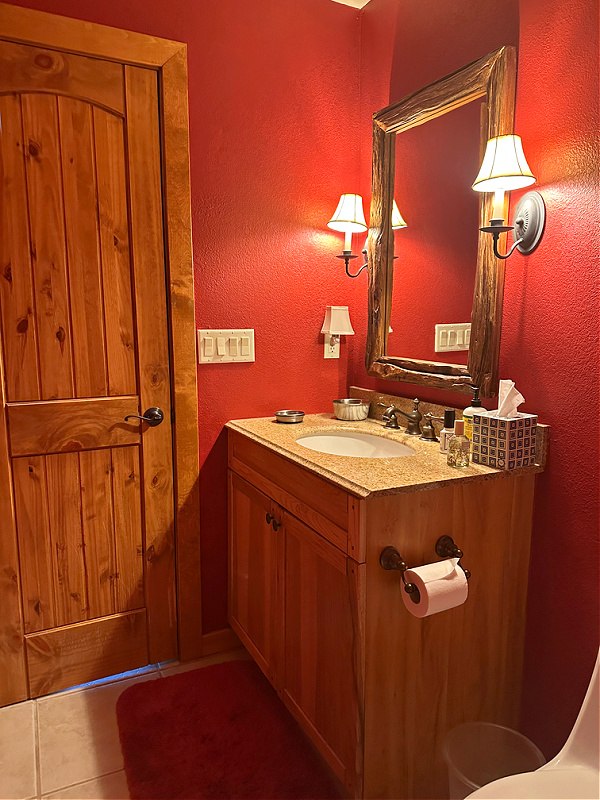
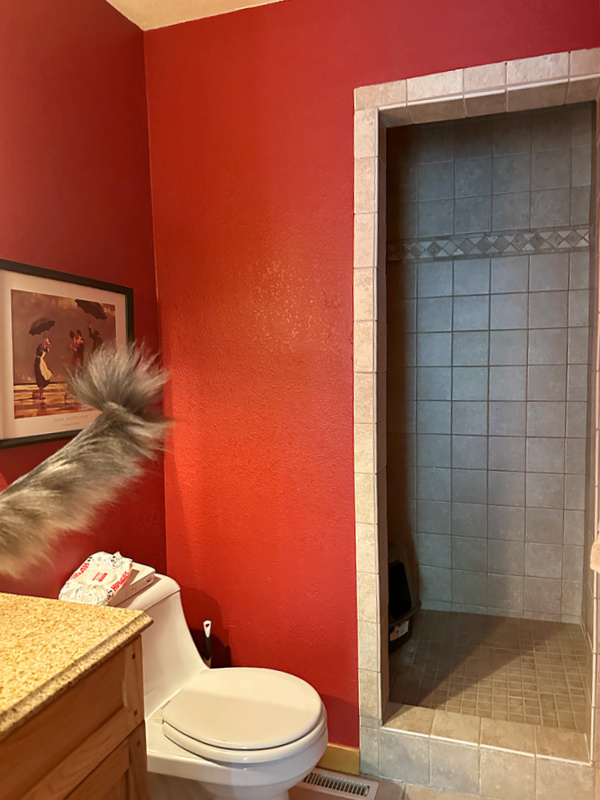
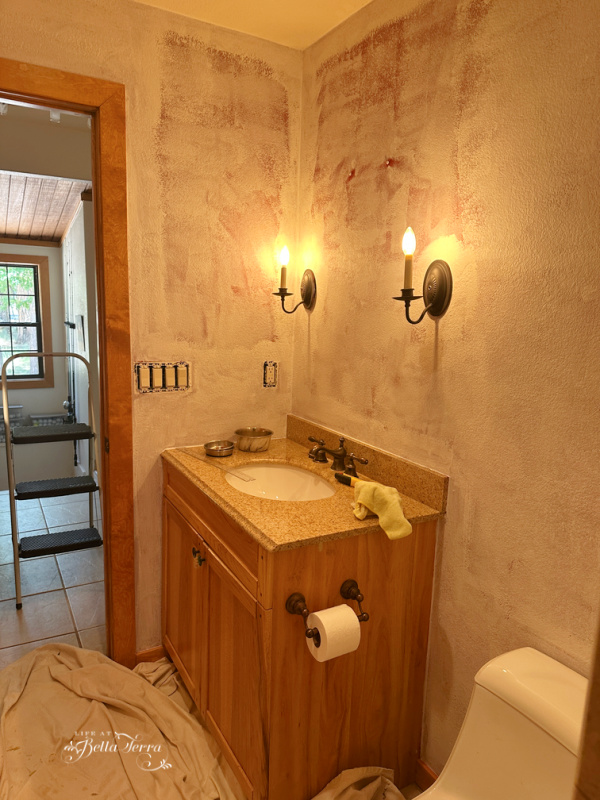
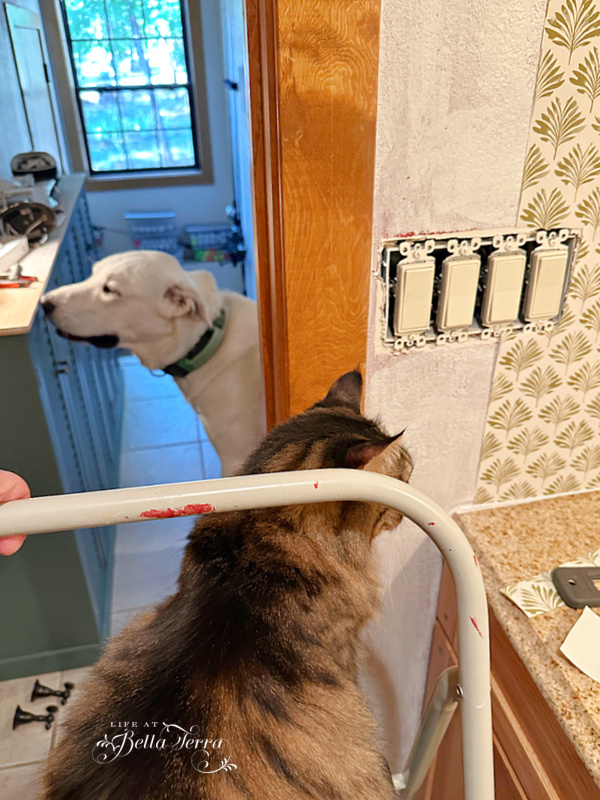
With no windows and only sconce and overhead lights, the red wall color made everything dark. In spite of being small in size, this is a full bathroom with a walk-in tiled shower. I don’t believe anyone has ever taken a shower in there. The cat is sequestered in here at night, hence the tail in the photo below.
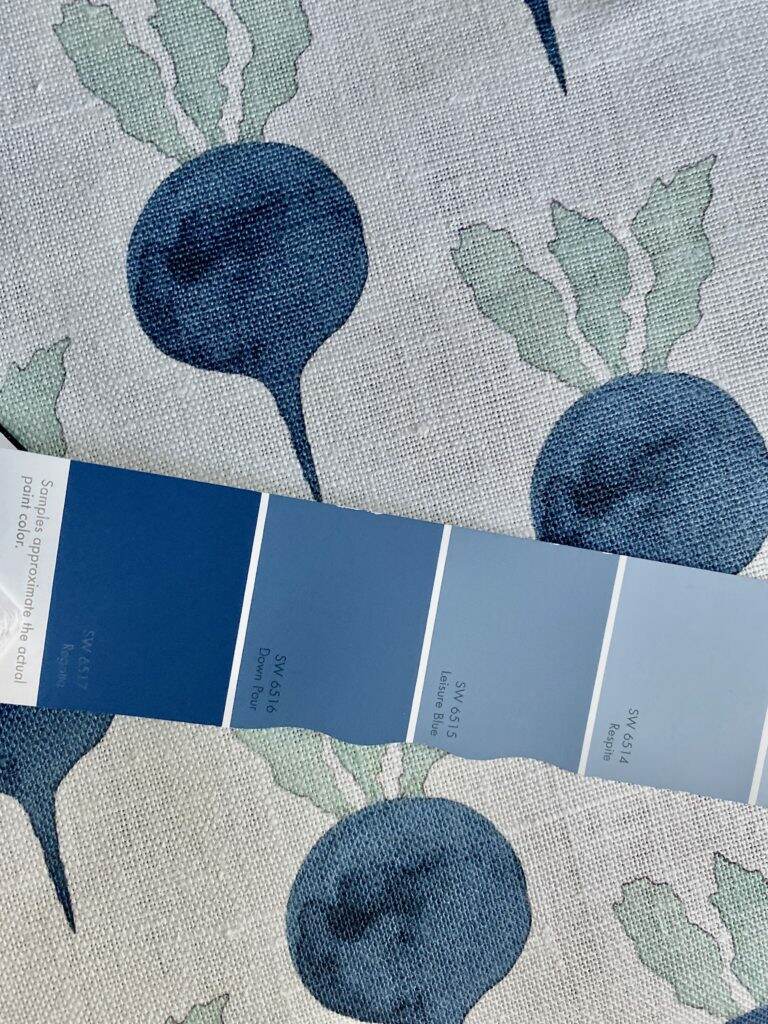
Right style, right measurement and right price.
It literally took weeks for me to find a wallpaper that works with our “cabin in the pines” feel, at a price that is not astronomical. Many manufacturers have samples (for a nominal fee), and this is a good way to see a pattern up in the room, and live with it for a few days.
I keep striking out~the pattern is too big, too cutsy, too busy, or not the right color. But don’t toss those samples, as they make great drawer liners (see that post). Previously I purchased wallpaper from Spoonflower, which has many beautiful designs. However, to wallpaper this small bathroom (4.5′ x 9.5′) with Spoonflower would run close to $1000.
I also did not want to buy inexpensive wallpaper that wouldn’t cover the orange peel texture of the walls. Yes, I could sand all those bumps down, but visions of my sanding walls pinned between the toilet and vanity is not an exciting option.
To get a sense of how many rolls I would need, I measure the room. But in this room there is only one full wall. The other three have a door, shower entrance, vanity and toilet. Not wanting to spend money on wasted wallpaper, I break the room down in sections and then tally up the square footage. Keeping in mind the pattern and repeats, I guesstimate on an overrun/error amount, hold my breath and place the order. Lesson learned with my other wallpaper project (which cost a small fortune) as I have full rolls of leftover wallpaper.
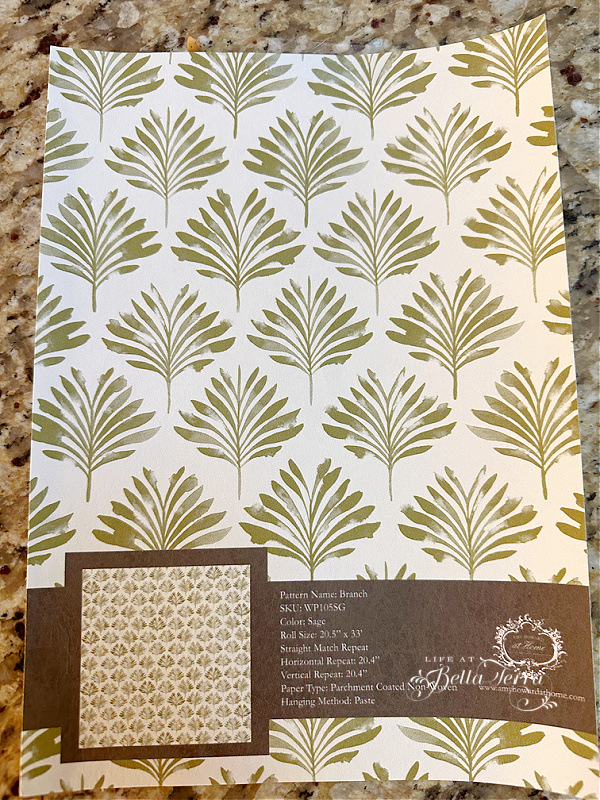
When purchasing wallpaper, note the size and length of the rolls. For this project, I only order 3 rolls, but they are 20.5″ x 33′ (which is a double roll). The last wallpaper project the rolls were only 12′ long at $129.00/roll. Amy Howard at Home wallpaper is $21o.00 per roll and nearly 3 times the length. Works out to $6.36 per foot vs. $10.75 per foot, a 60% difference!
Taking advantage of their July 4th sale of 25% off, 3 rolls of Branch Sage, minus shipping and taxes =$472.50.
What Type of Wallpaper
You have choices when it comes to wallpaper: peel-n-stick, paste the wall, or paste the paper. This Amy Howard at Home wallpaper is a paste-the-wall type. Having experience with peel-n-stick wallpaper that didn’t stick, using wallpaper paste is fine with me.
What is the difference between paste the wall and paste the paper?
According to Wallpapershop.co.uk, the major difference between “paste the wall” and normal standard wallpaper is in their construction. Paste the wall tends to be thicker, heavier, and normally a non-woven substance that acts like a mesh. “Paste the wall” papers are much stronger and more durable than paste the paper and do not expand when the paste is applied. You have to paste the paper if it specifies this. But with paste the wall wallpaper you can do either.
Wall Preparation
With a dark red paint on the walls, I decide to apply a wallpaper primer. The white paint will help cover up some of my painting errors of the past. I also did not want to take the chance that the red paint would appear beneath the paper.
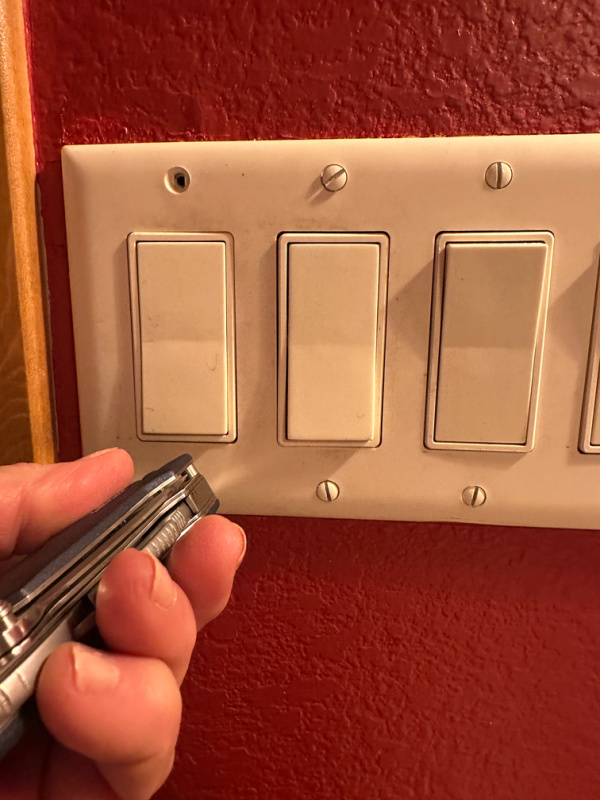
Prepping the space is really important. With a drop cloth on the floor and a damp rag to quickly wipe up any spills, I am ready to start. After wiping down all the walls with detergent and water, I remove the light switch plates and towel bars.
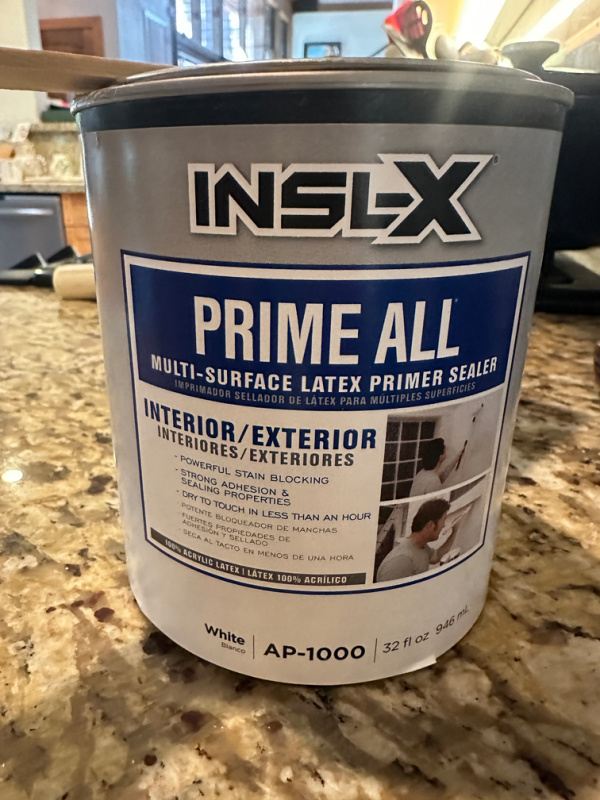
This is the primer my husband purchases for the walls.
I first paint all the edges with an angled brush and then use a roller for the rest. I’m never sure if you roll first and then paint the edges, but it all worked out in the end. You can see the rather ugly texture to these walls. Who ever thought an orange peel texture is attractive?
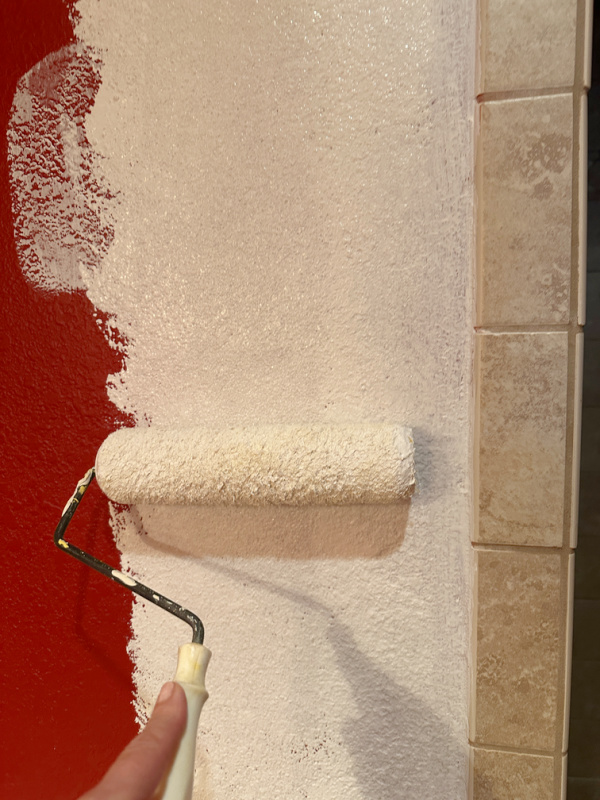
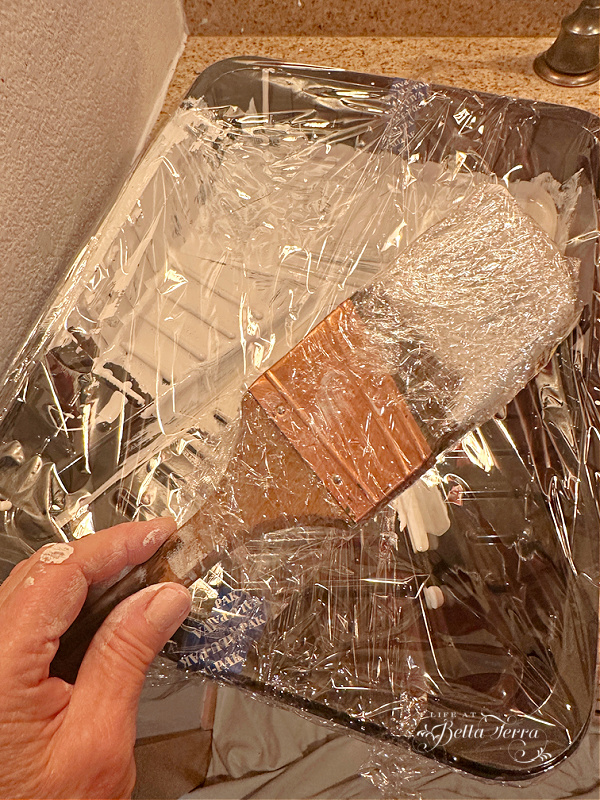
Once the priming is finished, I keep the paint brush on hand in case I missed a spot. Wrapping it in plastic keeps the paint moist for several hours.
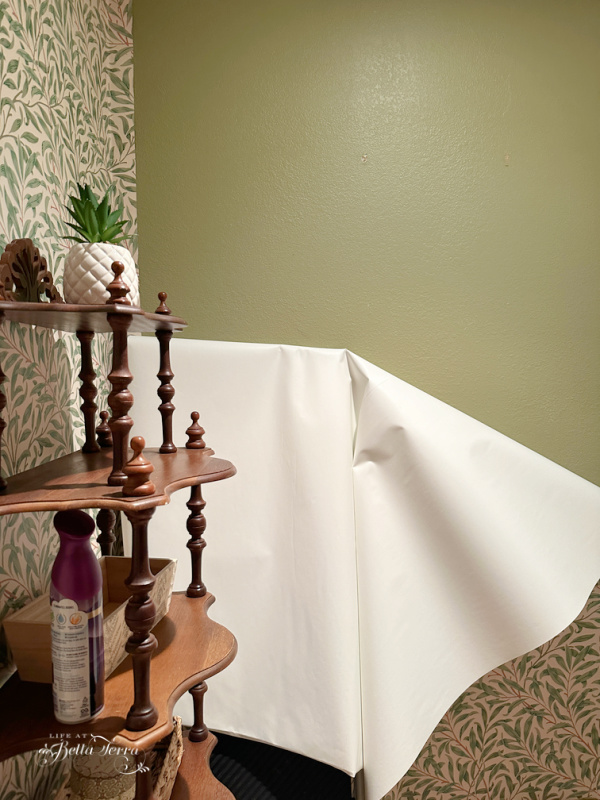
Here is what the bathroom looks like after primer painting. I let it dry overnight, not that it needed to, but because I was pooped. A good night’s sleep will aid in better wallpaper hanging.
Measuring the Wallpaper
As my Dad always said, “measure twice, cut once”. Fortunately, the dining table with the leaves out is long enough to roll out the proper lengths of paper. I’m not sure what the attraction is but both Donovan and Finn want to be my helpers.
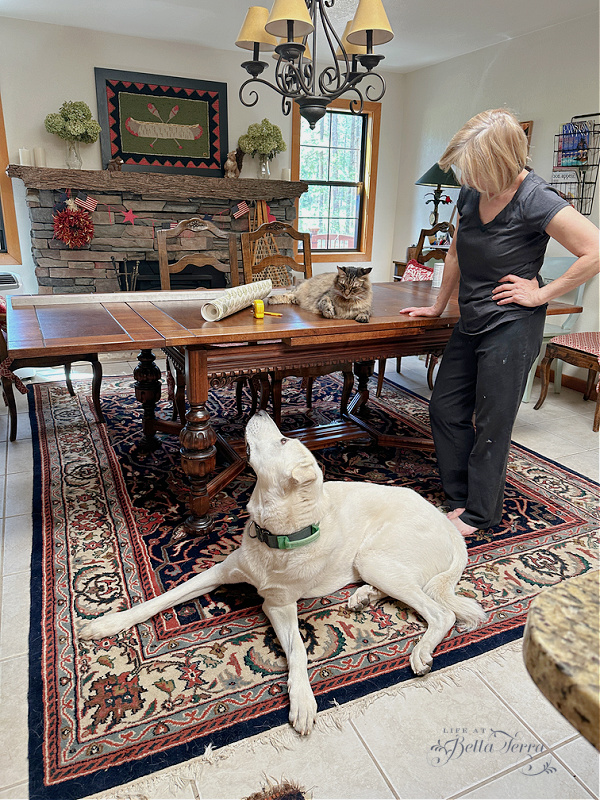
Their “assistance” continues throughout the entire project!
Drawing Guide Lines
Starting with the full wall (one wall without doors, etc.), I measure the width of the paper and draw guidelines using a long level. Getting the first lengths of wallpaper squarely placed is important.
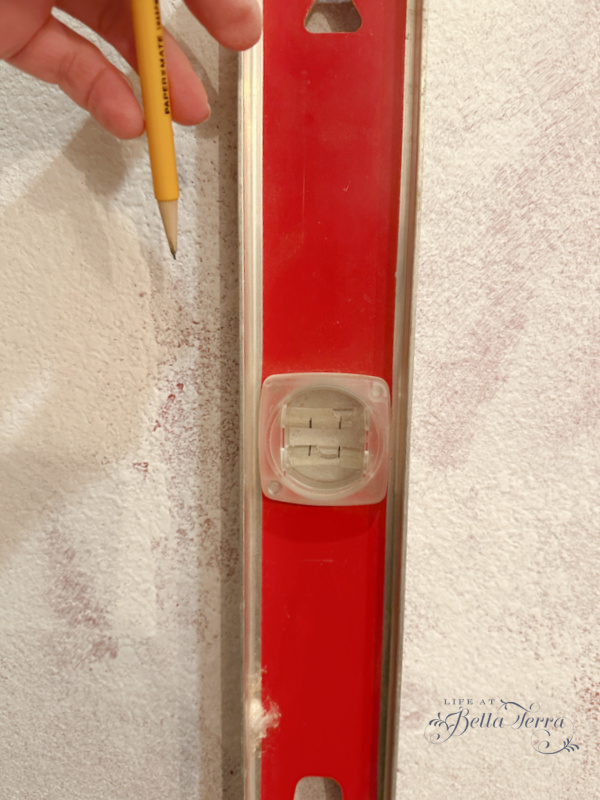
Hopefully if you decide to do this, you will hang wallpaper in a room that is relatively square. If not, there are ways to create an optical illusion, as I found out when doing the corner by the toilet.
Applying the Wallpaper
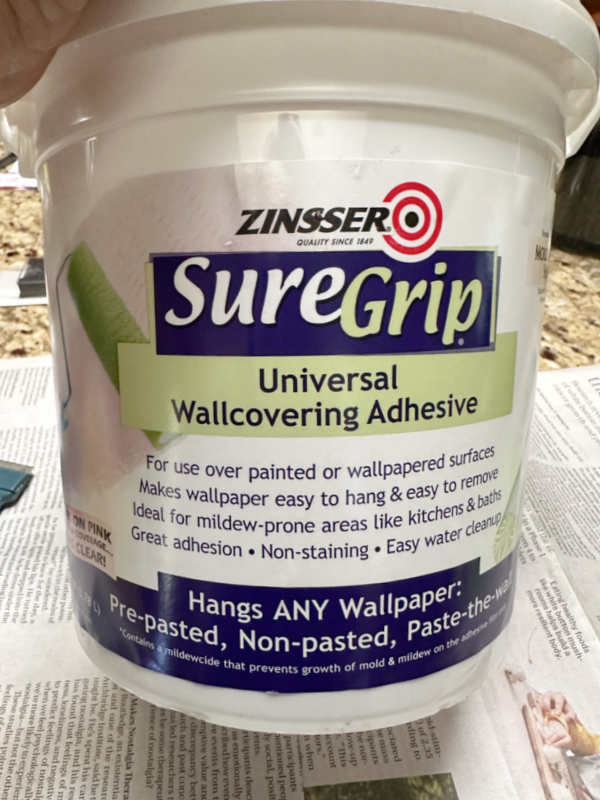
The wallpaper paste is Zinger Sure Grip Universal Wallpaper Adhesive, claiming to go on pink and drying clear for easier coverage. It failed to go on pink and being clear, it was a bit of a challenge to determine if I had enough on the wall. But I adapt and add more in those bare spots.
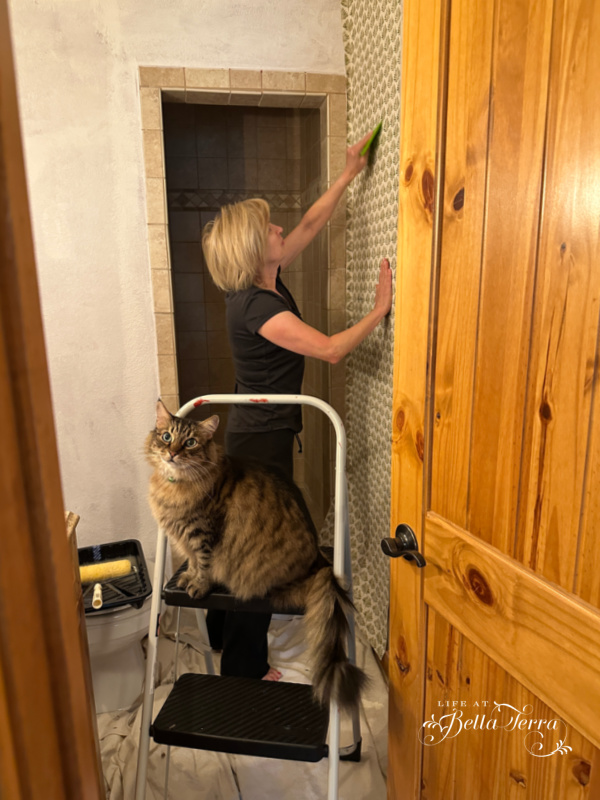
Using the proper wallpaper tools help to flatten the edges and get any bubbles out from under the paper. A straight edged razor blade is used to trim the paper at the ceiling and baseboard. Note: be very careful with a sharp blade. I unfortunately cut across the top of my hand, through a vein and it is still healing (and hurts).
The only difficult challenge is discovering the corner near the toilet is not square~it is way off. With a patterned paper, I am able to make it look square even though it wasn’t. Thankfully with the help of a YouTube video I figure it out. The key learning is that the internet provides lots of help when you need it.
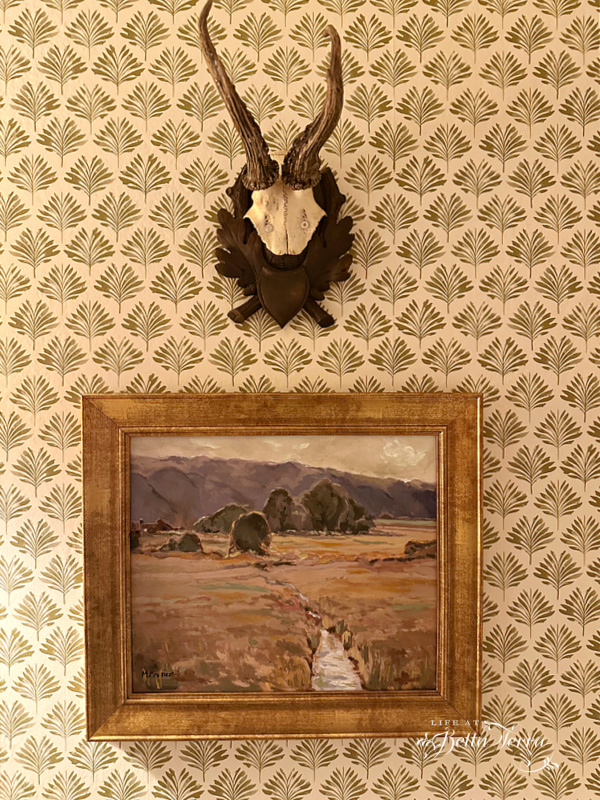
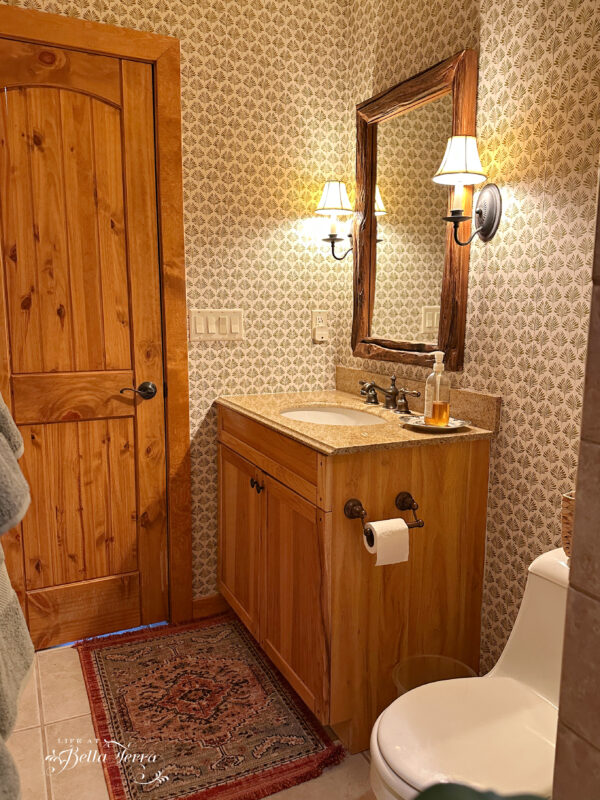
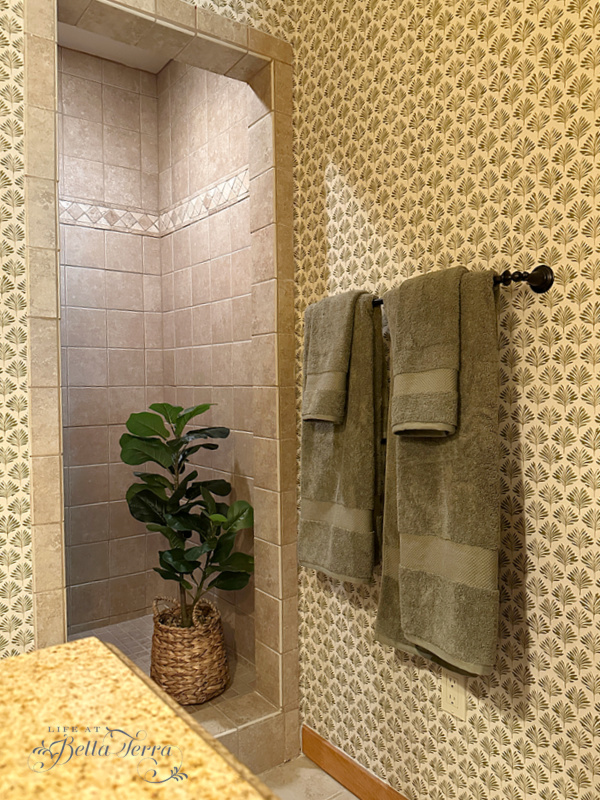
The Bathroom ~ After
What a difference! This sweet sage patterned paper completely changes the look and feel of the room.

Since none of the colors from the previous towels or art work fit, I find what I need at a local Target superstore from Threshold brand. From the new area rug to the towels and artwork, these few elements make the look more cohesive.
This project took me two days from start to finish, not accounting for all the time it occupied in my head! I hope this inspires you to take the wallpaper leap.
Thanks for joining me today and let me know if you like the updated bathroom.

Just a reminder that any words that are italicized bring you to the source. If it is a product on Amazon, please note that I am an Amazon Affiliate. If you purchase something through my website, I receive a small (very small!) stipend, which doesn’t affect the price you pay at all. My goal is to make sourcing the items easy for you. Thank you for your continued support.


I have seriously been considering wallpaper n my powder room. I think you have just convinced me to go ahead. This is lovely.
Pattie, Please let me know if you do tackle the wallpaper project. I am so happy with mine. Send pictures!
Love the paper and it really does look great!
Janie, thank you! That means alot coming from you, as I love everything about your home!
Looks fantastic! Perfect choice of wallpaper.
Corinne, thank you so much.
Looks like a whole new room! I’m so impressed with your wallpaper skills!
Diana, thank you. I am hoping it all stays up! Ha!
When using a paint tray for a roller, start by sliding the tray inside of a large plastic bag. Next, pour the paint in. Then no tray cleanup after. If patching wallpaper or covering over a dirty area, carefully cut out a suitable patch. Lets use a big leaf as an example. Before pasting the new big leaf over the leaf that has been damaged, get your pinking shears and slightly trim around the edge of the entire leaf. Now you can paste the new leaf over the bad one. The irregular edges disappear better. No pinking shears? Fake a wobbly cut with regular scissors. Linda
Linda, you should write a book as you have the best ideas! I Love the plastic bag on a paint tray-which I do not like cleaning. And good tip about the pinking shears…so smart. Thanks for sharing!
I am also in awe of your talent! The room looks transformed and brighter. You had some good looking assistants too…
Elle, thank you so much. The main concern about my “helpers” is making sure no stray hairs ended up under the paper!
Looks amazing!!! Nice job!
Susie, thank you. I thought of Mom while doing this. I recall her laying the paper down on a board over work horses and spreading the paste. It was easier to paste the walls in this project!
What an incredible transformation, Mary! WOW! It looks so good! Well done – that is something I’d never take on. I am so impressed.
Michele, I’m not sure I could take on a larger room. The biggest challenge was the wonky corner…what a hurdle that was. I’m glad you like it!
I’m so impressed! I would be way too intimidated to try and take this on. Looks amazing!!
Michele, you have such incredible taste you could definitely do this! Thanks for the compliment!
I agree… you are SUPERWOMAN!! You can do anything. Husband should be very proud of you!! Love the wallpaper look. Clean and fresh looking.
Nancy, I read your comment to my husband! Ha! Have to remind him all the time how lucky he is. Glad you like the paper!
Mary, you are talented and such a brave soul to take on this project all by yourself. The bathroom turned out so well. Love the new look. Give yourself a big hug and lots of pats on the back for an outstanding job so well done. You give new meaning to “Wonder Woman.”
Katherine, you are too kind. I am so glad you like the final look!
Great video and reminds me of our parents wallpapering the Connecticut colonial house. Love to see the crooked toilet section, glad you had the help of the pets too! Thanks for sharing.
Mike, yes, I remember Mom and Dad restoring that beautiful historical home. Remember when she painstakingly took off the section of the front hall wallpaper (after so many other layers on top) and had it reproduced? Mom was a very talented gal.
It just looks fantastic! Living in a small log cabin (we built) I know about “tight spaces!” Job “Well Done!!” franki
Franki, now I want to see pictures of your small cabin!!!
Mary, this looks wonderful! Beautifully suits the cabin and space. Once again, am in awe of your talents (and patience!). Fun to see the pet ‘helpers’ too!
Tracy, was just thinking of you as I did my walk by your cabin yesterday.I am so glad you like the wallpaper! It’s a massive improvement.
I’m so excited to see this. I want to wallpaper my coffee/butlers pantry tiny room but the walls are textured and I wasn’t sure it would work. You answered all my questions! I was also going to hire someone but maybe I won’t.
Andrea, if you don’t sand, try and get a thicker paper. Or you could knock down the texture. Thinner paper will show the bumps. Happy to help you and it would give me an additional excuse to come to Texas!