Your Home’s Entry-Are You Making a Good First Impression?

As you may know, our historic home was built in 1910, before Arizona became a state. Originally the plats of land were 20 acres and were marketed to build rural agricultural estate homes surrounded by citrus groves. Nearly all the large parcels have been subdivided as Phoenix has grown. We feel fortunate to still have 2 acres, which is rare in this urban environment.

Unfortunately, I do not have any pre-renovation pictures of our entrance. The driveway was dirt/stones with no gates.

During the holidays, we love to decorate the entrance to our home, because you cannot see the house from the street. Our goal is to make our entry welcoming and festive. The first impression we want to create is that all are welcomed here.

Irrigation Laterals

Our home sits 150 feet back from the street. Adjacent to the street are irrigation laterals, which supplies public water at an affordable cost to deep water our large, mature trees.

As you drive in, you cross what I call the “moat”.  It is the main irrigation ditch that runs along the road.  If you look to the left and right once you pull onto the “bridge”, you see this~~a river (the irrigation lateral). The main gates are inset to provide enough room for two vehicles pulling off the street (as our street is very busy).

This water source feeds into our private irrigation ditch, which parallels the main moat and our property line.

Twice a month in the summer and once a month in the winter, water is released into our private ditch.  After opening hatches, the water is then funneled throughout the 2+ acres providing many gallons to the orchard and mature trees.

Original Stone Pillars

Large, original stone pillars act as sentries at the entrance of the driveway. Back in the day, we believe a heavy chain hung between the columns for security.

The hooks are now a great place to hang a holiday wreath.

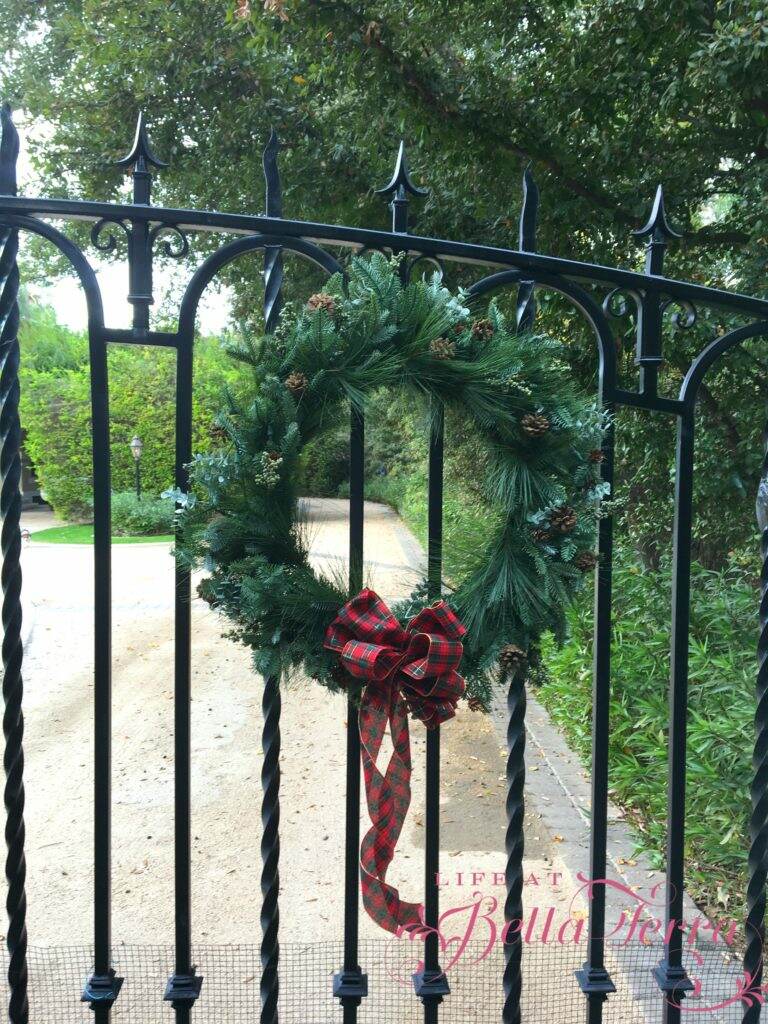
The wrought iron fencing and gate design is to replicate the architectural arches throughout the house. Since we live on a busy street, the fence and gate keep the dogs safely inside the property and deters any criminals looking to cause mischief.

Our pre-lit wreaths change with the season and hang on the automatic gates.

We used tumbled pavers on the entrance bridge. Once you go through the gates, the driveway is a combination of paver edges and bands with packed decomposed granite in between.  This stone/gravel look is more historically appropriate for our 112 year old home.

Arriving at the Front Door

Driveway to front of house

The original front door and sidelights had security bars and gates on them, hiding the beautiful 4 foot wide raised panel door. To see the before and after of the front of the house, click here.

Holiday front door 2021

Here is the view from the front door to the street. Notice the archways in the architecture. You will see many of these details throughout the property.

View from front door to street

We are getting the front door decorations up this week and if you recall my Christmas in July post (see it here), the theme of the wreaths will be blue velvet ribbon, oranges, artichokes and cinnamon sticks. Hoping to tie it all together with the living room mantel and staircase garlands (and share it with you next week).

Holiday porch 2020

First impressions are lasting. To me, having a welcoming entry is such an important element in your home. In spite of the size or location of your home, you can make the entrance attractive and unique. It doesn’t take a great deal of resources, just a little upkeep and attention to detail.

What do you love about the entrance to your home?

If you enjoy this post, please share on Pinterest.


From Trash to Treasure: Rescuing Adirondack Chairs

A few weeks ago, in two separate garbage piles, I found Adirondack chairs and a small table. Typically I do not look for junk furniture in someone else’s trash, but I do love a good Adirondack chair. Several new Adirondack chairs are made with a high density polyethylene and can be pricey. So when an opportunity presents itself, what’s the worst that can happen? If the chairs are in really bad condition, then all I need to do is throw them out again.

Before~The Trash

Here is the chair I found in the alley. I do hate it when people use alleys for a dump site (very irresponsible). Behind the chair is the small table.

Dumped chair

The second chair was sitting in a pile across the street during bulk trash pickup. I spotted it pulling out of our driveway on the way to an appointment and my sweet husband went and got it for me.

Rescued by my husband

Even though the chairs are different in style, I think, once refinished, they will look lovely together.

Chair Repairs

Both chairs need new slats as they are either warped or split due to knots in the wood. This repair is rather easy by purchasing popular boards of similar size from Home Depot.

Warped slats need replacing

With this chair back repair, my husband uses the damaged piece as a template to cut a new one.

Back slat warped
Remaking the center slat

Sanding and Prep Work

The white chair has a plasticky paint that requires a good sanding job. Meanwhile, the other chair’s paint is nearly gone. Sanding will help knock off the old blistered remaining paint.

Safety glasses, mask, gloves and hair scarf

Make sure you wear eye,skin and respiratory protection while sanding old paint. Since I don’t know the age of these chairs, nor the type of paint, I do not need any fine sand to end up on me. Not attractive, but using safety glasses, mask and gloves are essential.

What Grit Sandpaper to Use?

It’s important to use the right grit of sandpaper to get the finish you want. Here is a handy guide to know the grit levels and what they accomplish.

Image from Handtool Essentials

Using a hand sized (palm) sander is perfect for this project. It is lightweight and easy to maneuver. I start with 60 grit paper to knock off the old paint, and then finish with a finer grit of 120.

Sanding with a 60 grit paper

Getting Ready for Paint

After sanding is complete, I wipe down each chair to remove any dust or debris. With the new wood slats and nearly bare wood everywhere else, the next step is using a good primer.

Wipe down with a damp rag

After consulting with the painting expert at Sherwin Williams, my husband purchases this Extreme Bond Primer which is a urethane modified acrylic. You can use this for both interior or exterior. I like that I can wash the brushes and all the paint on me with soap and water!

Primer paint

The paint glides on easily and both chairs only require one coat of primer.

One coat of primer

Based on the manufacturer’s suggested drying time, the chairs dry rather quickly (also helps that it is 100+ degrees outside!).

Final Coats of Paint

Since we will more than likely take these chairs up to our cabin in the mountains, we decide on a color that will look good in the forest. The paint expert recommends this waterbed alkyd urethane in semi-gloss. Color is Foxhall Green #9184, which is more of a blackish-green.

Foxhall Green semi-gloss

Each chair needs two coats. Since I haven’t finished prepping the small table (needs more sanding), that part of the project is still incomplete.

Applying first coat of paint

The newly cut pieces for each chair are painted separately and affixed once they are dry enough to handle.

Waiting to dry

Since this paint will be very durable, the manufacturer’s drying time is several days. We put the newly painted chairs on the back terrace where they get the daily heat but not direct sun or rain.

Trash to Treasure

Though a bit more work than I expected, we are very happy with having two “new” Adirondack chairs.

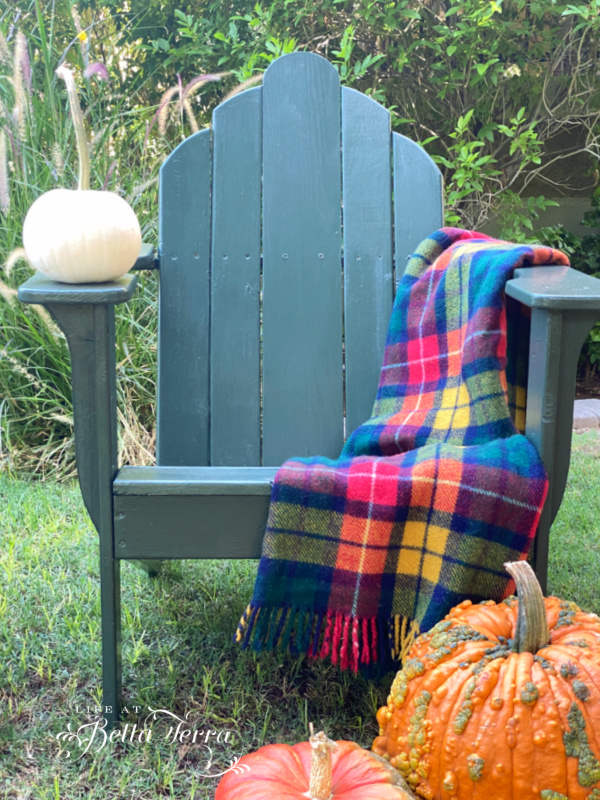
Finished chairs

Here is the one with the replacement back slat (found in the alley).

Looks good!

And here is the one that needs new seat slats (found across the street).

New slats

Cost of the Project

So, is it worth it to rescue someone else’s trash and turn it into your treasure?

Here’s a breakdown of the costs:

  • Chairs/table ~ free
  • Popular slats ~ $9.96
  • Birch board ~ $19.53
  • Primer~we bought a gallon, but a quart would easily do it. Approx.$20
  • Paint~ we bought a gallon, but a quart would do it. Approx $20
  • Sandpaper~ we had on hand

Approximately total is $70.00; so $35.00 per chair.

Granted we didn’t figure our time, but we spent a few hours for about 3 days to prep and paint 2 chairs.

Before and After Side by Side

Before
After
Before
After

Once I finish the table, I will share that with you too.

Have a Happy Tuesday, friends! It is so much fun to share these projects with you.

If you enjoy this post, please share on Pinterest.


Room by Room :The Hardworking Mudroom

The mudroom is perhaps the most used, and abused room in our home.  Located right off the back door of the house, the mud room is also adjacent to the kitchen, laundry room and library. This small room has 4 doors and a back stair case up to the 2nd floor.

One of Cooper’s favorite hangouts

The Before

Here is a “before the restoration” picture. Stained linoleum floors, security bars on the window and a Norman Bates style elevator adds to the creepy vibe in this room In adding a new kitchen, we are able to increase the square footage and have a much better mud room floor plan.

Before the Renovation

The After

Where the old window above the wash sink was, is the new entrance to the back of the house. I just love Dutch doors for their charm and function. Some of these pictures are taken around the holidays so look past the decorations.

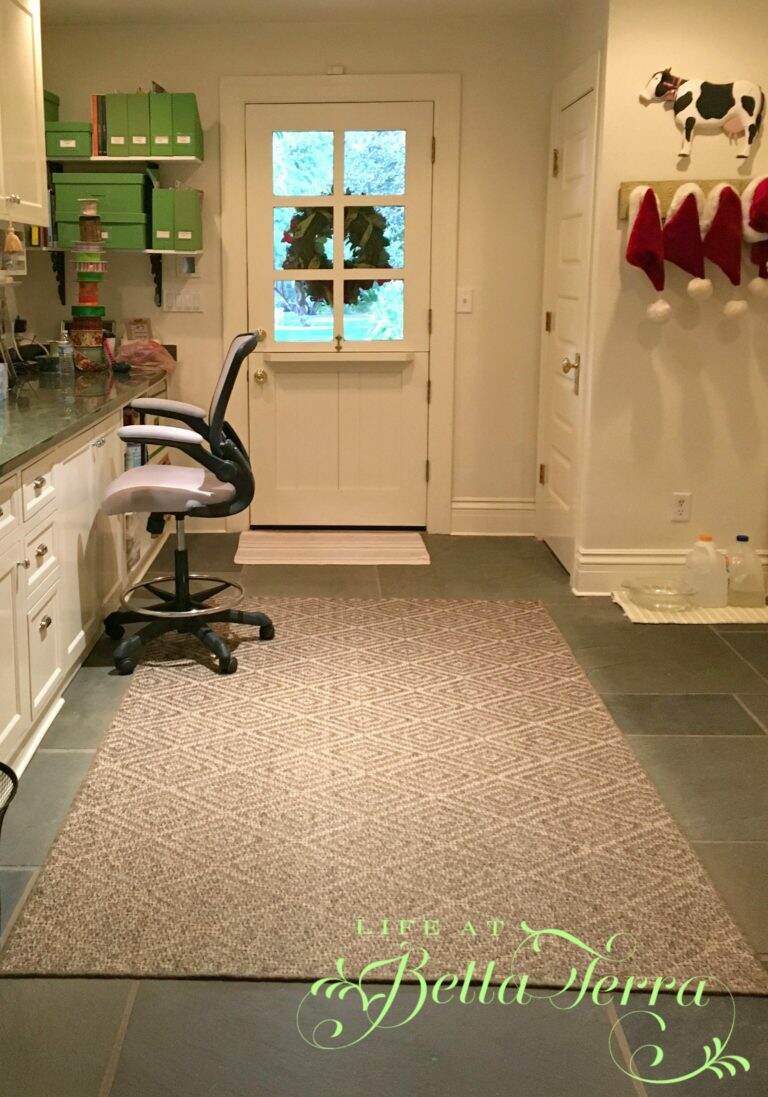
Dutch door entry

Flooring

This room is designed to withstand a steady stream of muddy feet, wet bathing suits, dogs, cats, and sometimes chickens (when one is ill).  The stone floor, a blue slate, holds up beautifully to lots of traffic.

Blue Slate and a natural fiber rug are durable

A 2′ x 3′ washable cotton rug from Dash & Albert is rarely clean for long but is surviving multiple washings. The 5′ x 8′ diamond natural sisal rug is from Ballard Designs and still looks new. You can find it in two colors here.

The Desk Area

Originally this area is designed as an additional desk/office space. However, with a 10 foot long countertop that is accessible to the entire family, it became clear that keeping this a personal office space would prove difficult.

Instead, it is an active craft room area. Flat plastic boxes in the cubbies below hold everything from decorative paper to stencils. The green fabric boxes are filled with inspirational catalogs and magazine.

A view to the back door

The cabinet doors open up to create a proper knee hole, but close to hide anything stored beneath.

The office/workspace

Mail slot cubbies hold cards and stationery. Galvanized buckets from Ikea capture all the pens, pencils and markers.

Ikea containers

My ribbon tree is handy for quick gifts. To see how I made this, click here.

DIY Ribbon Trees

Storage Areas

To the right of the Dutch door, there is a broom closet which houses all the cleaning supplies, batteries, light bulbs, vacuum cleaner and tool box. As you can see this 9′ x 15′ room wears many hats.

Holiday hat rack

The kitchen is to the right of the hat rack.  Santa hats go up in the day after Thanksgiving and are removed after January 6 (the Epiphany). The rest of the year the rack is used for every day hats. The cow wall art is a gift from my friend, Gwen.

Command Central

As we move around the room, to the right of the kitchen door, is command central.

View to the Kitchen door

All the brains/technology to the house are located in the top 3 cabinets.  The doors have metal screens for mechanical ventilation.

Command Central

The cabinets and doors are painted a Dunn Edwards Cottage White SP113 semi-gloss and the walls are the same color in satin. Polished nickel pull and handles are used on all the cabinets.

Security and technology

All the equipment is on sliding metal racks for easy access and maintenance.

Gift Wrapping area

Below the mechanical equipment and behind the middle oblong cabinet is the gift wrapping center.

Gift wrap storage drawer

Flanking the gift drawer are several smaller drawers labeled accordingly for miscellaneous items~scissors, tape, glue gun, and ribbon pieces.

Handy storage drawers

Laundry Folding and Gift Wrapping Spot

When we initially designed this room, we hoped to have the washer and dryer beneath this countertop. But the basement staircase is interfering with this space.

Instead we add this pull out table surface as the laundry folding area or a place to wrap gifts. The drawer pulls out when needed and provides a nice, large flat work surface.

Pull-out work area

The narrow upper cabinet is where various rolls of ribbon are stored.  What a good use of a typically wasted space!

Pull out ribbon storage

Back Staircase

When you keep going to the right from the command center and gift wrapping area, you reach the back staircase. Here is a picture of it before the renovation in early 2021.

Old staircase

Here is how it looks today. Much cleaner and brighter. To see that complete (lengthy) project, click here.

Refreshed staircase

Laundry Room

Tucked behind the pocket door to the right of the back staircase is our primary laundry room and half bath.  Even though we have an additional washer and dryer upstairs, this laundry room gets the most use.

Primary Laundry room

With a laundry shoot from our master closet, all the dirty clothes land in the basket against the headboard wall.

Laundry shoot from Master closet

Library Entrance and Ironing area

Moving past the laundry room, our next stop is the library room entrance and the small area at the end of the long countertop. See the cabinet mounted to the wall? This is one of two ironing boards which is conveniently located next to the laundry room. The other ironing board is in our master closet.

Hidden ironing board

The artwork is now different in this room as all the black and white photos have been removed and an original painting put in its place.

Out of all the rooms in the house, I feel like the mudroom is the most versatile and utilitarian.

Of course, our Maine coon cat, Donovan, likes to sit in the office chair. My little helper.

Our sweet cat, Donovan

Thank you for taking the time to read another edition of Room by Room. If you have missed any others, you can find the links below.

Room by Room Series:

A Peek into Our Library

The Wine Cellar

The Butler’s Pantry

The Front Hall

The Master Bedroom

The Living Room

If you enjoy this post, please share on Pinterest.


Room by Room: A Peek into Our Library

It has been 6 months since I wrote an edition of Room by Room. So today we will take a look at our library nestled between the family room and mudroom.  This sweet room has many bookshelves and a fireplace. Measuring in at 11 feet x 18 feet, this smaller room has the lion’s share of doors~two sets of French doors, a pocket door and an exterior glass door. One set of French doors leads to the living room; the other to the family room and the pocket door goes to the mudroom. 

French doors leading to the living room

Lots of Books

The books are organized by topic including gardening, travel, art, history, animals, health and medicine, poetry and favorite novels.  Also stored here are numerous photo albums of our early years with the children, long before digital cameras. Also, I want to apologize for the quality of the pictures. This room faces west but has an outdoor covered patio that blocks good quality light for photography.

Multiple book shelves

Unlike designer-staged shelves, ours are filled with cherished items. Antique clocks, treasures from our travels, sculptures and family photos, to name a few. The painting below is by my friend and artist, Jane Horn. Each cubby is lighted which looks lovely at night.

Lemons by Jane Horn
Grecian Urn plate by Royal Worcester

On every shelf is a remote controlled candle, which is a fun way to add ambiance to the room when entertaining. Candles are at a very good price right now (9 candles for $22.09) on Amazon here. Especially around the holidays, this small touch makes the room feel magical.

French doors to the right lead to the family room

The Sitting area

The two reading chairs are covered in a grayish-blue bird print ~~ Olana Bayleaf by Waverly.  Between the chairs is a vintage glass topped garden table and a library lamp. The walls are painted a lovely blue (paint name escapes me, but if you inquire, I will find out what it is).

The Bar

In one corner, we repurposed an 1820s English mahogany wash stand as a bar. It’s a bit more cluttered than this now as I believe we acquired more beverages during the pandemic…..can anyone relate?

After dinner drinks

Paintings

The painting of the street scene below reminds me of our trip to Italy, where we had many dinners on the sidewalk.  The artist, Cecilia Rosslee, sells her beautiful pieces online through Etsy here.

Street scene painting by Cecilia Rosslee

I am a fan of gilded framed antique oil paintings, and two of my favorite hang above the bar. The artist is W.T. Fisher and they are from late 1800s.

Oil painting by W.T. Fisher

The Fireplace

Getting pictures of the fireplace and artwork above is a bit difficult due to the light and too many reflections.  The mantel has an inlaid wood pattern that is delicate and intricate.

Antique mantel

Deep garnet crackled glazed tile from Waterworks adds a rich time period color to the fireplace.

Tile from Waterworks

As always, I have my animal helper nearby~~Sox, our 15 year old beagle.

My favorite time of the year in this room is the winter.  When there is a fire going, the room is so warm and cozy. It’s a wonderful space to sit and chat with a glass of wine or cup of coffee, or read a book.  Do you have a small, special, cozy place in your home?

Western Screech owl in our library

Recently, we had an unexpected visitor in the library. To see the full rescue, check out a video on my Instagram @lifeatbellaterra. He doesn’t look real in this photo!

Well, I hope you enjoyed the tour of the library. If you missed any other editions of Room by Room, you can find other posts below:

The Living Room

The Master Bedroom

Front Hall

Butler’s Pantry

Wine Cellar

Thanks for joining me today and enjoy the very last day of August 2022!

If you enjoy this post, please share on Pinterest.


Take a Peek into Our Guest Cottage

I’ve had a few requests to share pictures of the guest cottage interior. This sweet small building sits in the quiet northwest corner of our property and is very secluded from the main house. We estimate the age of the guest cottage to be from the 1930 to 1940. So let’s take a peek.

I recall the first time we toured the house with the realtor. When we opened the side door to the guest cottage, you couldn’t see in as it was packed from floor to ceiling with stuff. After some substantial cleaning and a second visit, we did get a glimpse inside only to find the entire bathroom ceiling on the floor and in the tub. Apparently, a roof leak several years earlier caused the collapse and the debris was left for years. Sigh.

Here is a photo of the guest cottage when we bought the property back in 1999. The guest cottage became the first building to undergo a complete renovation, as we needed a place to work, meet with contractors and put up guests who were courageous enough to visit our job site.

Size and Space

The guest cottage is approximately 576 square feet and has one bedroom, one bath, a living room and eat-in kitchen. It has everything anyone would need including a washer/dryer and its own parking space.

Guest cottage exterior

The guest cottage has the original single paned window on a rope and pulley system. Note the large roof overhangs which keeps the direct sun off the sides of the cottage. Old green shutters are from France and a thrifting find. The front door overhang is a custom made piece to help accentuate the front entrance. It is clad in a type of shiplap-style siding before shiplap became so trendy.

Behind the cottage is a very large, mature Hong Kong orchid tree which provides a colorful backdrop with its fragrant purple blossoms.

By the front door an old vintage/antique mailbox hangs below the lantern. To see how I updated this sweet old mailbox, click here.

Interior

When you enter the front door you arrive in the living room. There is no foyer or hallway. The floor is carpeted with a thick berber rug. Vintage wood framed pictures of mallards hang on the wall. A skirted table sits in the corner allowing additional storage below.

Sofa is a pull out queen bed

To the right of the sofa is a small scaled secretary with a writing desk. The wing chair provides extra seating.

Secretary provides a work space

Though not ideal, the wicker coffee table is a $35 find at a second hand store. I really need to find a rectangular or oval table. The pull-out sofa and loveseat are Ethan Allen purchases from decades ago (really..) and covered in Sunbrella fabric. Same with the wing chair.

Since the guest cottage is heavily shaded, the living room tones are neutral with soft blue accents.

Cozy seating
Faux peonies and coffee table books

All the accent pillows are from a previous Pottery Barn purchase but you can find beautiful pillows online for great prices, like these 2 gorgeous ones here for only $14.99!

Across the room from the sofa is a distressed white console and a wall for the television.

Console under television

The Bedroom

The bedroom’s grand carved headboard is from an 1897 Victorian house I owned in Alameda, California.  The previous owner left it in the master bedroom and it has moved with me to each house ever since. 

Victorian bed

Lampshades and decorative pillows are from Pottery Barn.  The matelasse coverlet and sheets are from J.C. Penney. I really love this coverlet and I’ve been unable to find another one. The skirt to the bed is the same coverlet but in white. The edges are scalloped and it is a nice weight.

The JC Penney store by us has closed and not sure what their status is~but I always had good luck with their bedding.

Blue matelasse coverlet
Decorative pillows from Pottery Barn

The Bathroom

The full bathroom has a stackable washer/dryer and plenty of storage. The mirror over the sink is from an old dresser and the wall lamps are added to the frame. Walk-in shower and plenty of storage in this small room.

Vintage lighted mirror over sink

Kitchen

The kitchen is actually a pretty good size and is fully equipped with a gas stove, refrigerator, dishes, pots and pans and silverware.

Guest cottage kitchen

An antique drop leaf table allows more dining for guests. Both the kitchen and the bathroom have engineered hardwood plank flooring. It’s hard to believe that something with this small square footage has everything you need!

Eat-in kitchen

The journey to the guest cottage is a bit magical as the walkway is through an arch of vines. During the spring, the arch is covered with fragrant white clematis. Not only do our guests enjoy their privacy tucked away in this corner of our property, but we do as well.

I hope you’ve enjoyed peeking into the guest cottage! Happy Wednesday!

If you enjoy this post, please share or save on Pinterest.