
Glass Etching
Etching glass is a relatively easy thing to do. I purchased several Korken glass bottles from Ikea (a bargain at $2.99 each). We keep these in the refrigerator filled with water~~easy to bring to the dinner table. I like these bottles because the circumference is appropriate for smaller hands.
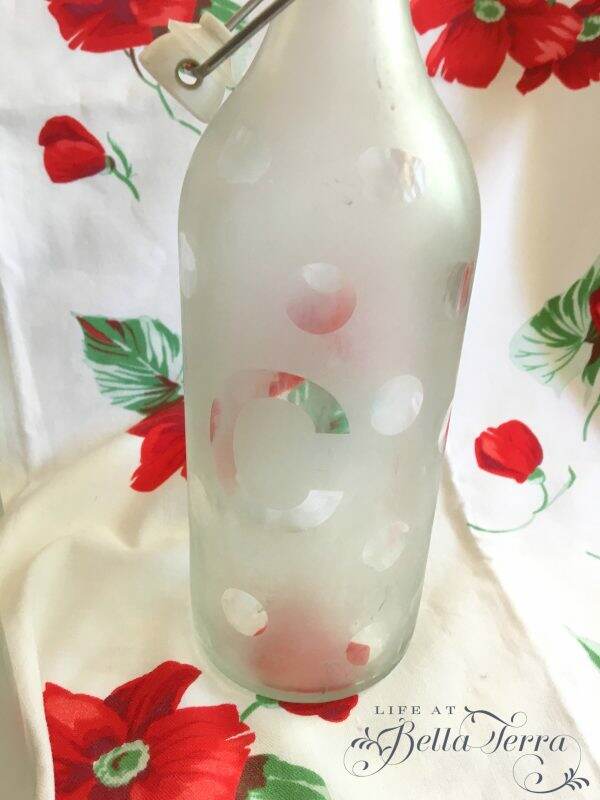
Personalizing the bottles with our family initial was an simple DIY project. This frosted look was achieved using adhesive letters and dots.
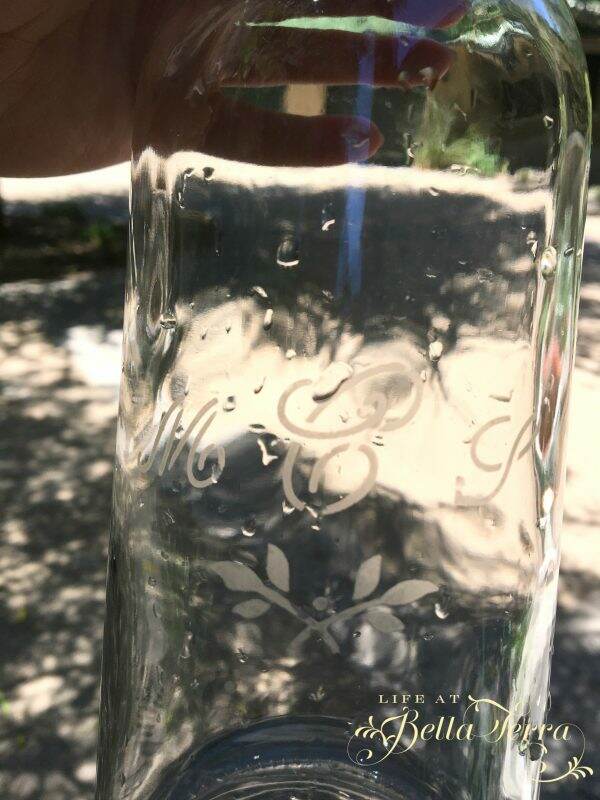
Here is another with my initials and decorative leaves.
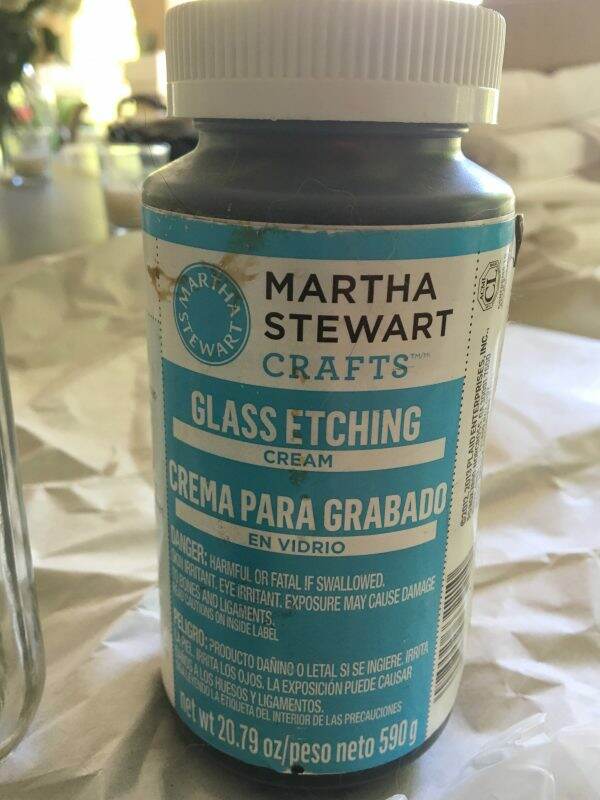
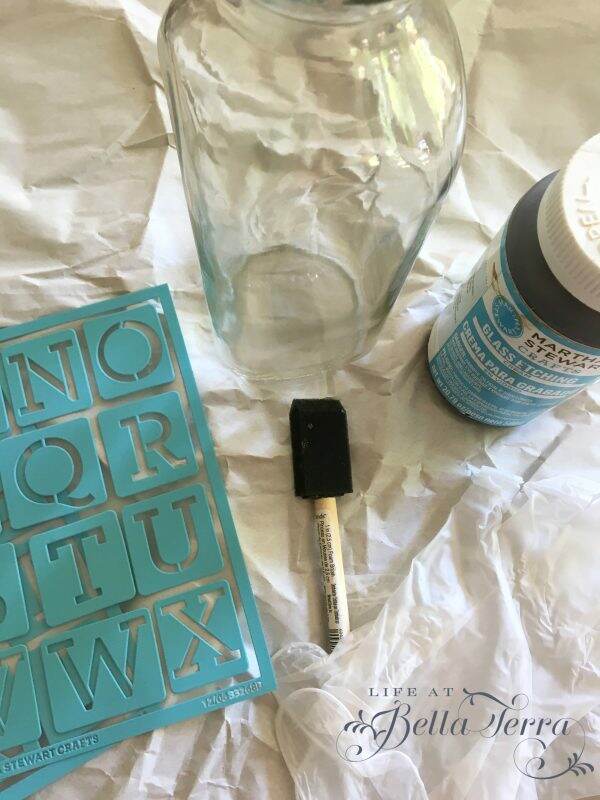
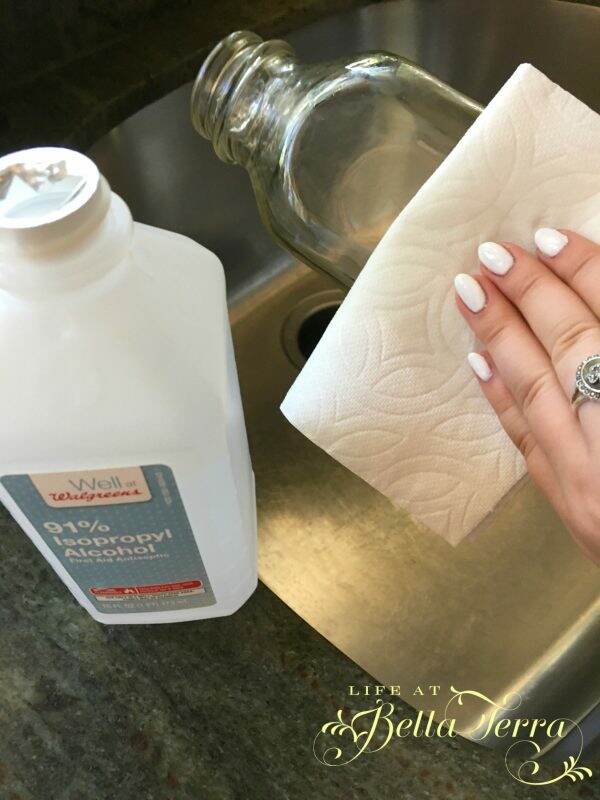
The supplies you will need are: glass vessel, rubbing alcohol, etching cream, gloves, paintbrush and adhesive stencils. I used Martha Stewart’s Glass Etching Cream which was readily available at Michaels. My bottle is rather old so the cream has darkened, but it is still usable. The cream will dry clear.
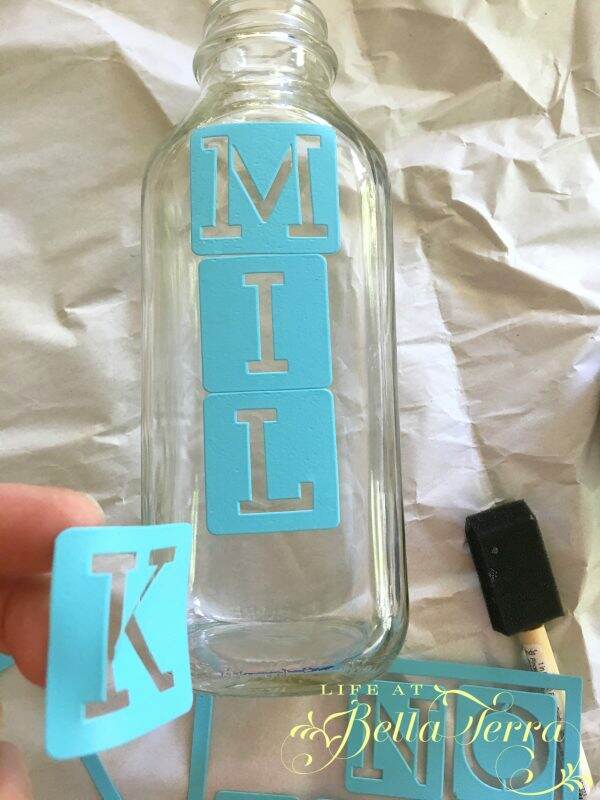
The adhesive stencils are also from Martha Stewart. These are ideal for using on curved surfaces. You can reposition them for precise placement. When finished, you can save the washed stencils for another project.

Make sure you have a protected work surface and gloves. The etching cream is Ammonium Biflouride and Sodium Fluoride~~avoid contact with skin and eyes. Use in adequate ventilation. I set up my work station outside.
First, wash your container with soap and water. Then wipe the surface with rubbing alcohol (done by my assistant daughter~~her hands are much better looking than mine!).
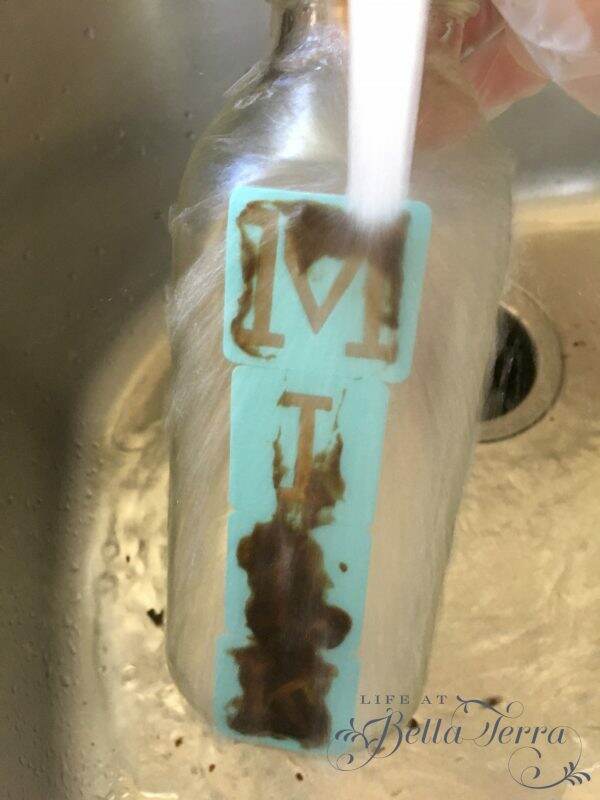
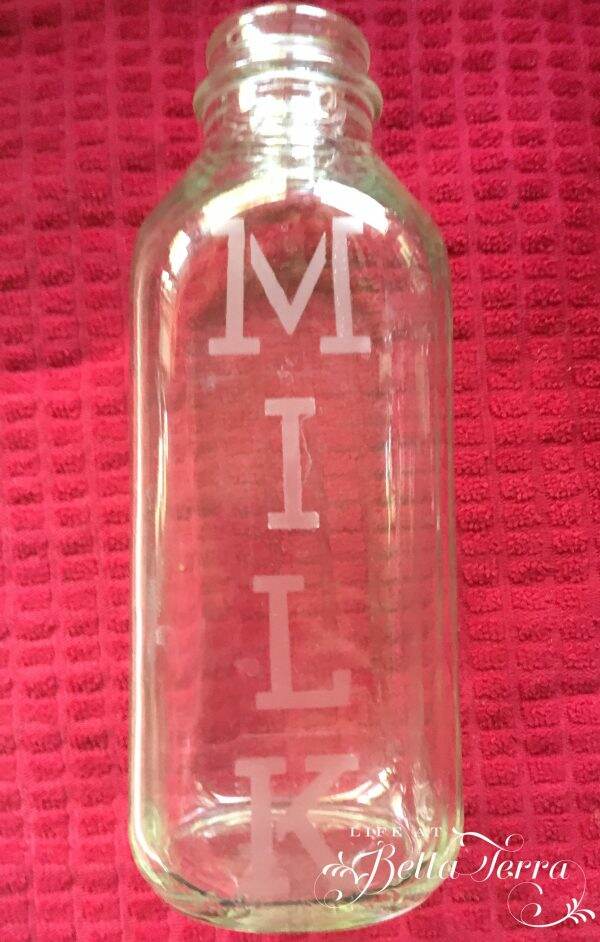
Position the adhesive stencils on the bottle. I use this glass bottle for my homemade almond milk, so M-I-L-K seems appropriate.
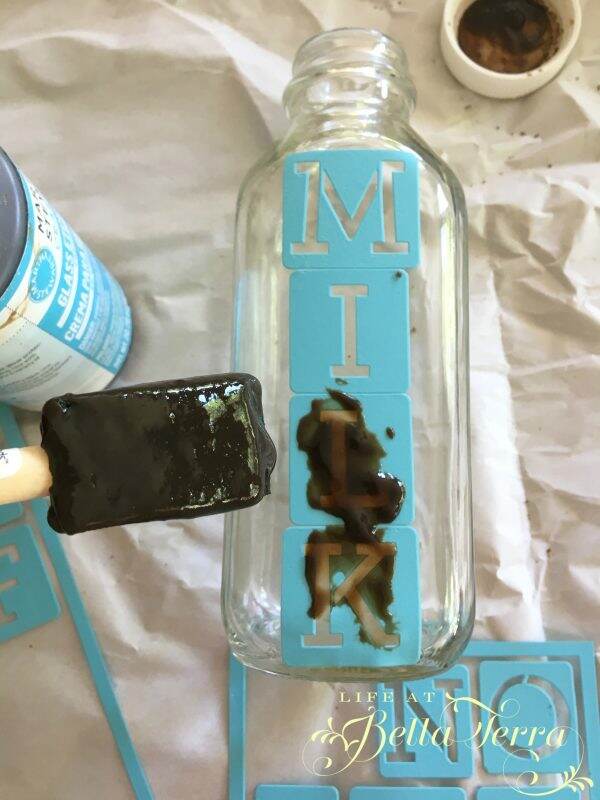
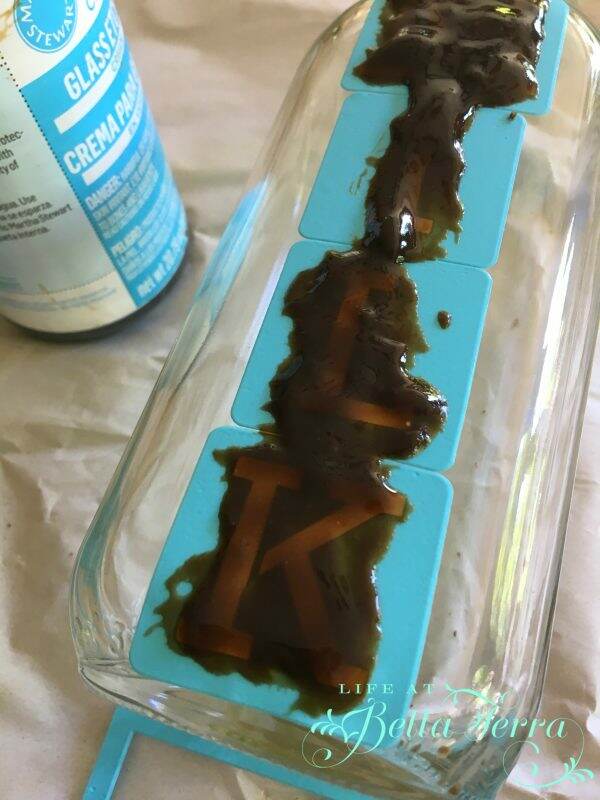
Using a disposable foam brush, apply the etching cream in a thick, even layer.
Let the etching cream remain on the surface for 15 minutes.
Rinse the bottle under running water to remove the etching cream.
Peel off the stencils and VOILA!
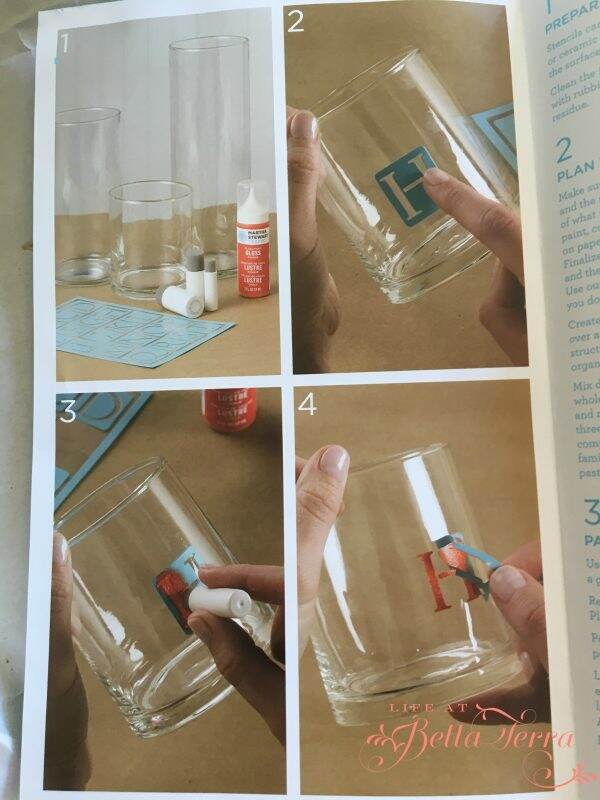
You can also use glass paint to create designs on your pieces. Think of the possibilities for personalizing glasses, vases, bottles and pottery. Here is an example of using paint in lieu of the etching cream.
Have fun creating one of a kind pieces. These would make great hostess gifts too.
![]()
Just a reminder that any words that are italicized bring you to the source. If it is a product on Amazon, please note that I am an Amazon Affiliate. If you purchase something through my website, I receive a small (very small!) stipend, which doesn’t affect the price you pay at all. My goal is to make sourcing the items easy for you. Thank you for your continued support.

Oh wow, I never knew etching could be so easy! This is definitively a D.I.Y I can see myself doing soon. Thanks so much for showing step by step on how it’s done because I really would not have believed it was this easy otherwise.
I like the MILK bottle btw, it looks great!
It had a been a few years since I etched my first bottle and I forgot how easy it was. I am thinking about all the fun projects I could do this summer using this medium. If you decide to try something, please share!
Ok, I will share! 🙂
That looks like something I could do! Thank you for sharing. I have come to love glass. Slowly plastc is leaving my kichen and being replaced by the beauty and durability of glass. Your etchings add an exquisitenss to glass.
It’s so easy to do! I am thinking of all the possibilities-personalizing wine glasses, coffee cups or name cards. I haven’t done it with glass paint yet, but that looks relatively simple too. Let me know what project you decide to undertake!