
Hanging Peel and Stick Wallpaper in the Bathroom
When we purchased our cabin 12 years ago, I loved the additional space it provided to our family. However, every single wall is white and that not so attractive orange peel drywall texture. Since it is our 2nd home, it is always been fun to come up for a long weekend, then lock it and leave. One summer, many years ago, I paint two bathrooms~one a sage green and the other a cranberry color (what was I thinking?). Now after spending weeks here, I decide to try wallpapering the master bedroom water closet.
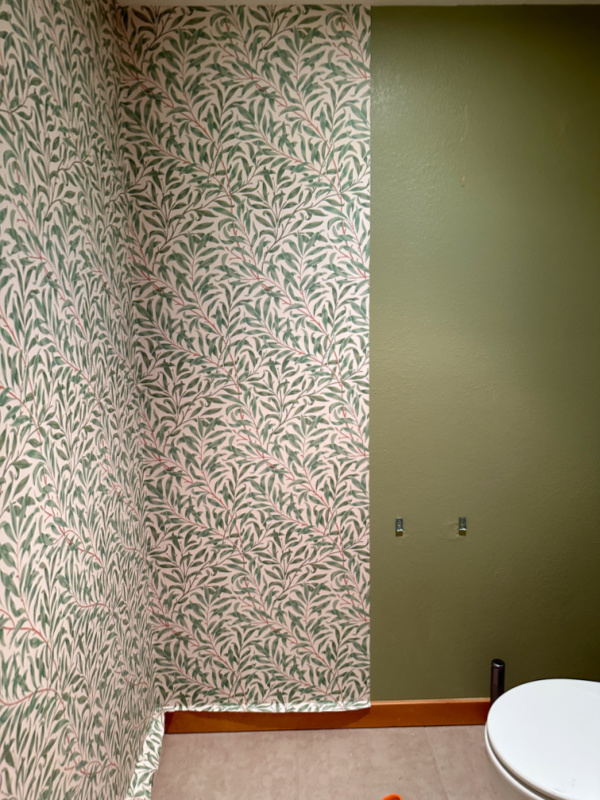
The Before
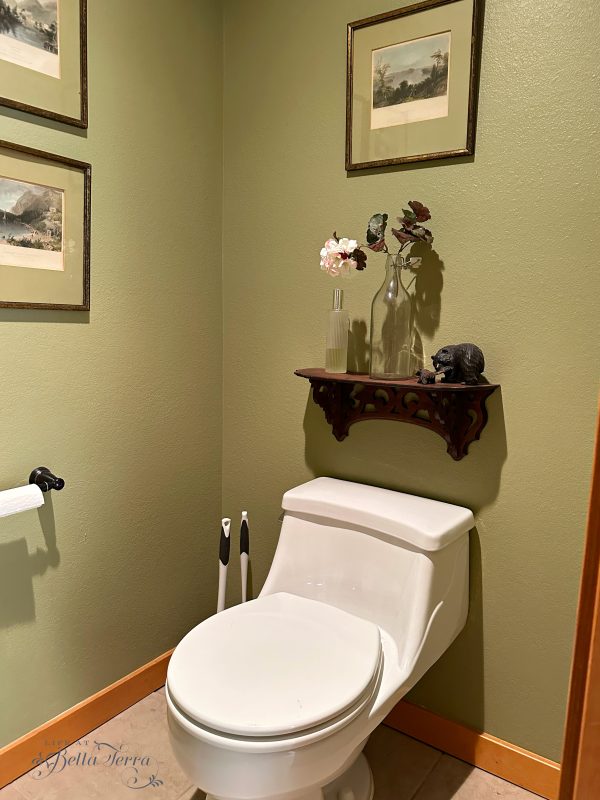
This is a small space, 3.5 feet by 5 feet, as it only holds a toilet. There are no windows so unfortunately most of my photos are under icky lighting. Yes, this is the sage green bathroom, but a slight upgrade from the stark white one.
All the trim is a natural wood as is the sliding pocket entry door. Ceiling is white. Flooring is 16″ square neutral ceramic tile~a pretty basic water closet.
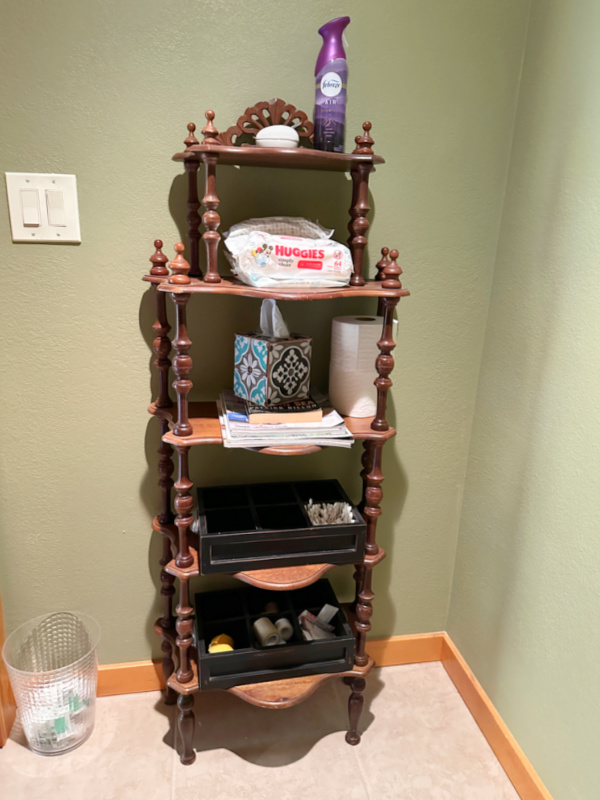
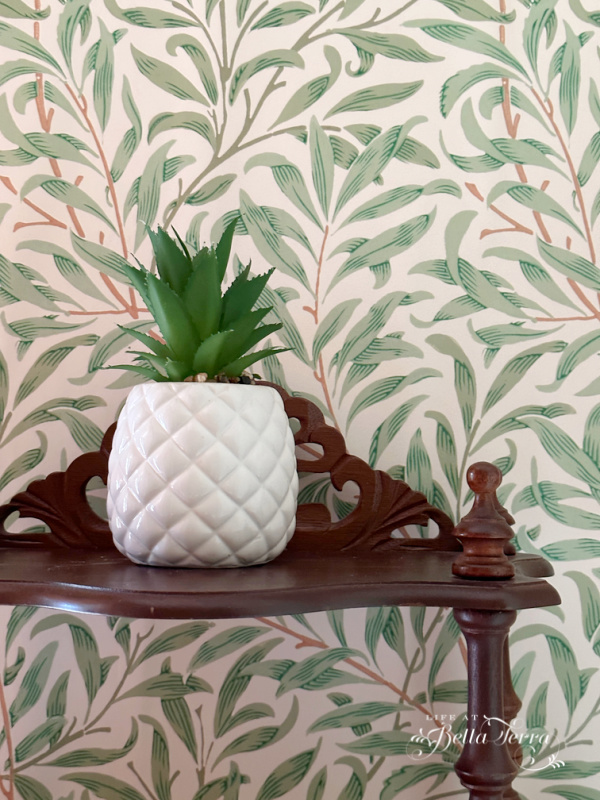
Across from the toilet on the opposite wall is a mahogany 5 shelf etageré from the 1950s I picked up at a thrift store. I think the entire small room is rather depressing and fortunately it’s not a space where one spends a great deal of time.
Selecting a Wallpaper
Quite honestly, I didn’t shop around much. I really like Spoonflower and their wide variety of styles, patterns and types of wallpaper (and fabric). Being a cabin in the mountains, I am leaning toward nature patterns in nature colors. However, I do want something a bit brighter. One single overhead can light and no additional outlets in this space needs a bit lights and cheering up.
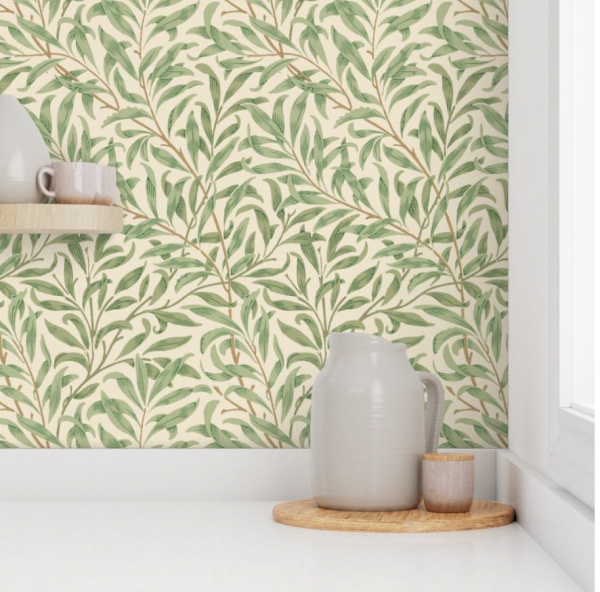
I choose William Morris ~ Willow Bough 2′ x 9′ Peel and Stick panels. Surprisingly for this room, their wallpaper calculator indicates I need 9 rolls.
The last time I wallpapered anything was with my mother, using the wallpaper paste and a long table. Since I have never used the Peel and Stick wallpaper, I am hoping it adheres to my not so smooth walls. It better as this wallpaper is non-returnable.
Prepping the Room

I remove the etageré, waste basket, toilet brushes, pictures, toilet paper holder and shelf above the toilet. After clearing out the room, I wipe down all the walls and begin.
Hanging the first Piece
Starting is always the most difficult, but I choose to begin at the far left side of the room, where the light switch is located. The edge wraps around to the door frame approximately 1.5″. You unpeel the backing from the paper about 6-10″ and affix the top of the paper. Then while easing the backing off, you push the paper onto the wall.
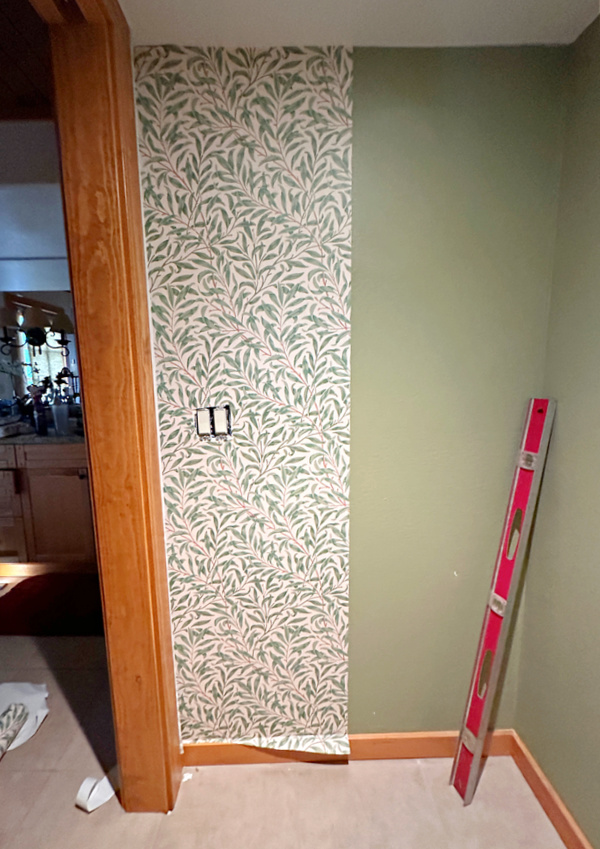
The first piece took a while as I need to cut out a section for the light switch…but I am not discouraged yet. Using a long level, I make sure the edge of the first panel of wallpaper is straight.
I continue around the room and by the 3rd panel, I’m feeling rather confident.
The Room is not Square
With each panel, you need to line up the pattern, which seems relatively easy to do. However, once I hit the next corner, the paper will not lay flat and the pattern, that matches at the top, doesn’t match at the middle and bottom. It’s due to the corner not being square. You can pull the paper off and try re-applying it, which I do several times to no avail. Now I think I have stretched the paper too much and I’m not happy with how it looks.
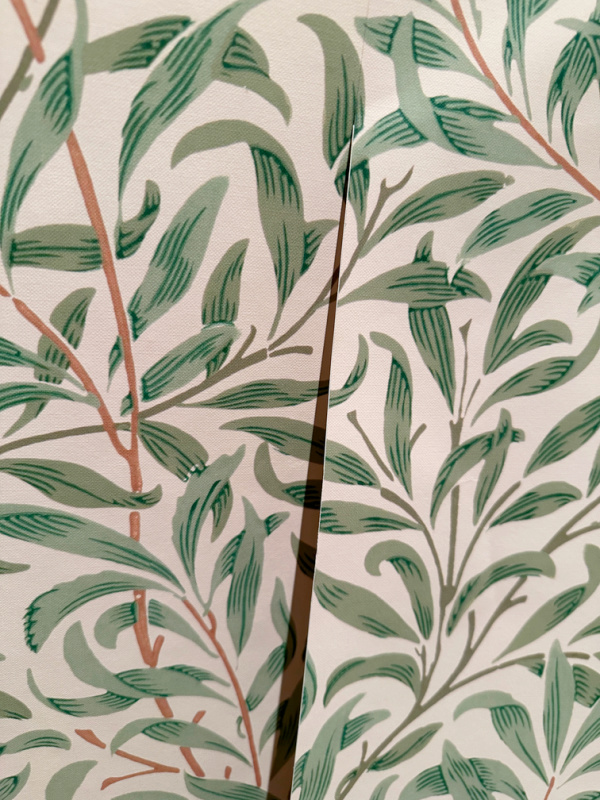
Since it is the least visual corner, I cut this panel close to the corner, and just get another panel that hasn’t been so manipulated. With a relatively busy pattern like this, I don’t think anyone will notice that the pattern, while matching near the ceiling, does not at the baseboard. Thankfully I have enough paper to make this adjustment.
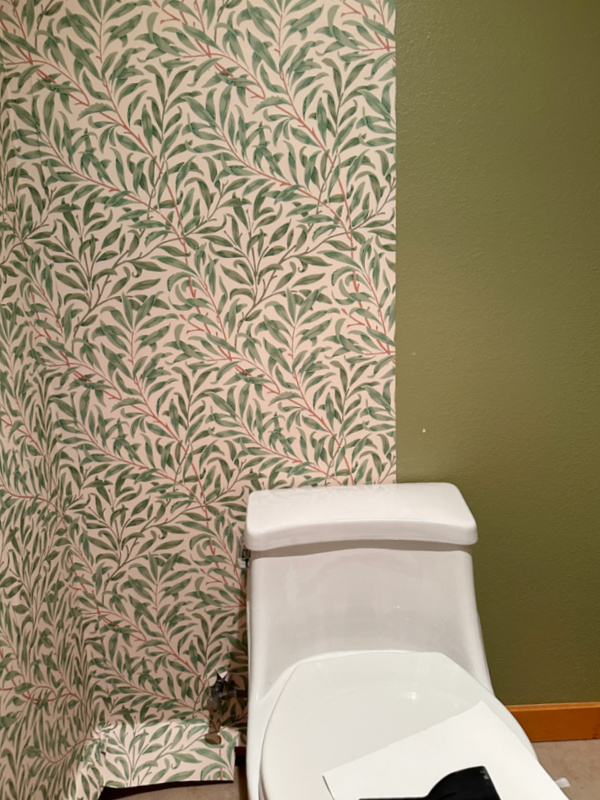
Not only is this corner difficult, but I also am maneuvering around the toilet! As you can imagine there is a bit of cursing and working is this small room is just hot and challenging. The entire room takes 8 rolls and I have one complete roll leftover.
Finishing the Application
With a sharp knife, I cut the excess wallpaper at the baseboards and where necessary around the door trim, toilet paper holder and toilet plumbing.
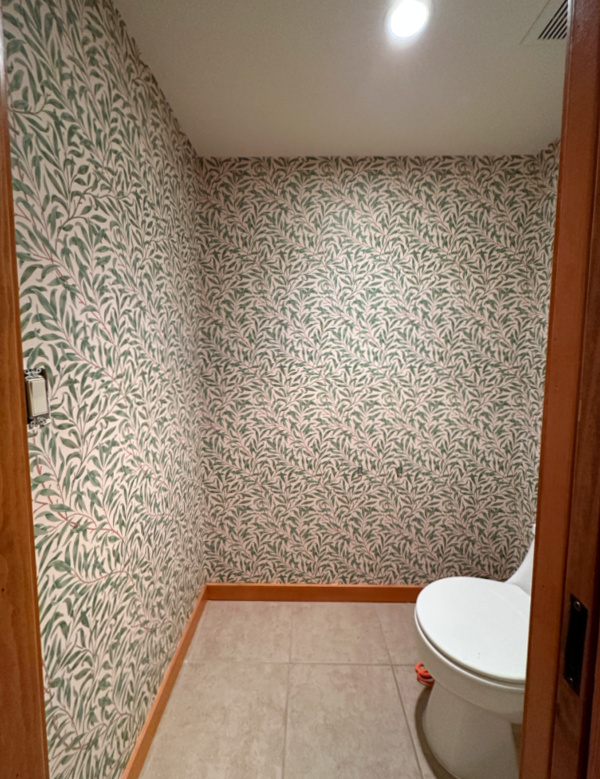
The poor light doesn’t capture how pretty this wallpaper is and the fact it makes the room feel so much bigger. It looks busy in the photo but that’s not the case in real life.
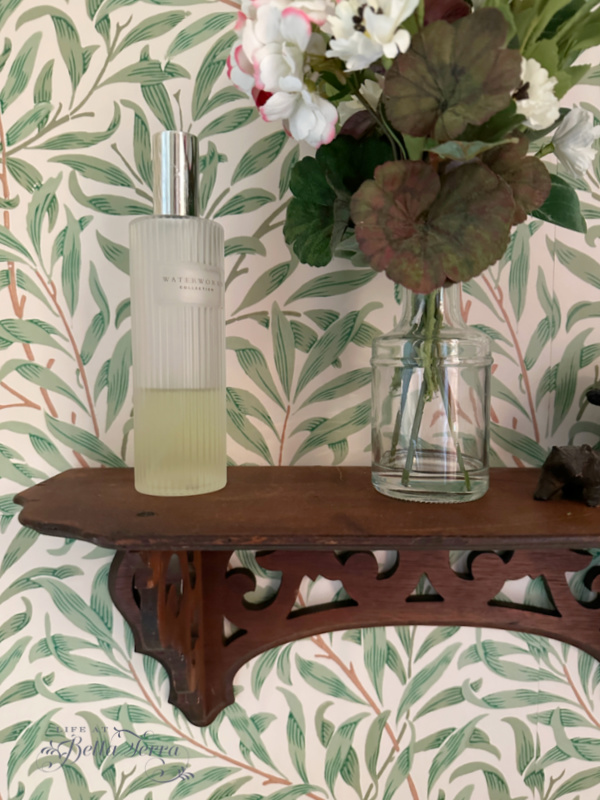
Adding the Extra Touches
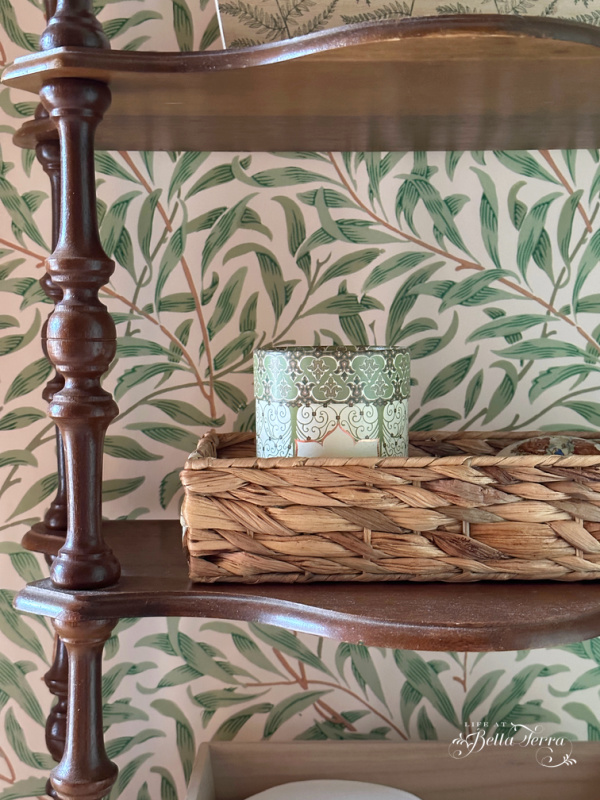
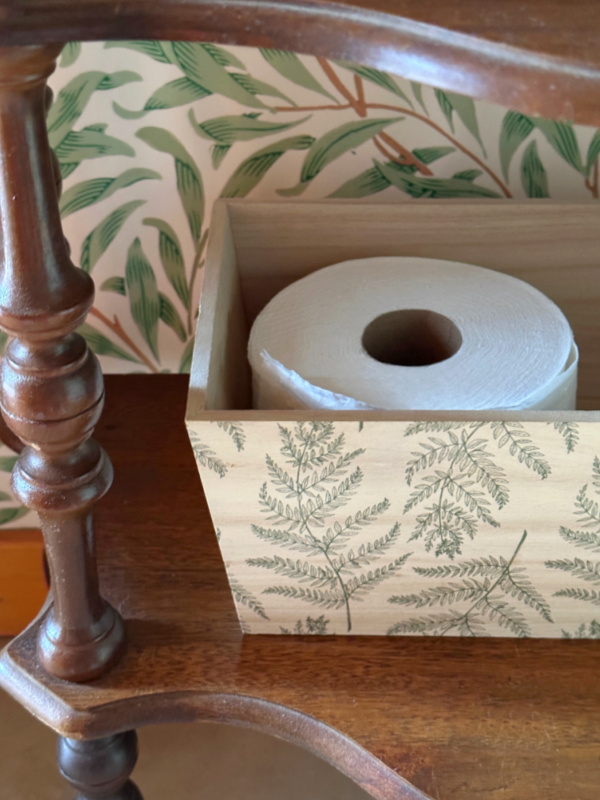
A bit of organizing needs to take place on the etageré. Small wooden boxes and a woven tray provide a pretty place for additional toilet paper, wipes, and a candle.
As you can see the wooden boxes have a fern pattern, but it’s light in color and scale and I don’t think it clashes with the wallpaper. They come in 2 sizes.

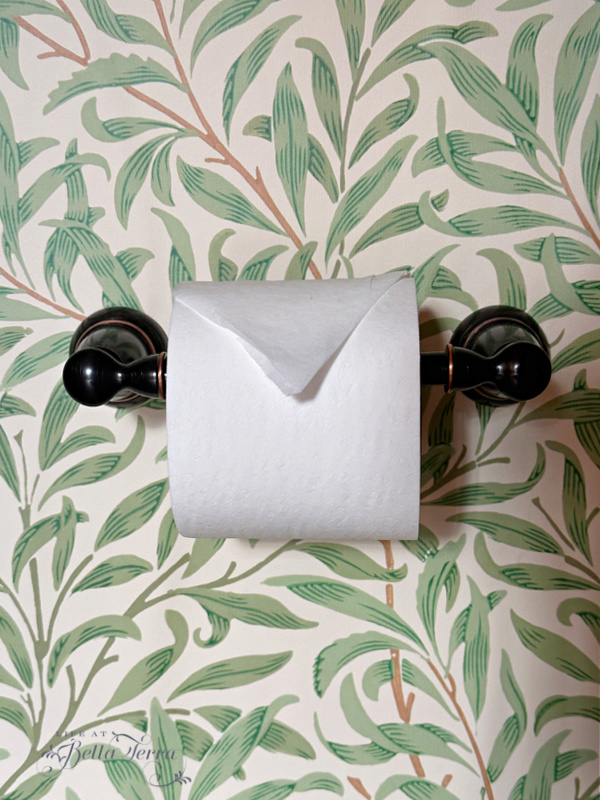
Between the mahogany shelf, etageré and toilet paper holder, they provide a few darker anchors against the wallpaper pattern.
What to Do with my Antique Prints?
Prior to papering, I have 5 antique prints hanging in the water closet.
The 1838 illustrations done by British landscape artist, William Bartlett are engravings with hand coloring. Bartlett drew scenes during trips to the United States. The subject matter is almost exclusively eastern United States landscapes, with most of them scenes of places in New York State.
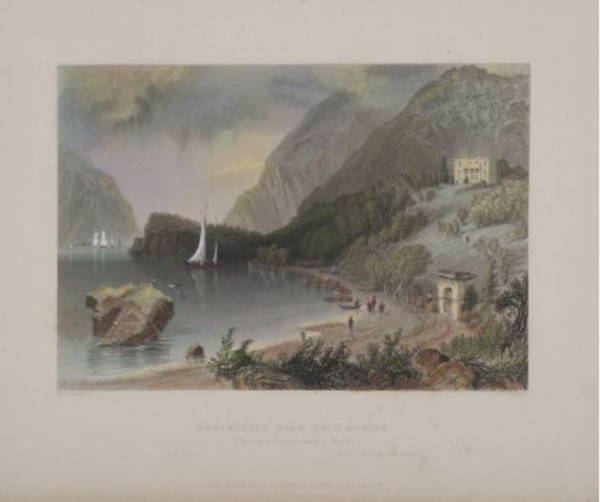
I bought 5 of these from an antique shop and they are all the same size. The detail is beautiful and each print has a lovely sage matte and narrow gold frame.
It’s almost hard to punch holes in the wallpaper to hang them in the water closet now. Also, I think what I have in there is enough. I can easily find another place for these prints, but what are your thoughts? You can see how they look in the Before picture.
Summary
All in all, I am very pleased with how cheerful and bright (and bigger) this small space looks. Since Spoonflower recommends smooth walls to hang Peel and Stick paper, I am keeping my fingers crossed that it stays in place.
There is another bathroom I would like to wallpaper. But I am going to wait to see how this project holds up over time. It took me approximately 5 hours to complete this job. Perhaps it would have gone faster with an extra set of hands, which Spoonflower recommends.
Has anyone else used this Peel and Stick wallpaper? Did it stay in place?

If you enjoy this post, please share on Pinterest.

Just a reminder that any words that are italicized bring you to the source. If it is a product on Amazon, please note that I am an Amazon Affiliate. If you purchase something through my website, I receive a small (very small!) stipend, which doesn’t affect the price you pay at all. My goal is to make sourcing the items easy for you. Thank you for your continued support.

Reading this post late, but for hanging your pictures, use Command Hooks/Strips. No holes in wallpaper and you can remove them, just be sure to follow removal directions.
Love the wallpaper!
Bravo Mary! Now you need to come up to Seattle and help me put some up in my house.
It’s lovely, Mary! I had complete faith that you would pull it off, and I’m sure the less-than-perfect part will never be noticed by anyone unless you point it out! 🙂 I have several rolls of self-stick wallpaper that I’ve earmarked for an accent wall in my continual office remodel project, and now I’m motivated and inspired to get it done! Thanks, and congrats on your beautiful “new” WC!
Barbara, thank you. I am excited to hear how your project goes! I think for me it will be easier the next time around.
Hi, Love the paper…lights up the room very well. Love wallpaper especially in bathrooms.
You did a great job and I have never found a perfectly square room in all my days of putting up
wallpaper, I am in favor of putting up the prints. Glad you are enjoying the cabin and cooler weather
there.
Virginia, thank you! How are you feeling? Hopefully your pain has subsided? So glad I put up a swirly print vs. stripes in that non-square bathroom!
It looks beautiful! I love it. Well done, my friend.
Renae, thank you!
What a difference, it’s really beautiful and bright in there now. I am a huge fan of wallpaper and use it my bathrooms and my kitchen, as you know.
Karen,I just love your home and your decor style. So glad you like it. Hoping it stays put!
Hi Mary, I love this pattern. It’s perfect. I just had to share this with you.. I was on my hands and knees with my head between the toilet and vanity in our half bath trying to pull the new peel and stick wallpaper behind the toilet when my wrist started vibrating! I pulled my arm out and looked at my Apple Watch and realized it was asking if I had fallen and was ok! Needless to say, I certainly didn’t want it calling 911! Some of those same words were used by me!
Love your bathroom, it’s beautiful!
Kathy, I can completely relate to your position near the toilet! I have that feature on my Apple Watch (I think the kids activated it!) and it goes off all the time! How funny it happened while you were by the toilet. The things we do to beautify our homes.
I love that wallpaper!!!! It’s so happy and such a pretty green! Once again, Miss Mary, you have amazed me.
Janie, I’m so glad you like it as I know you have such great taste!
Oh I love how it brightens up that space! YOUR water closet is way bigger than ours. I literally can only hold the commode, a towel bar, a tp holder and an above the commode wall cabinet. My husband’s knees (very long legged fella) nearly hit the door when closed.
You are right about the paper – it does make that room look bigger.
Michele, and I thought our WC was small! It was so confining in there so it didn’t make sense to try and fit two people hanging wallpaper. Plus with no windows, I was sweating profusely by the time I finished.So glad you like it….certainly worth the effort.
Mrs. Mary, what a beautiful wallpaper!! It adds so much to a tiny room. I think the wallpaper should stand alone without the prints, the paper in itself is art. I totally understand the cursing. I wallpapered one wall in my laundry room with, of all things, peel and stick Contact shelf liners! It’s a black and white flower pattern and I fell in love with it. What a nightmare to hang. I had the exact same problems you had. But it has held up for 3 years now, even with the heat from our dryer and water heater. I did hang another brand of shelf liner in our bathroom alcove, which the walls have a slight texture to it and that did not hold up too well. Probably it was the steam from the shower because I used the same liner to cover the 1960’s wood paneling in the linen closet and it is still holding strong. Keep enjoying your beautiful weather up at your cabin. I’m jealous, lol.
Crystal, I never thought to use contact paper. Wallpaper is SO expensive, well at least this one is. Great idea…I am worried about the wall texture. I have visions of going up to the cabin over the winter, after we haven’t been there for a while and seeing it all rolled up on the floor. Let’s hope not! Thanks for sharing your ideas/experiences and I agree with no art on the walls too.
Great makeover, Mary. I have a place in one of our guest room baths that is love to try this. Glad to know you didn’t have to remove the texture from the walls.
Carol, well, so far so good on the paper staying in place. Spoonflower does recommend flat walls so I’m keeping my fingers crossed.
Wow it turned out beautiful! Althought it sounds like it was not a walk in the park. None of my walls are square either.
I love the print you chose. Definitely don’t get rid of those prints.
Andrea, I think I will hang the prints in the master bedroom. We have an “office” alcove with a sofa and there is a great blank wall there. Maybe my next wallpapering project will go faster now that I sort of know what I’m doing!
Way beyond like…truly looks FANtastic!!! WHAT a UPGRADE!! Love it!!!! franki. ps…I’m working on 38 year old bathroom update…copper slipper tub in my dining room…waiting for it’s home…*sigh*
Franki, Ok, I want to know more about your bathroom remodel and oh my, a copper slipper tub?!? Please send pictures as it sounds marvelous.