
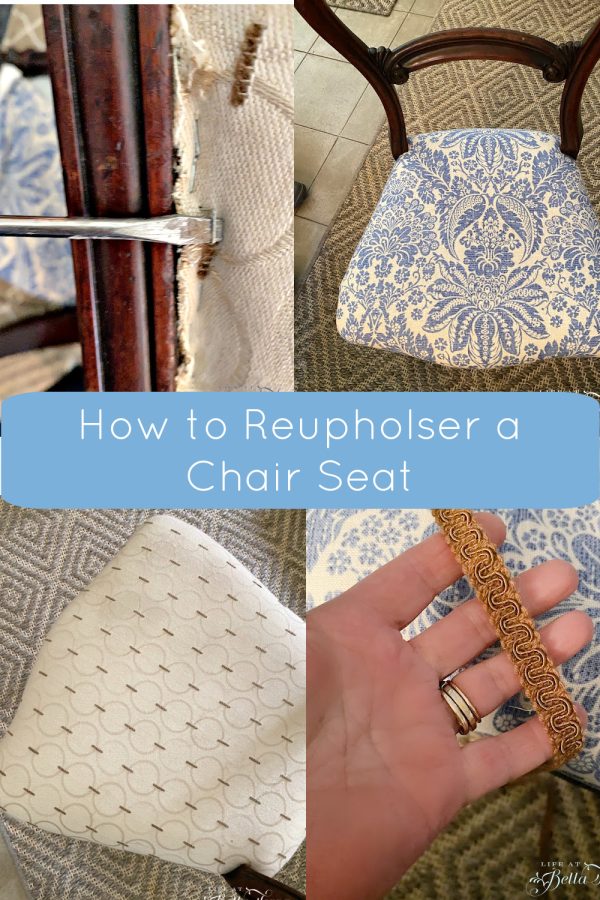
How to Reupholster a Chair Seat
Changing out the fabric on a piece of furniture is an affordable way to get a completely different look. Honestly, I have never done this. Any large upholstery projects are left to the pros. But in remodeling the pool house, the seats to antique chairs need a new look.
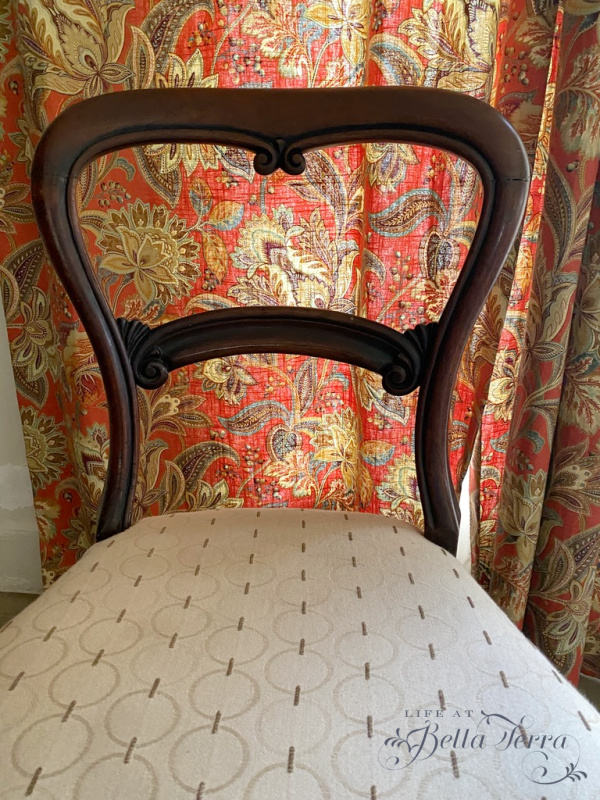
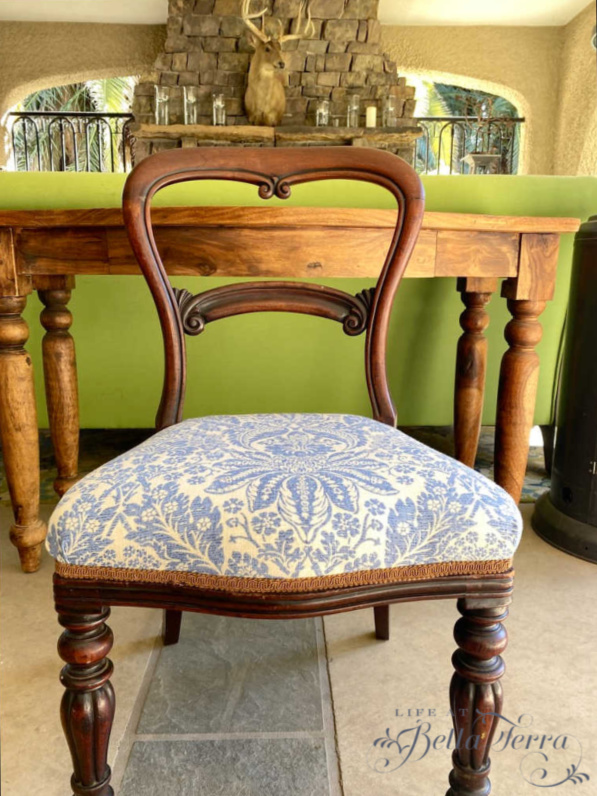
This very pretty Victorian bustle back chair is one of two. Popular between 1850 and 1900, the chair is open in the back to allow women to sit in it while wearing a gown with a large bustle. I find that some antique chairs are so well made that they are worth keeping. However, the fabric on the cushion does not go with the mostly blue theme of the new pool house re-do.
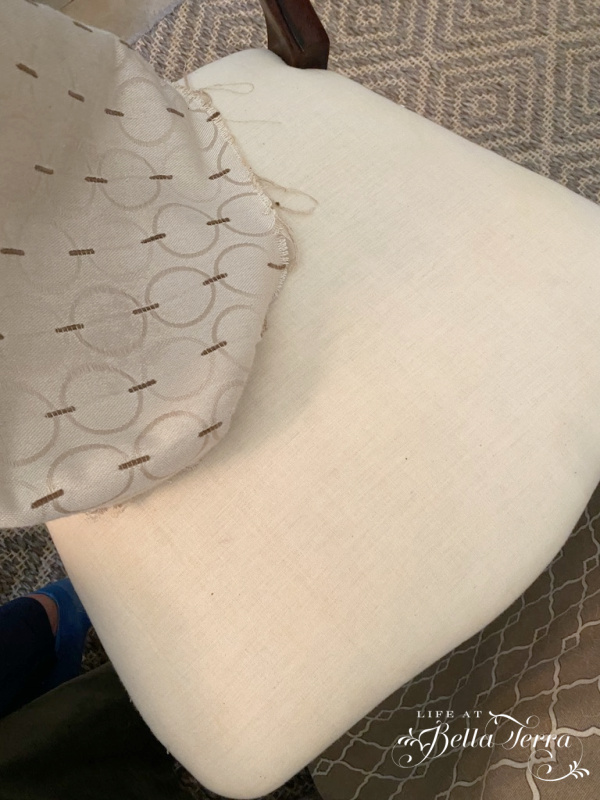
Here is a look at the chair before the fabric change. Initially, I thought I would remove the entire seat and recover it. But the seat did not detach from the base so the challenge is to recover it in place. The existing fabric is Sunbrella and in good condition, however, the color is not what I want.
Tools You Will Need
- Flat head screwdriver
- Pliers
- Scissors
- Staple gun
- Glue gun
- Fabric of your choice
- Trim of your choice
Removing the old fabric
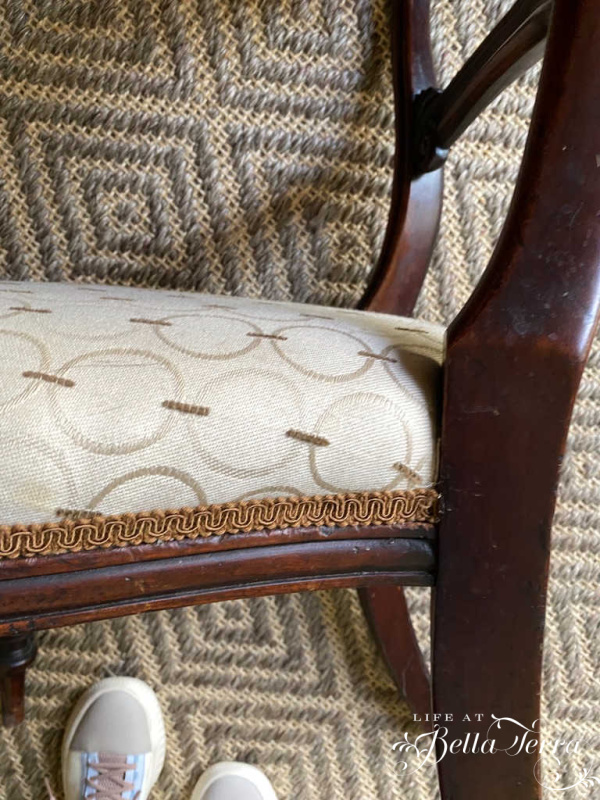
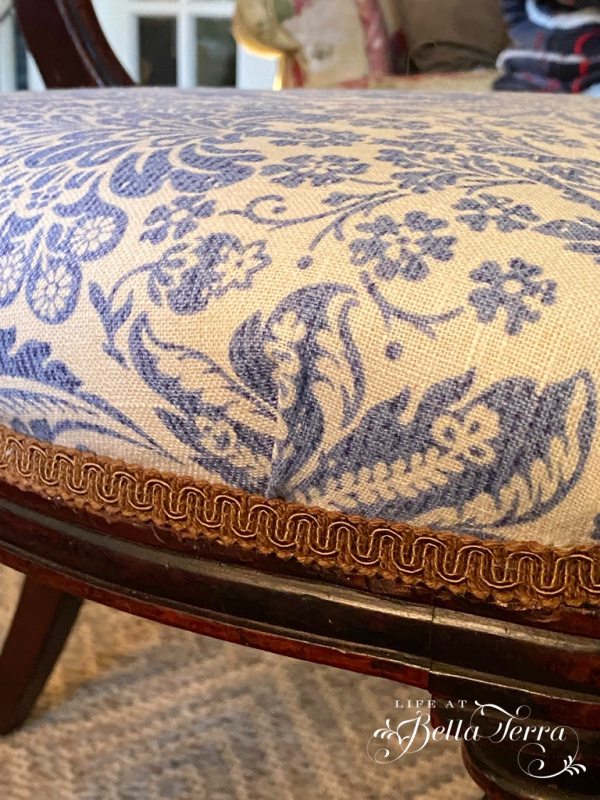
First I remove the gimp braid trim, which pulls away rather easily. Surprisingly the trim does conceal all the staples where the fabric meets the chair frame.
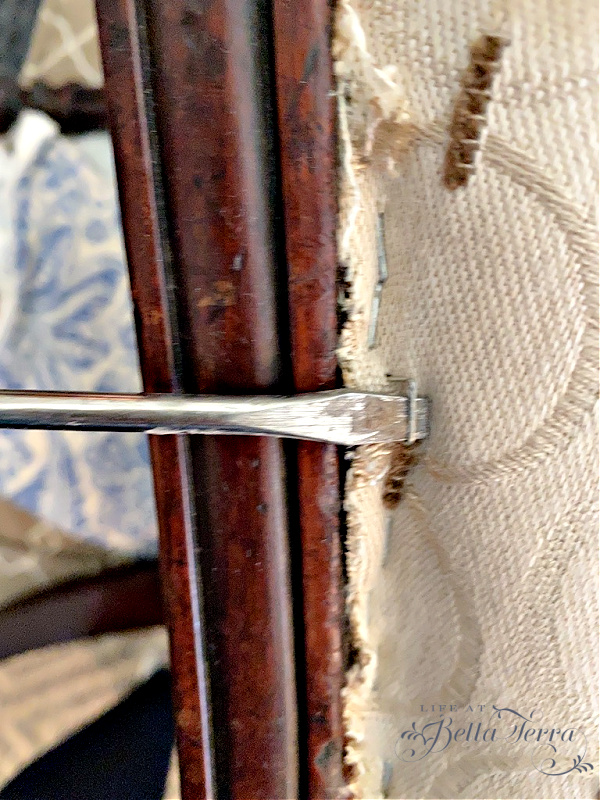
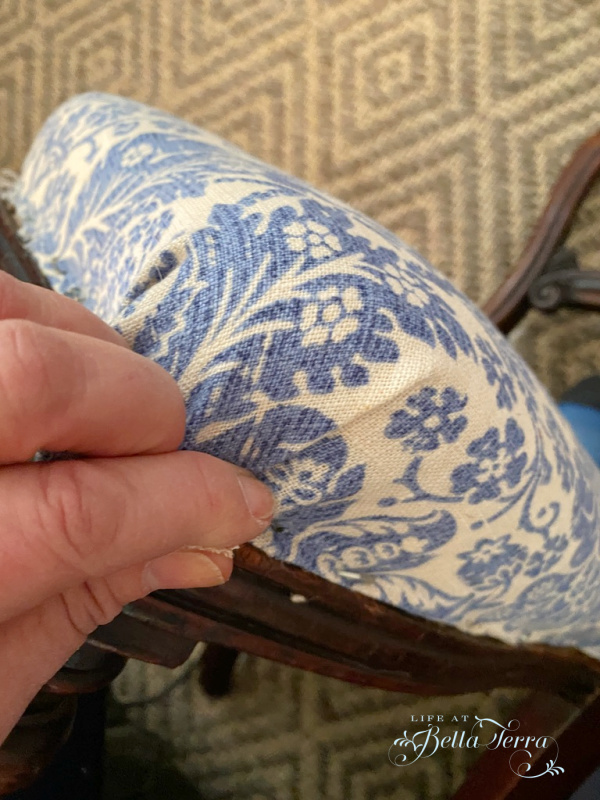
Sorry for the blurry photo as it is difficult to work and photograph at the same time. Using the flat head screwdriver, I pull the existing staples out of the fabric. To assist, I use the pliers as some were more difficult to remove than others.
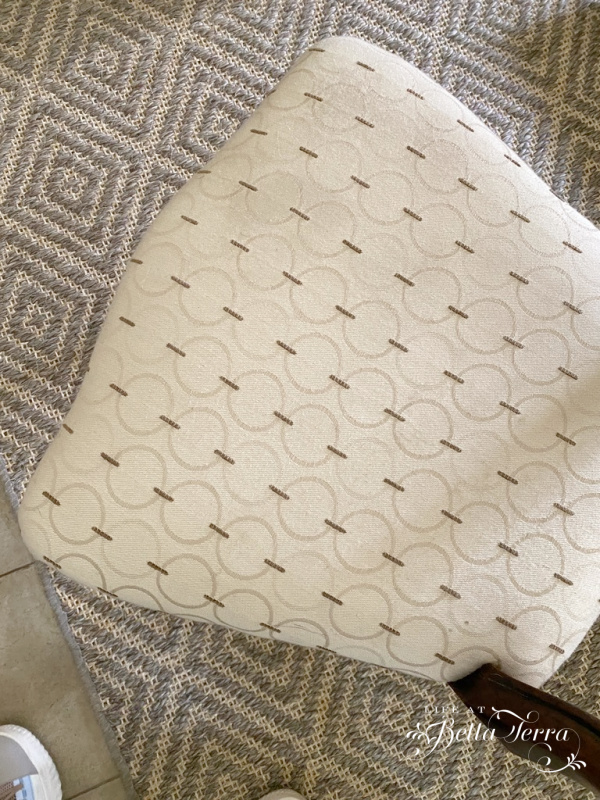
Under the fabric, the linen seat cushion is in good condition and will remain the same.
Making a Pattern
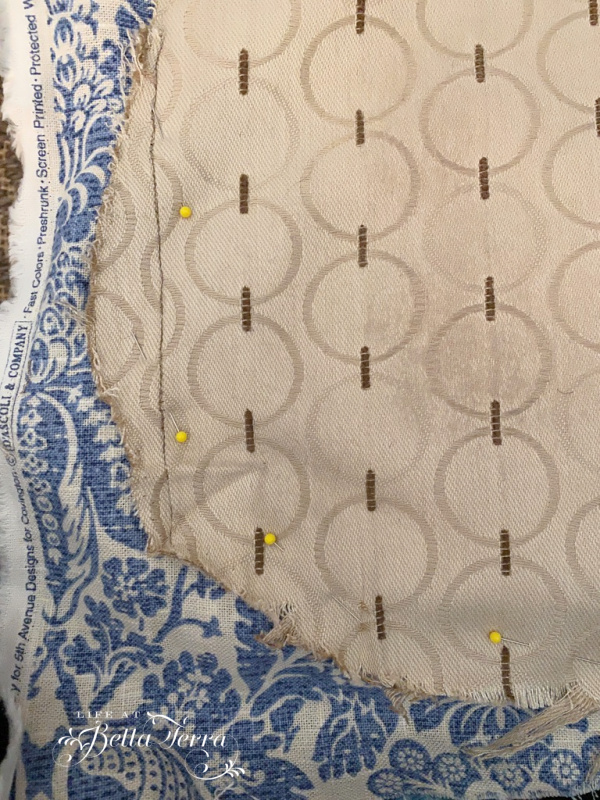
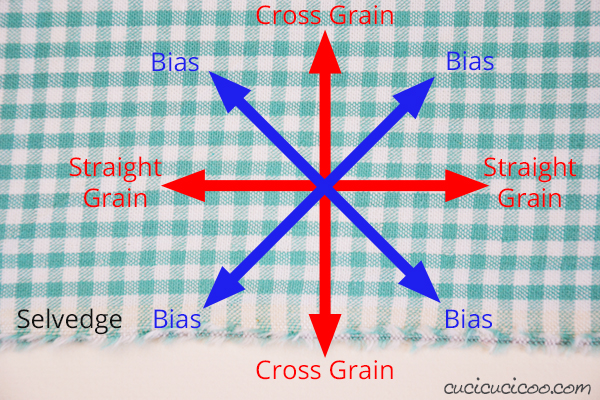
Using the old piece of fabric as a pattern, I cut a new one with the blue fabric adding an extra 1/4″ to all 4 sides. If you recall from HomeEc in 7th grade (am I dating myself?), it is important to note the cross grain/straight grain vs. bias of the fabric. Since I will be pulling this fabric taut across the seat cushion, I want to make sure the pattern doesn’t get distorted. So pulling on the fabric and making the pattern lay across the cross/straight grain is the goal.
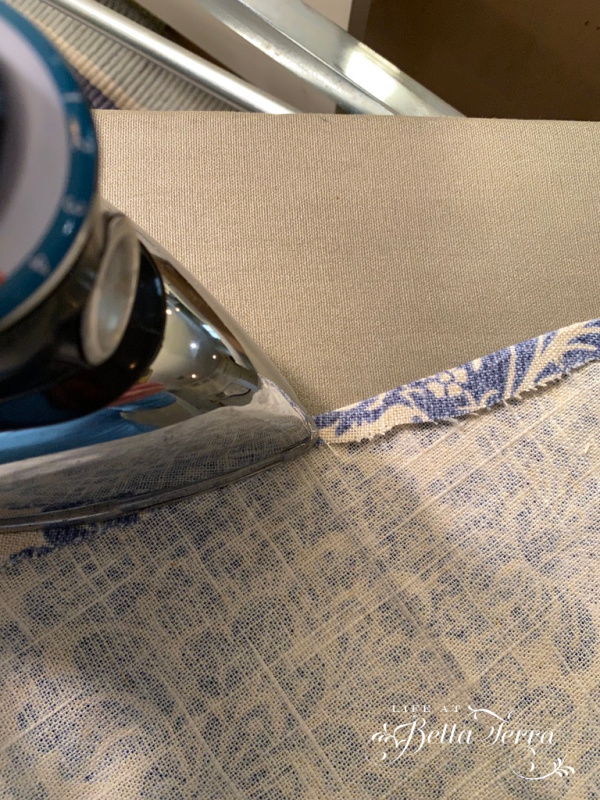
Next, I fold over the edge, approximately 1/4″ and iron it in place. I do not want the edges of the fabric to fray as I am stapling it on the frame.
Recovering the Seat
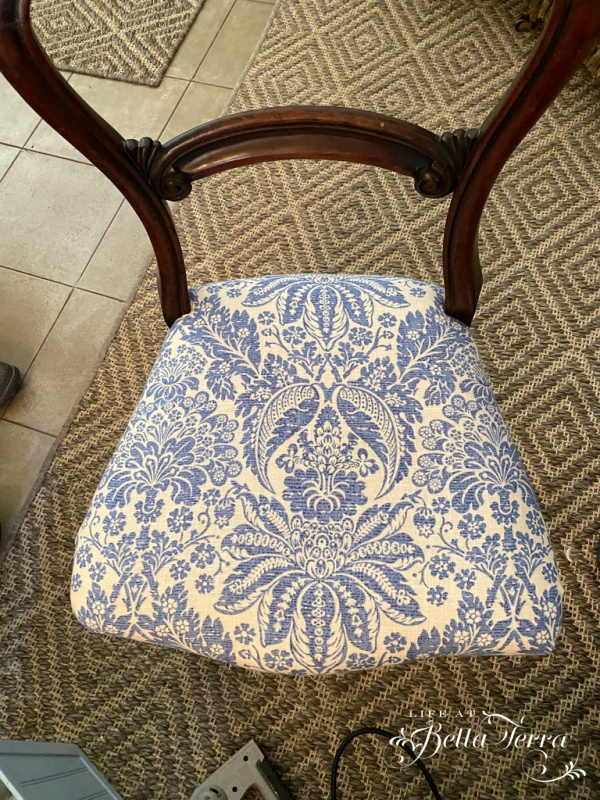
After placing the fabric on the chair, with the pattern somewhat centered, I start on one side and staple the ironed edge of the fabric onto the frame. Before each staple, I make sure the fabric is in the right spot and that it is tight against the cushion.
It took a few passes with the staple gun as there were some issues with 3 staples coming out at once. But with a new set of staples, the problem is resolved.
What’s nice about using a trim is that it allows you to cover any mistakes you make. Some staples went in easily, others not so much. But the fabric is secure and it looks like this.
Adding the trim
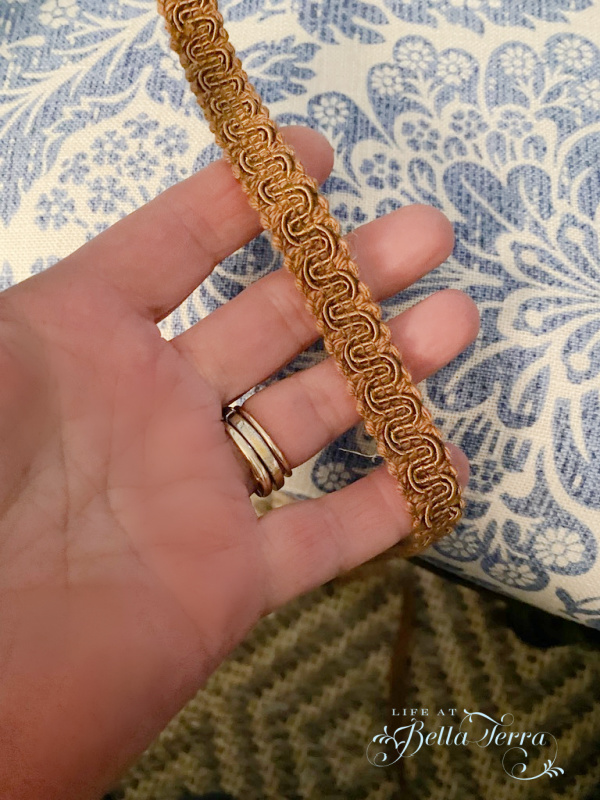
I am surprised at how easy this project is~all done while watching a television show. Since I tend to be a bit impatient, I re-used the gimp braid trim. Since the color is a bit neutral, it does blend in with the chair frame. My first choice would be blue or white, and I may still do that, but I am living with the old trim for a while to see if I like it.
Using the hot glue gun, I apply an average amount of hot glue to the underside of the trim. Starting at one edge, I apply it to the fabric to cover the staples.
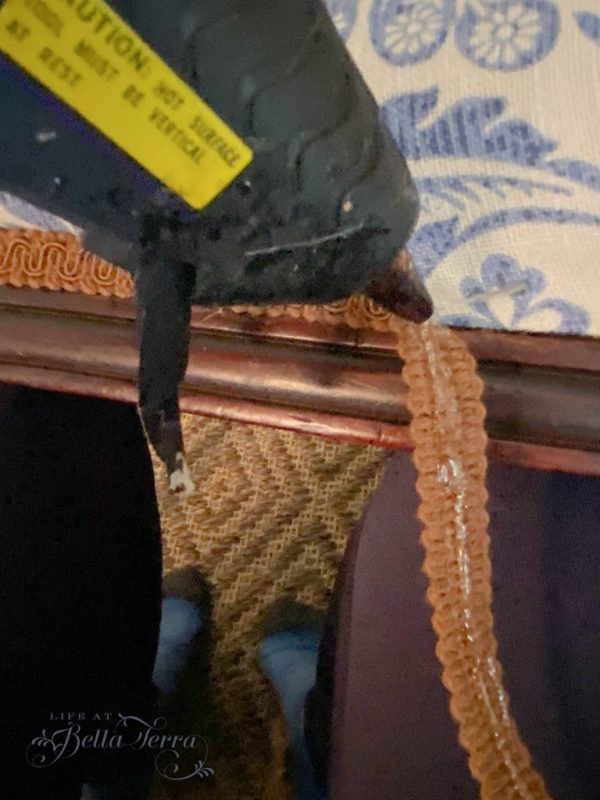
Caution: There is nothing worse than getting hot glue on your skin/fingers. So be very careful applying the glue. Take it from someone who burns her fingers every time I use it.
Here is the chair on its way out to the pool house. Let me know if you think I should replace the trim with blue or white braid. Or if it is fine the way it is. Now I hope to take some of this fabric and recover 2 small lampshades.
Happy Wednesday! I have been named an alternate juror for the grand jury. Keeping my fingers crossed that they do not need me as it would be 2 full days per week for 4 months commitment. Yikes.

If you need any of the items for this project, you can find them below.
If you enjoy this post, please share on Pinterest.
Just a reminder that any words that are italicized bring you to the source. If it is a product on Amazon, please note that I am an Amazon Affiliate. If you purchase something through my website, I receive a small (very small!) stipend, which doesn’t affect the price you pay at all. My goal is to make sourcing the items easy for you. Thank you for your continued support.


I have just recovered a chair very similar to you and was very frustrated at not being able to remove the cushion! I thought I was being lazy just recovering over the old cover (the staples were VERY rusty and hard to get out, plus I am sure there were 10000 of them☺️) so I was very happy to read your experience and guide!! Whew! Well done. Would love to show you my chair but not sure if uploads are allowed? Thank you anyway!
Debbie, please send me a photo of your chair! I would love to see it! Wow! So many staples and rusty on top of it. What a chore!Here is my personal email: [email protected].
Beautiful job! I have been looking for that fabric, could you please share where you found it?
Thanks !
I love the fabric. Your chair looks so gorgeous. I would love it if you could share it on The Fabulous Friday Link Party. You can find the link on my website. Hugs and blessings to you.
Great job recovering! I think the gold trim looks good because of age and wood on chair. If you put blue or white it will take away the age and look reproduction new.
I think so too! It softens the dark wood against the bright pattern. I hadn’t thought about looking “too new” but that’s a real consideration. Sometimes a little mellowing is good with sharp colors.
Gail, thank you for sharing your thoughts! I like re-using things and I think the trim looks great and appropriate for the age of the chair.
Great job, Mary. It looks soooo much better! I think the gimp is just fine. Love those chairs.
Such pretty fabric
Background fabric white/off-white will be best; blue next choice, very much depending on which trim will match a color in your fabric best. Outside of being convenient for a quick job, the gold has no place on the chairs now. Sorry to say….
BEAUTIFUL JOB!.
I vote for the blue first, white second…just love the fabric. Please show lamp shades if you do.
Never tried that but have some shades that need a replacement or re-do.
Thank you for sharing.
Lovely! The fabric is gorgeous, and I’m voting with most of the rest on blue or white trim, but no hurry. 🙂
I’m torn between wanting you to be a juror because you’re smart and fair and our system needs good people in it, or hoping you won’t have to spend so much time! Let us know what ends up happening, and in the meantime, nice job with the chairs! 🙂
Definitely replace trim! Love the blue fabric but would look much better with blue or white!
!Good Morning The fabric you chose is just lovely. The gold trim seems to dull the look a bit. In my opinion, blue or white would be a better look.
You did a beautiful job!! I love it just the way it is and I think the trim blends nicely with the chair frame.
We have done this many times, you did a good job for first try. I’m not sold on the trim, especially out of context with the room. In my humble opinion, I think white or blue would look crisp and fresh.
oh, dear…here we go…I luv this trim….really “sets it off” & frames that seat. Well done! franki
Blue or white trim would be better in my opinion. Beautiful job. ❤️