
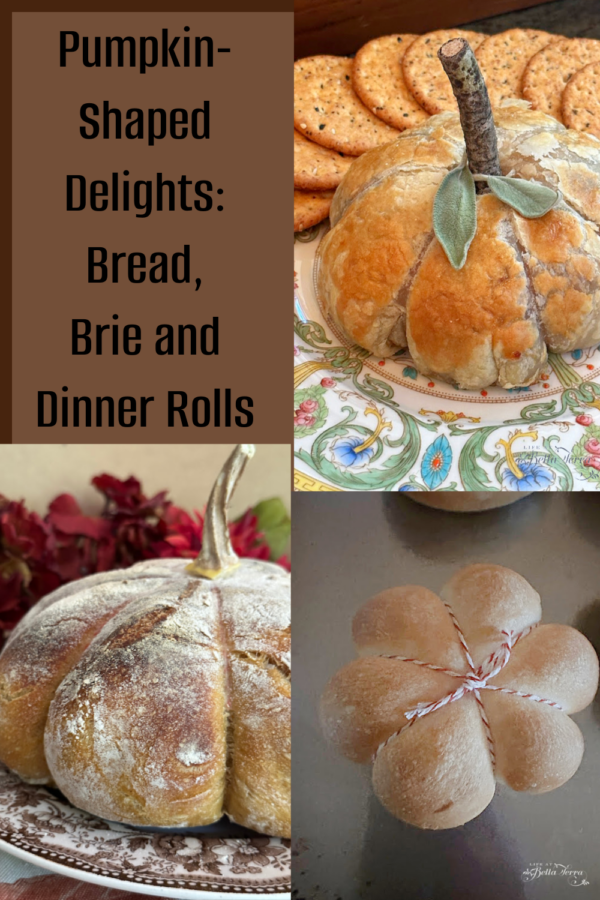
Pumpkin-Shaped Delights: Bread, Brie and Dinner Rolls Recipe
Want to create some pumpkin magic in your oven? Not only will these recipes wow your guests, but they are a celebration of the season. Here are 3 different ways to share some pumpkin perfection with homemade bread, a wheel of brie and those easy-to-bake frozen dinner rolls.
Pumpkin Shaped Bread
There are so many bread recipes available from quick, no knead dough using commercial dry yeast to sourdough bread from scratch. For this recipe any bread dough will do. Note: if you haven’t made bread yet, please do try it. Check out this quick crusty bread that is easy and simple to make.
For the last four years, I have been making sourdough bread from sourdough starter that I feed on a regular basis. Sourdough bread baking is a bit more challenging, but once you learn the ropes it’s very hard to bake anything else.
What You will Need
There are a few items you will need to make your bread dough look like a pumpkin.

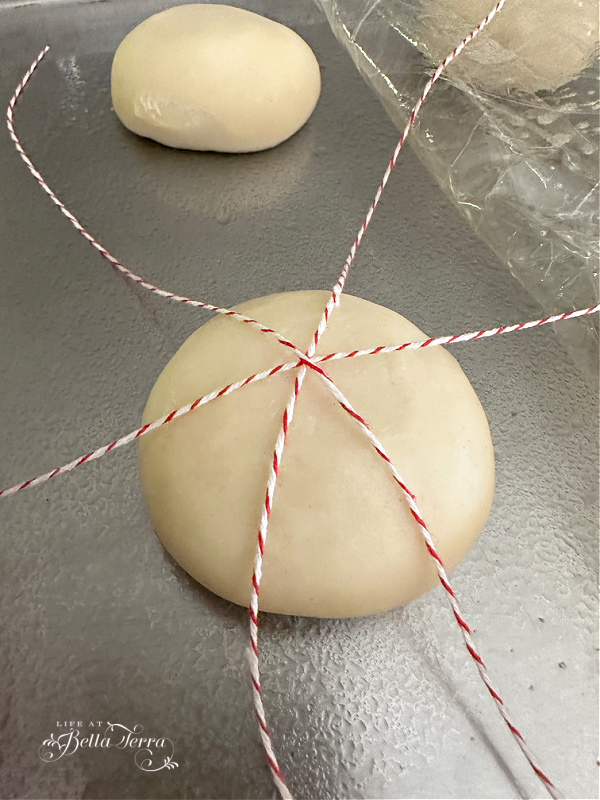
Cut a piece of parchment paper (can be bleached or unbleached) and use it as the foundation to laying out your baker’s twine. Since I already have red and white bakers string, I double it up and use it to create 8 even sections.
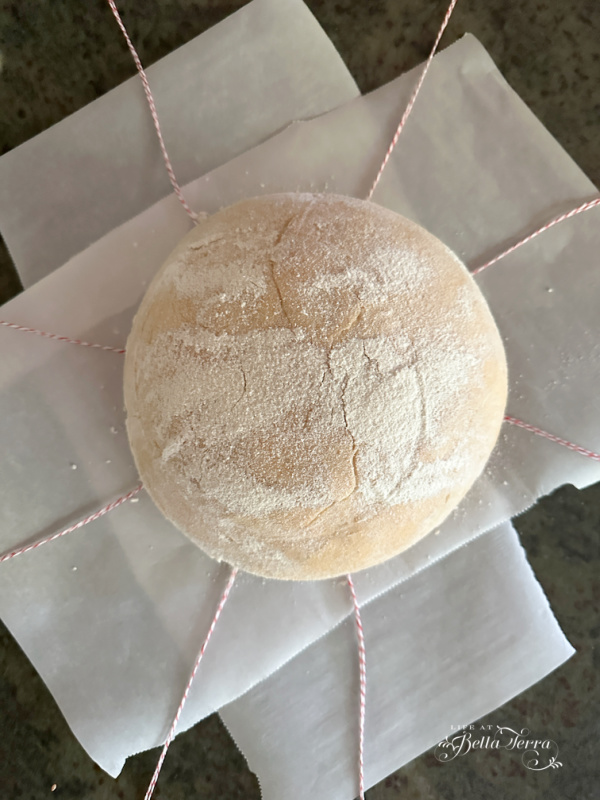
Place your dough in the middle and then tie the ends around the dough to the middle.
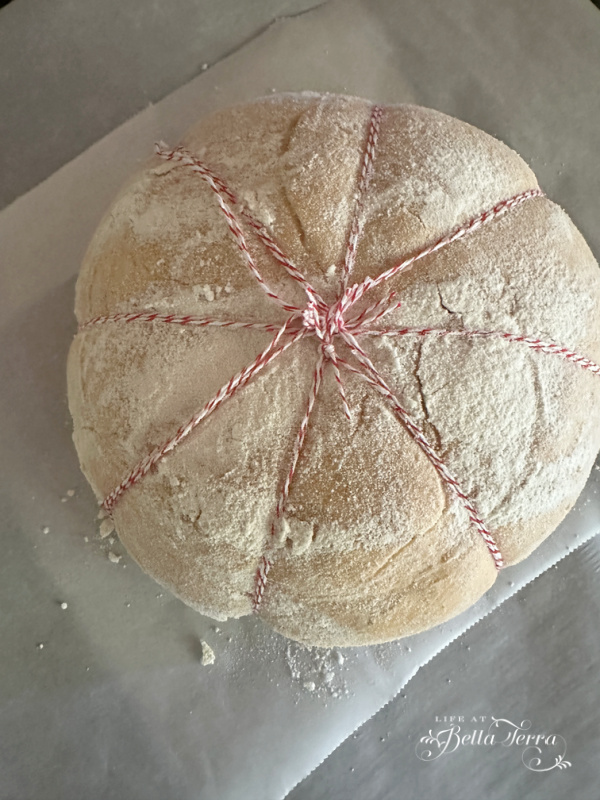
I always bake my bread in my 4.5 quarts (#24)Le Creuset cast iron Dutch oven. Such a worthwhile investment, however, you can find other cast iron pans for less, like this one from Lodge and Trustmade.

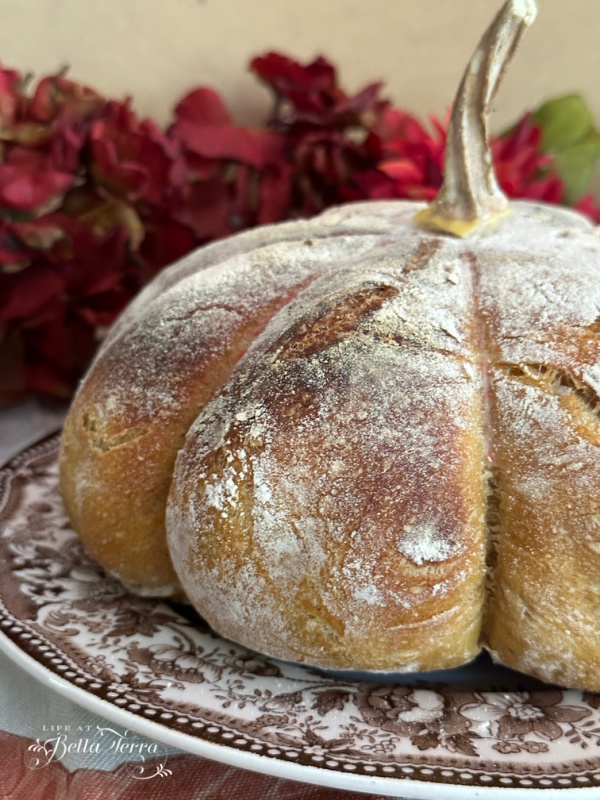
After the bread bakes, carefully remove the strings and voila! You now have a beautiful bread pumpkin. I add a real pumpkin stem to the top for fun. If you want, there are recipes that add pumpkin puree to the bread for a more seasonal flavor.
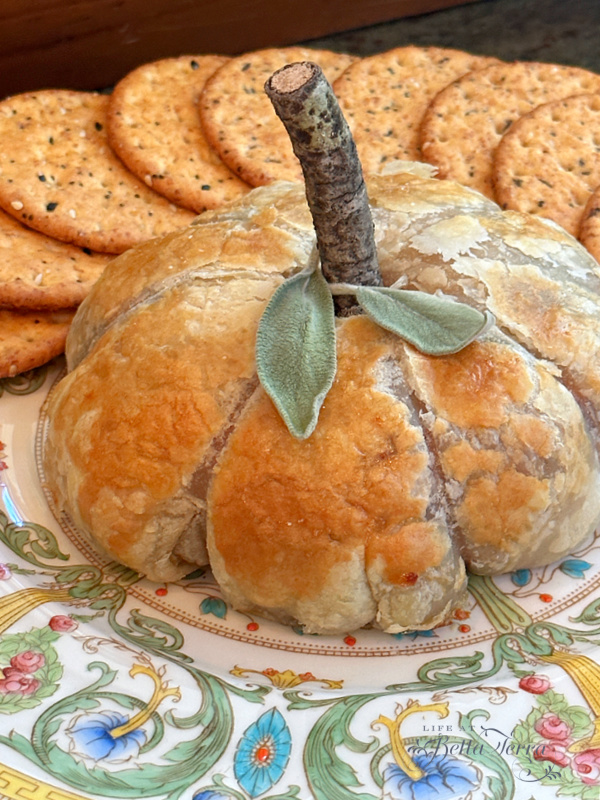
Pumpkin Shaped Brie
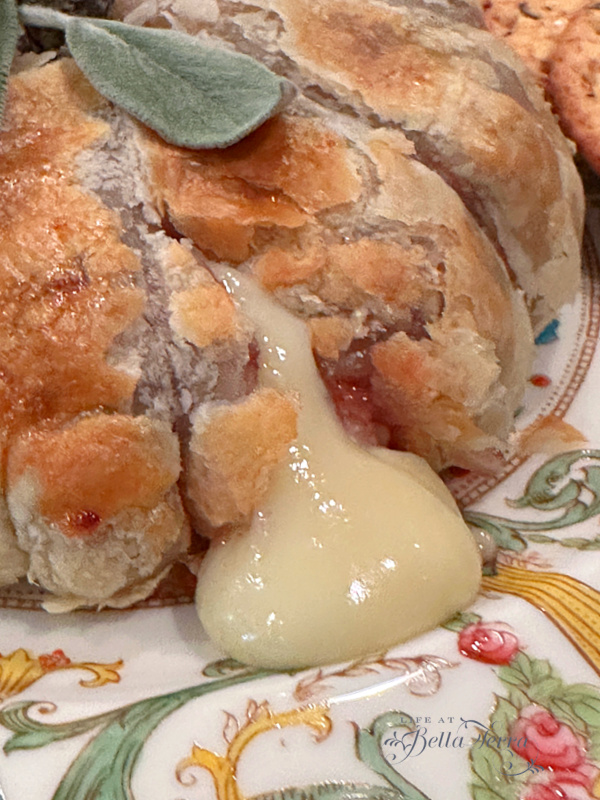
Wow your guests with warm, melted brie wrapped in a golden puff pastry crust….all in a seasonal, pumpkin shape.
Ingredients
- 1 puff pastry sheet, thawed
- 1 8oz brie wheel (mine is a 7 oz.)
- ⅓ cup apple butter (or jam of choice)
- 1 egg white, beaten
- 1 pretzel stick
- 2 fresh sage leaves
This is a super easy recipe and adaptable to whatever flavors you love. All you need is one sheet of puff pastry, a small wheel of Brie and a jam/flavor of your choice. It could be pumpkin butter, apple butter, cherry or fig jam. Whatever you like with your brie!
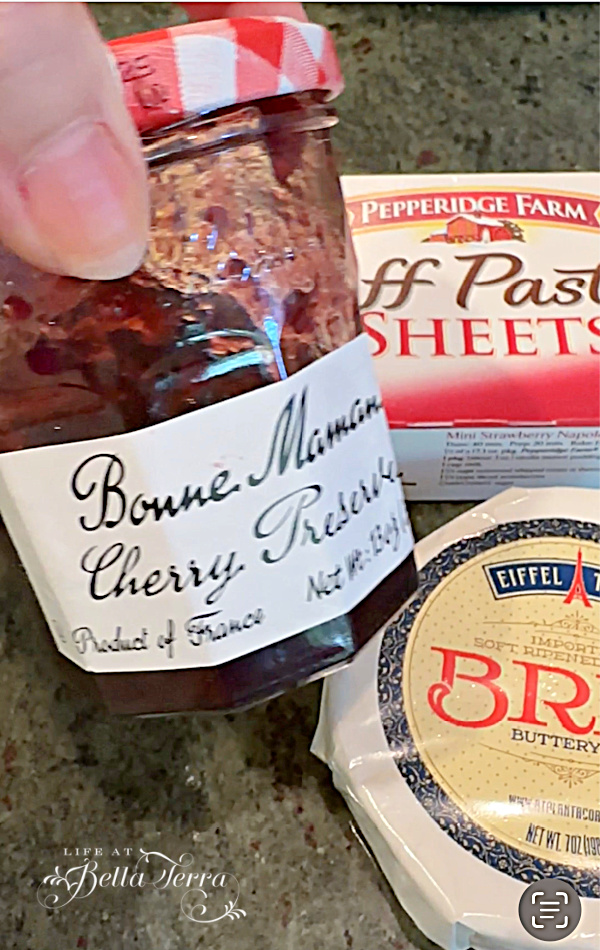
For my recipe, I use cherry preserves from Bonne Maman, which you can find in any grocery store. My go-to puff pastry is from Pepperidge Farms and is found in the frozen aisle in your grocery store. Thaw one sheet of puff pastry.
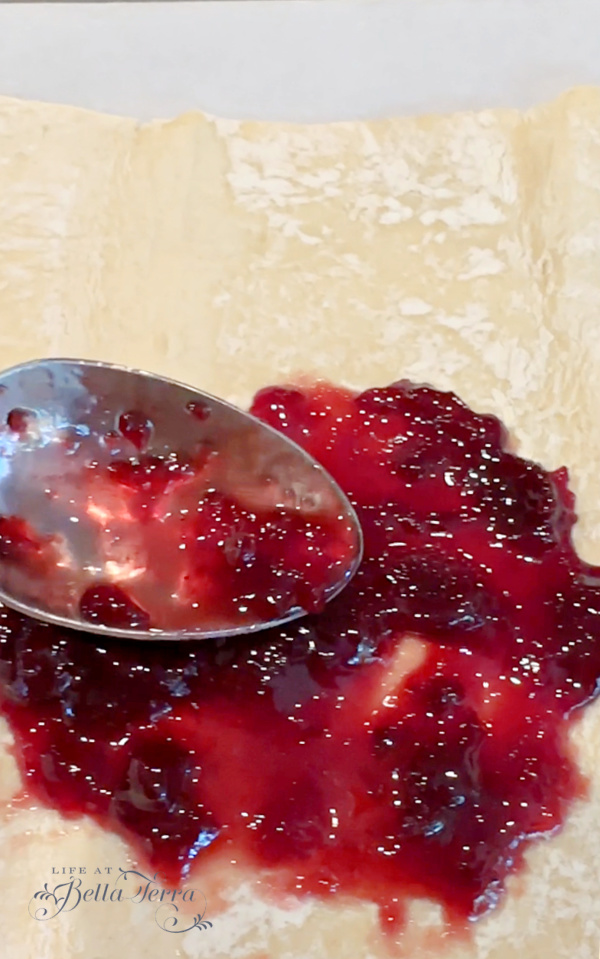
Open up your sheet of puff pastry on a piece of parchment paper. Spread your favorite jam on the pastry in roughly the same size as your brie wheel.
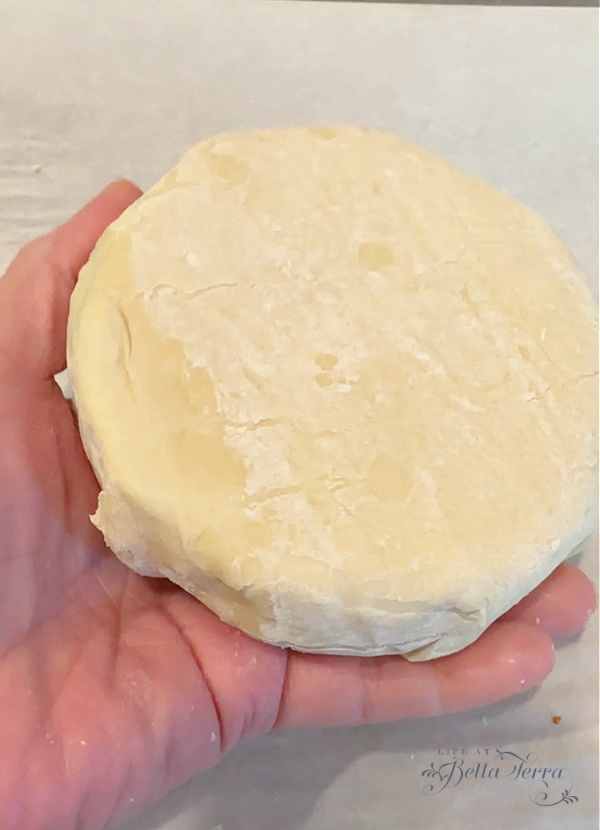
Place your wheel of brie on top of the jam on the softened puff pastry. To minimize excessive dough, I cut a large circle of puff pastry around the brie and then wrap the pastry covering all sides of the cheese. Pinch edges to seal. Note: I did turn the brie over, leaving the less attractive side on the bottom.
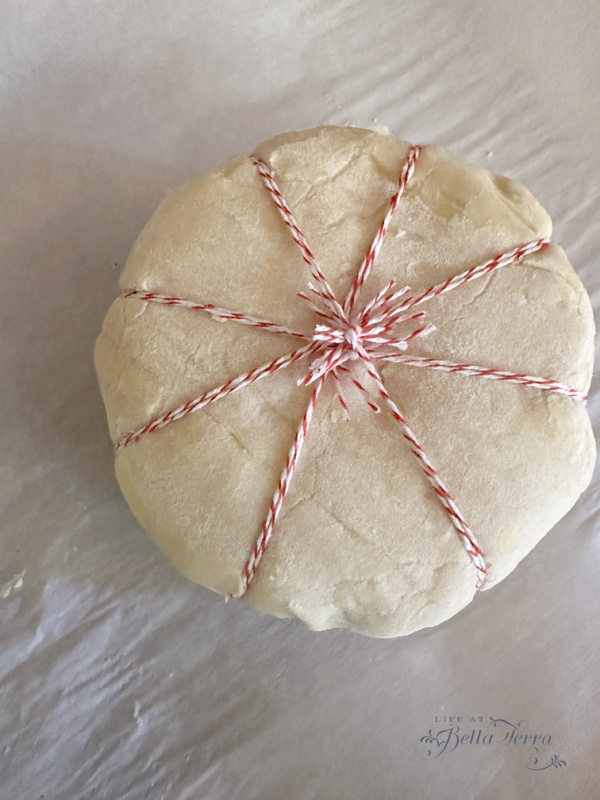
Place your pastry-wrapped wheel of brie in the center of the strings.
Use the same technique as with the bread dough. Lay out bakers string on parchment paper in 8 sections.
Tie all the strings in the middle of the brie. Trim the longer strings. Brush all over with the egg white. Bake for 15-20 minutes at 375 degrees. Cool for 3-4 minutes before removing the string.
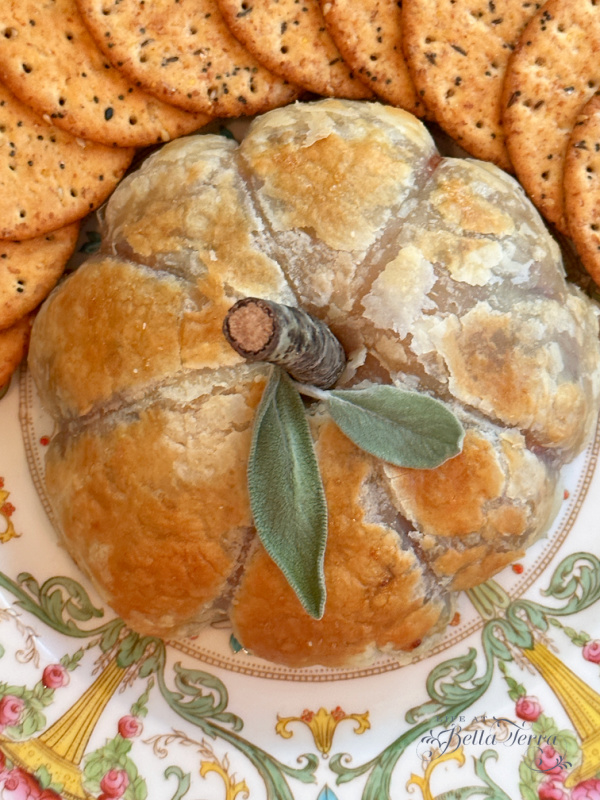
The brie is a beautiful golden color! For the pumpkin stem you can add a pretzel or in my case, I have a small stick leftover from the yarn pumpkins I made. Add sage leaves for color.
Using Thaw, Rise & Bake Dinner Rolls
After making the pumpkin style loaf of bread, I thought it might be fun to try this using Rhodes Thaw, Rise & Bake Dinner Rolls. If you’ve never had these dinner rolls, they are rather good. Found in the frozen food section of your grocery store, one bag has 36 rolls that are individually frozen so you can bake any amount you need.
The instructions on the bag suggest you let them rise for 3 to 5 hours before baking. So I conduct my own experiment and add the bakers string at different times within the rising period.

On a piece of parchment paper on a cookie sheet, I tied on of the dough rolls after the 1st hour. To be forthcoming and honest, tying the strings to these smaller pieces of dough is a bit more complicated.
I continue to do this every hour at hour 2 and 3. You can see how the bakers twine disappears as the rolls rise. Note: Once I finally read the instructions on the bag, they suggest letting the dough balls rise on a greased cookie sheet.
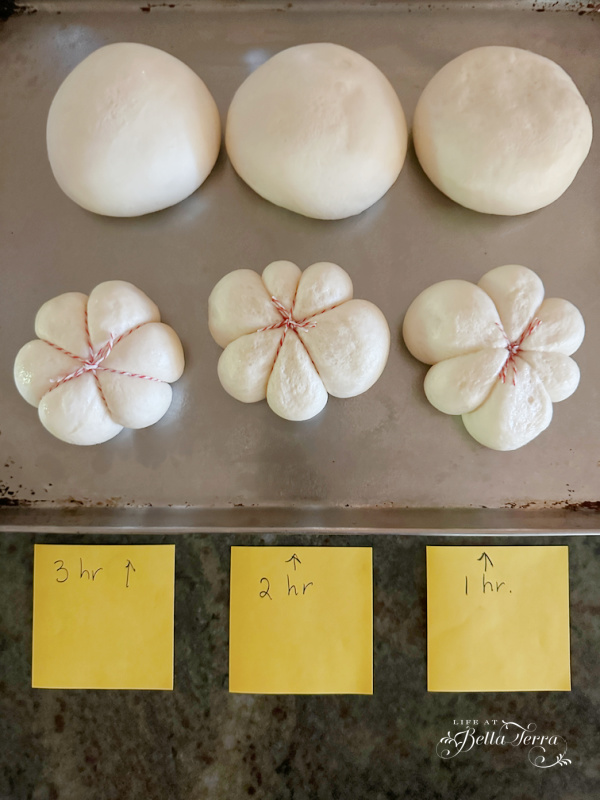
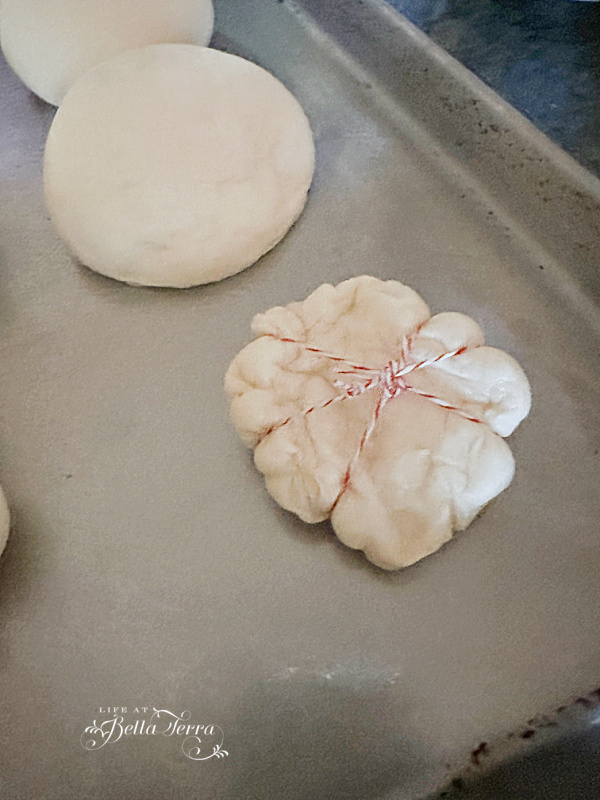
During the 4th hour of the rising period, the roll dough is SO soft and in applying the bakers twine, I deflate the roll.
Naturally the rise time will depend on the temperature in your kitchen but 3-4 hours seems to be the magic number for my kitchen.
Baking the Rolls
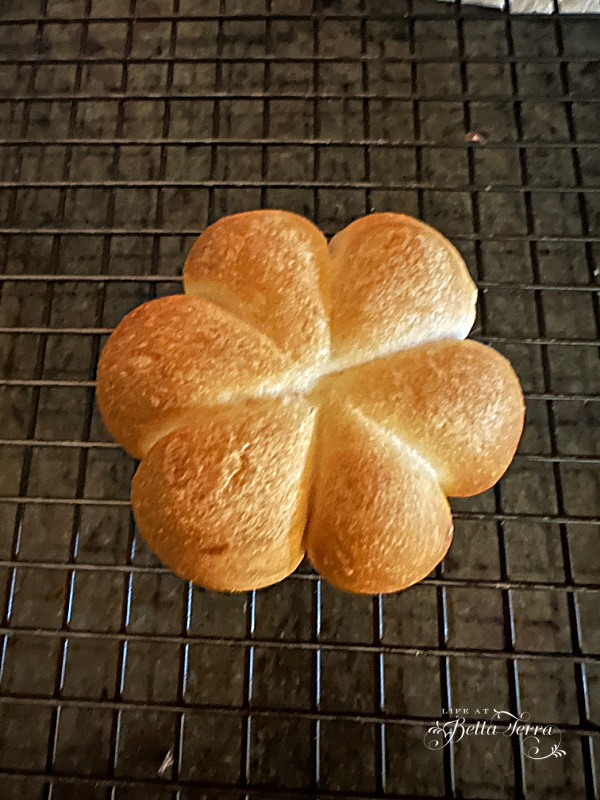
The rolls with twine at hours 1, 2 and 3 bake beautifully. However, it is nearly impossible to see the twine which is buried in the soft dough in rolls at hour 1 and 2.
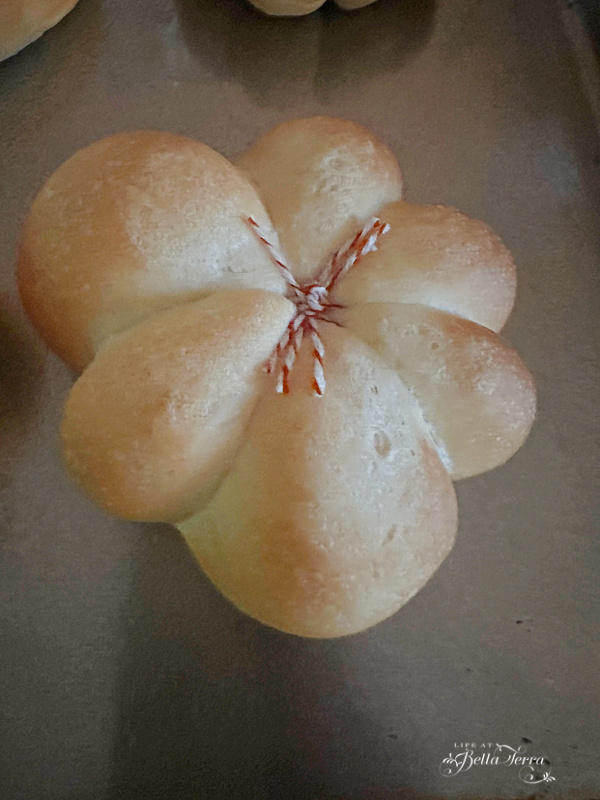
Here is the Hour 3 roll and you can still see the twine after baking.
In Conclusion
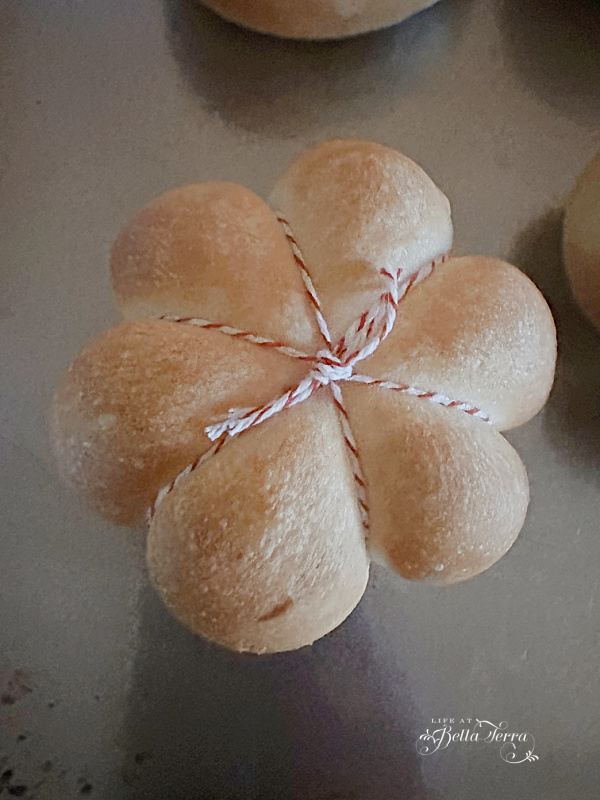
The best end result for removing the twine after baking, is the Hour 3 roll. The twine in Hour 1 and 2 are buried and the twine is difficult to remove, tearing up the roll a bit. Hour 4’s collapsed roll never recovers and bakes in the same sorry shape as noted above.
Quite honestly, unless you have someone who has the patience to tie the twine around these small rolls, I would probably not undertake this again. Effort vs. reward. The rolls are delicious as is….but if you do make them to look like pumpkins, then hour 3 of the rise is the best time to put on the twine.
Pumpkins are a way to savor the season and celebrate the harvest. I hope you like these 3 fun ways to provide a little autumn elegance in each and every bite!

If you enjoy this post, please share on Pinterest.
Just a reminder that any words that are italicized bring you to the source. If it is a product on Amazon, please note that I am an Amazon Affiliate. If you purchase something through my website, I receive a small (very small!) stipend, which doesn’t affect the price you pay at all. My goal is to make sourcing the items easy for you. Thank you for your continued support.


Mary,
I love this and plan to share it on DRA Sunday. You have the best ideas.
SO fun Mary – I never would have thought about the pumpkin shaped breads! And thanks to your candid and detailed tutorial, I think I’ll stick with the large loaf instead of the rolls! The brie looks and sounds amazing, and I love your stick stem. Thanks for all the inspiration and instruction – I’m excited to try these out!
Barbara, you have the nicest comments! Thank you for taking the time to weigh in!
Great ideas and thank you for the recipes and suggestions.
Alan, thank you for your sweet comments.
I love these great ideas!
Karen, thank you! Fun to play with food!