
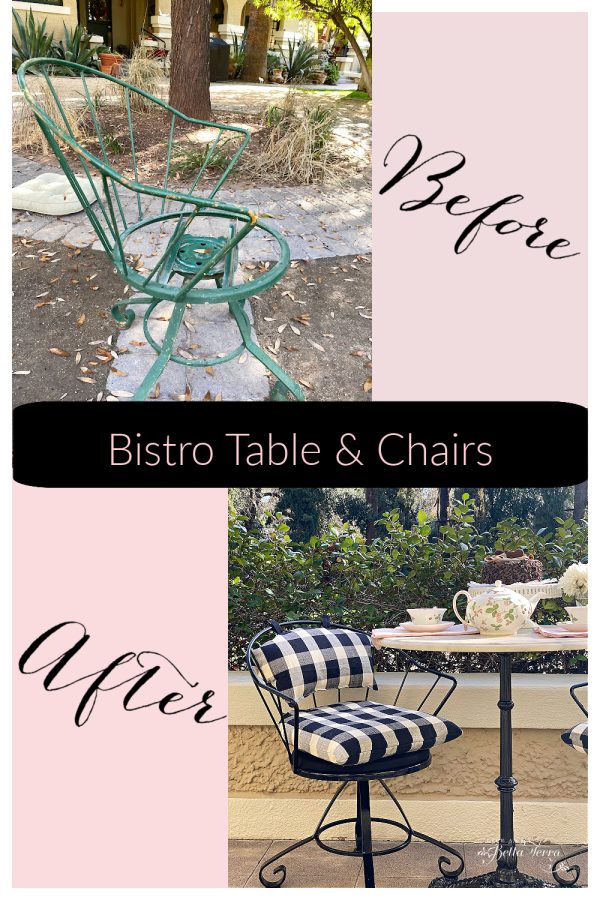
Reviving a Bistro Table and Chair Set
Several years ago I picked up this French marble top bistro table and 2 metal chairs at a yard sale. The romantic in me envisioned sitting there with a cup of tea or a good glass of wine, just relaxing. However, this set has been on the back porch of our pool house for several years, unused. With my daughter moving into a new apartment, there is a need for a small table and chairs so instead of buying something new, I decide to revive this one.
Current Condition
Even though I would love every area and item in my house to be in tip-top shape, the reality is, that many things are not. I do find it a bit embarrassing to show you the “before” pictures, but heck, that’s part of the process. Though the outdoor space is covered, the weather elements (dust, dirt, bird droppings) has taken its toll.
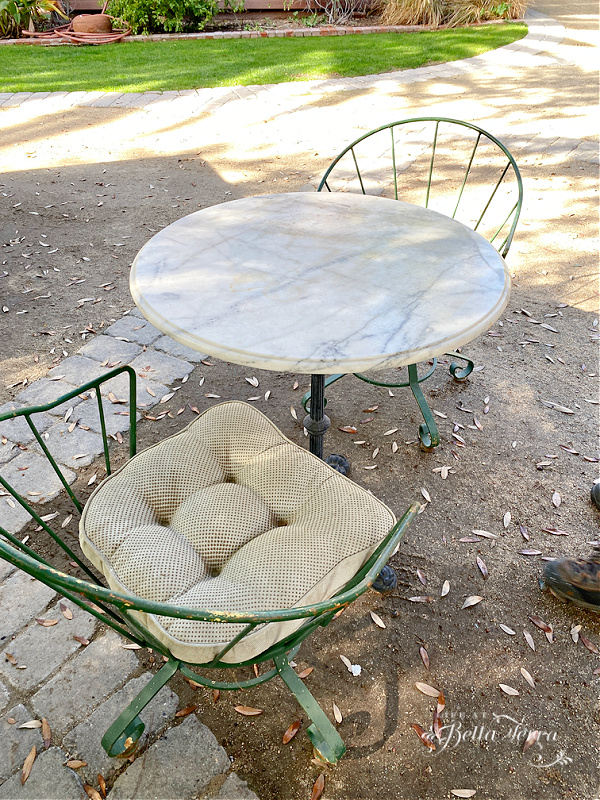
I love that the curved back chairs swivel, but the solid seat is made of a plywood circle which I covered in oil cloth so no one’s behind would get a splinter. The solid seat is not affixed, but fits well enough and stays in place under the cushion. Surprisingly, the cushions are dusty and dirty, but the fabric and filler is still in relatively good condition.
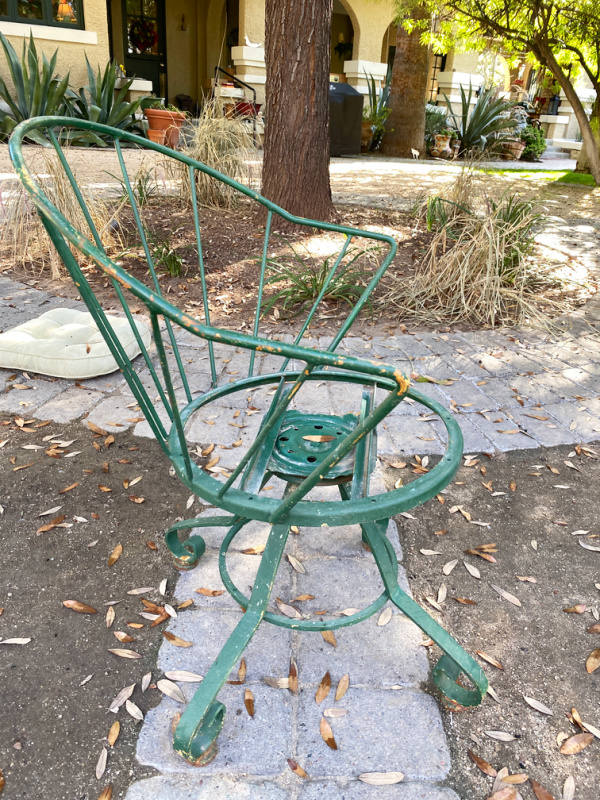
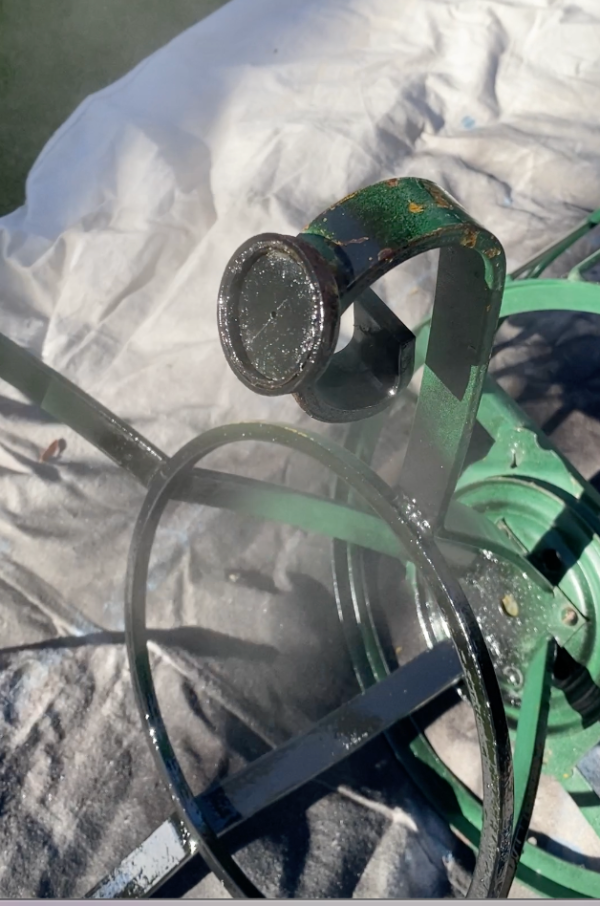
Green paint on the chairs is chipped in many places and the black paint on the table base is faded. Mechanically, everything else is sound.
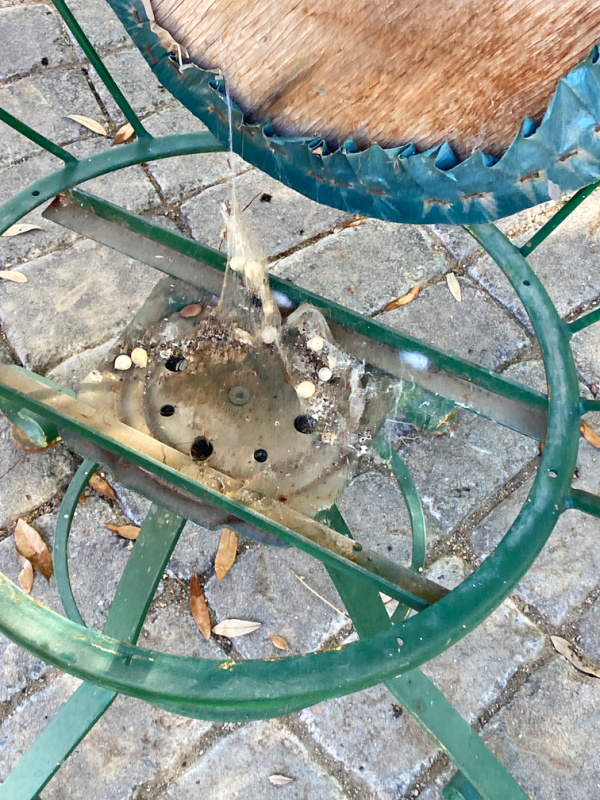
When I lift the wooden seat base, I am find many black widow egg sacks and a few large spiders. Ewww.
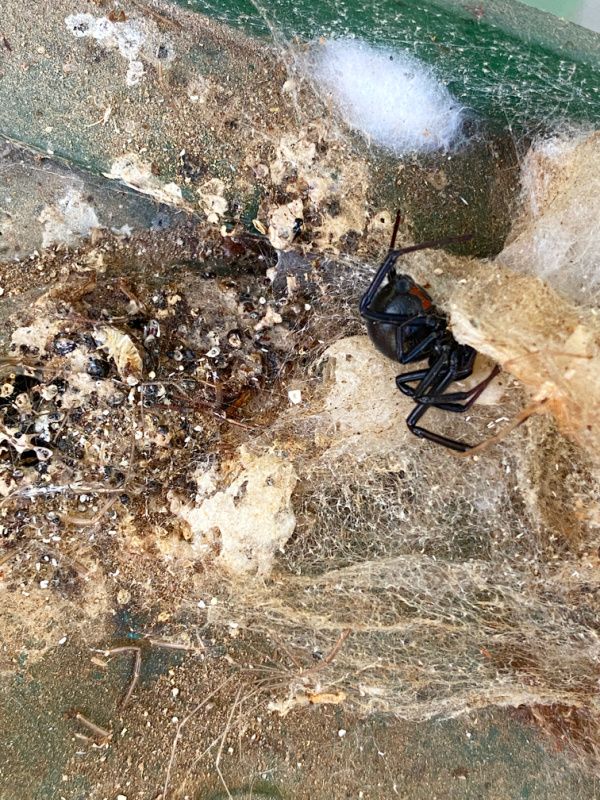
If you’ve never seen a black widow spider, here she is trying to hide from me. If you look closely, you can see a sliver of the red hourglass on her underbelly. She is very much alive. Again, ewww.

Prepping for Paint
After removing the spiders, webs and egg sacks, I thoroughly wipe down the chairs and table. Here you can see the condition of the paint on the chairs. They definitely need fresh paint.
The marble table top has rust stains too. My husband uses a combination of Krud Kutter, a concentrated cleaner/degreaser/and stain remover (love this stuff!) and Granite Gold (a stone cleaner). Nearly all of the grime and discoloration disappears.
Since my daughter loves the color black (see post here about her black and white bedroom here), it makes sense to paint the chairs and table base in a high gloss black.
Prepping for paint really takes the most time. With the work surface of the chairs and table clean, I place the items on a drop cloth outside. In the meantime, I put the two cushions in the washing machine, hoping to get out the dirt and dust.
Painting the Items

To paint the table base and two chairs, it requires 2-3 cans of spray paint. My go-to paint for metal is from Rust-oleum, as it prevents rust. This particular one is both a paint and primer and is high gloss black. It appears the spray top is redesigned on some of the cans, which helps prevent trigger finger fatigue.
With so many open spaces on the chairs, it’s impossible not to waste paint, but one coat does seem to cover everything.
Recovering the Wood Seat
The oil cloth fabric is deteriorated, but still solid enough to prevent any splinters from emerging from the plywood seat. But it looks awful as is.
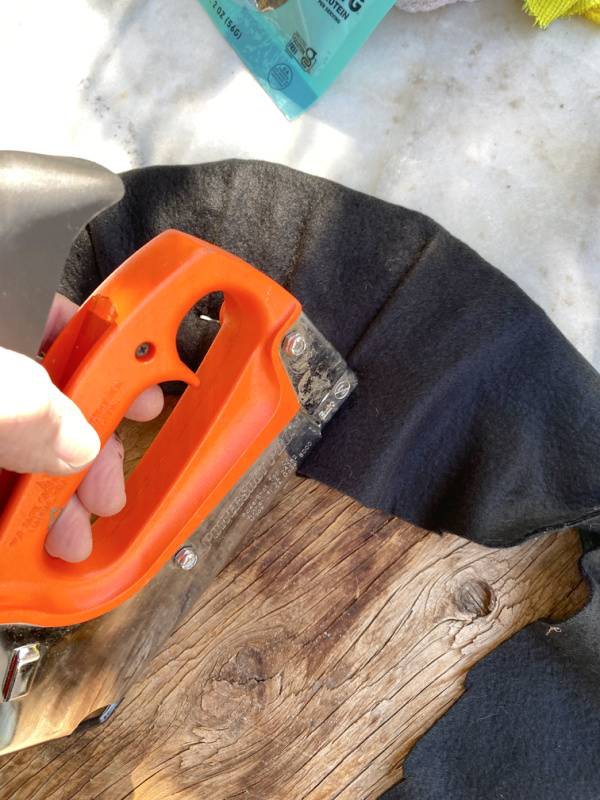
I find some leftover fabric that is black, soft and fleece-like and use it to cover both wooden seats. Using a Powershot heavy duty stapler I quickly affix the fabric to the wood. Easy peasy and the solid seat looks so much better.
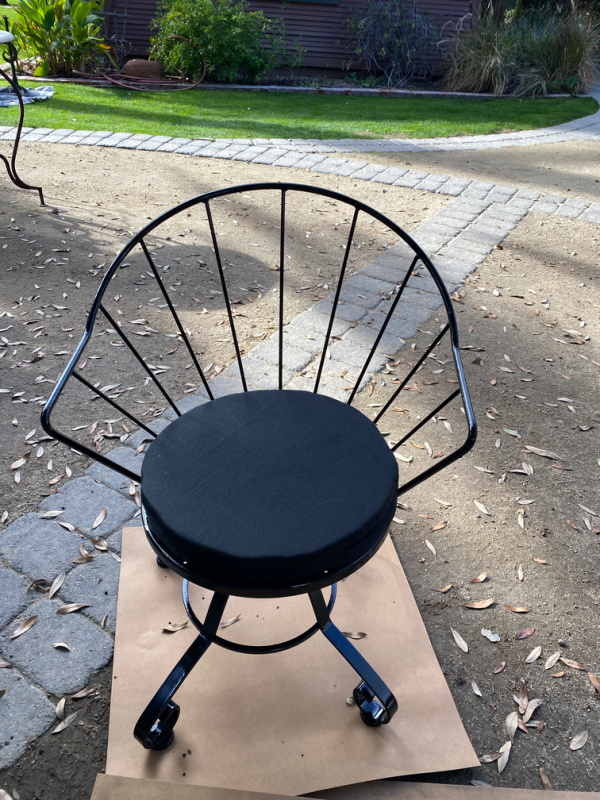
What an improvement already!
What to Do with the Cushions
Since the cushions did launder well, the problem is the current color and fabric texture. I search the basement for black and white fabric and I find the old cushion covers from the chairs I reupholstered for the pool house (see that post here). They are perfect with the exception that they are too big. And to my delight, the covers have zippers too!
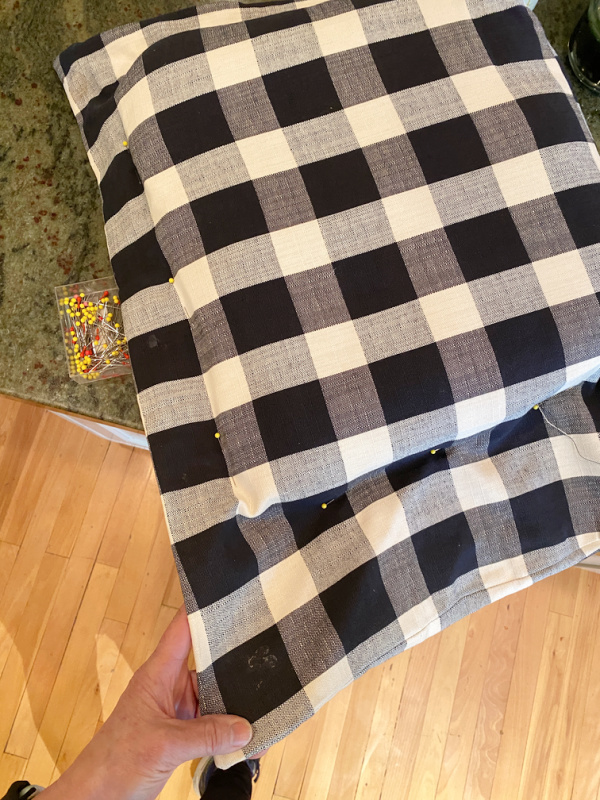
With some tailoring, I am able to recycle and retro-fit these seat covers for the newly cleaned cushions. In addition, I find some more of the same fabric, and decide to make small back cushions. These chairs are comfortable but the metal curved backs are a bit hard on the body.
Adding Small Back Cushions
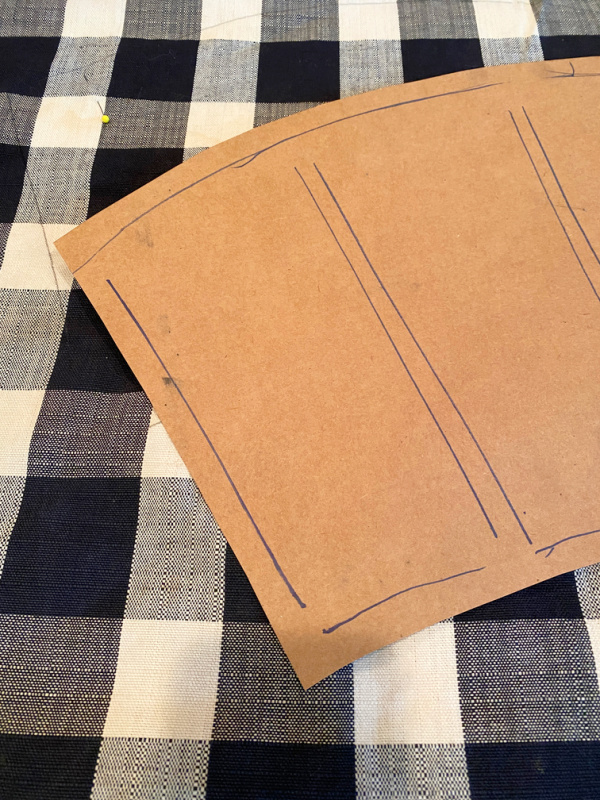
Using some brown paper, I lay it inside the curve of the back of the chair. I trace the chair backing to get a sense for how large and what shape I want the back pillow.
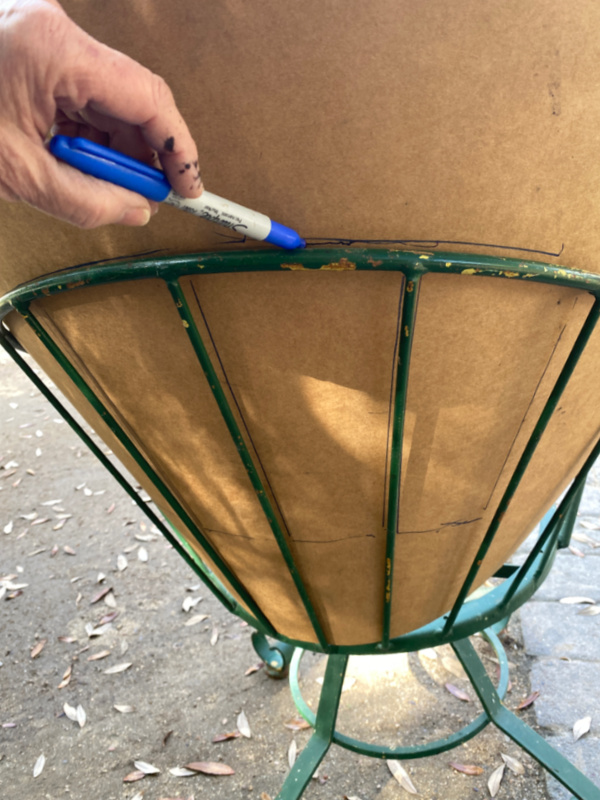
This now becomes my pattern for the back cushions.
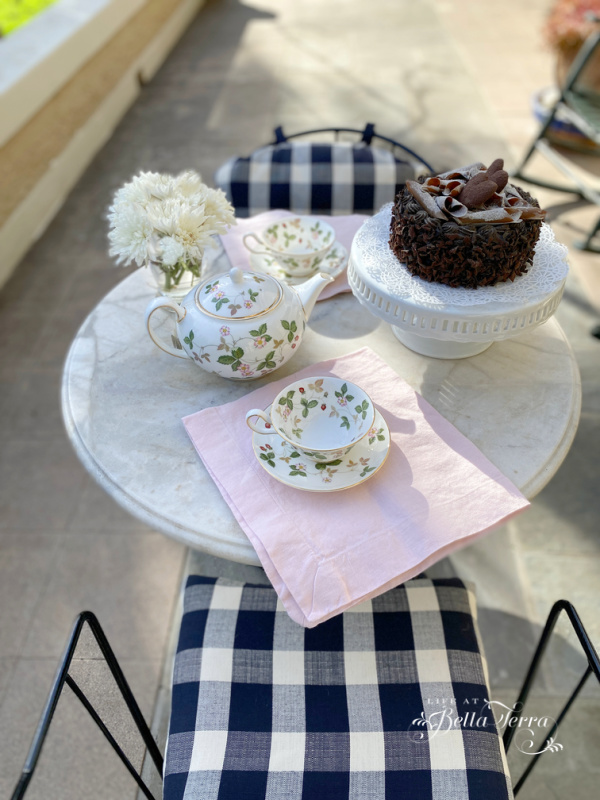
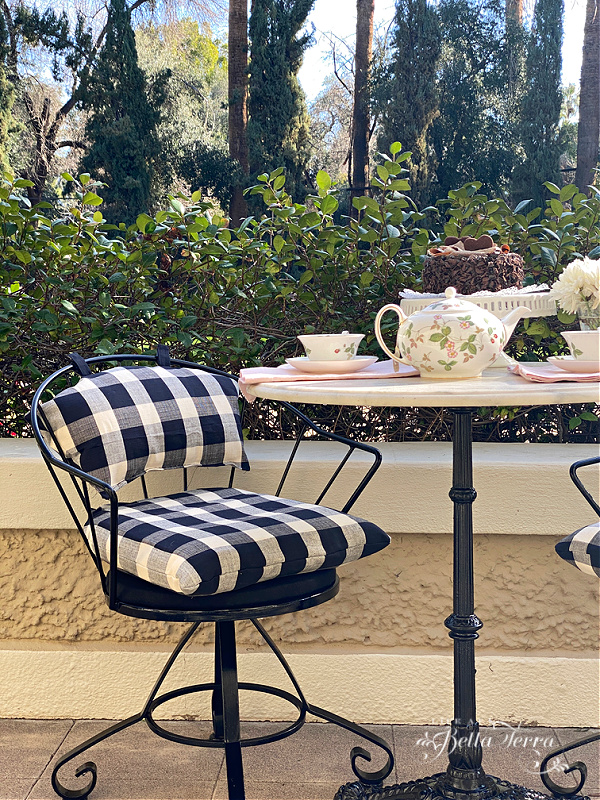
The Finished Product
Look how sweet this is! I am so happy with the results~especially since the cost of this project is minimal (3 cans of spray paint!).
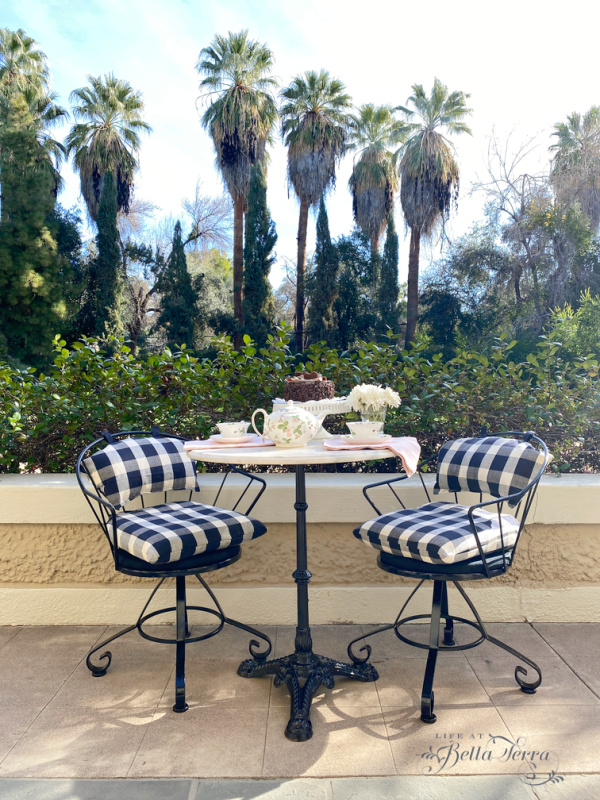
The back cushions are secured with cloth tabs and velcro squares. They are lightly stuffed with fiber fill and provide just enough softness so you don’t feel the metal.
The white Carrera marble top did clean up nicely, using
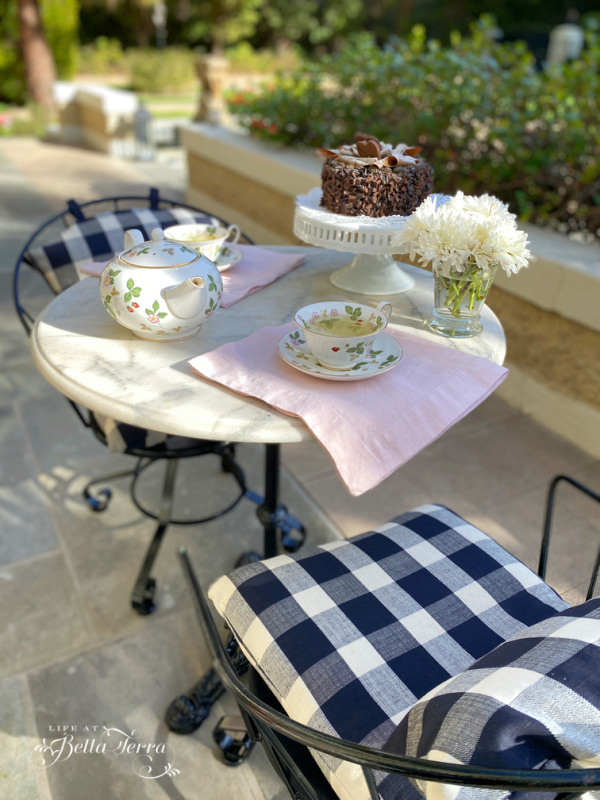
Now all the chair frames and table leg are all the same color. It feels so fresh and clean, I almost don’t want to part with it. But it will be perfect in my daughter’s kitchen in her new apartment.
Well, I promised to only post when I had something fun to share, so I am hoping you enjoy this transformation of 3 neglected pieces of furniture. This project was a bit unexpected but I am happy to fill my daughter’s furniture void without buying something new.
Thanks for checking in with me today! Have a beautiful week.

If you enjoy this post, please share on Pinterest.
This post shared on Between Naps on the Porch Metamorphosis Monday #786
Just a reminder that any words that are italicized bring you to the source. If it is a product on Amazon, please note that I am an Amazon Affiliate. If you purchase something through my website, I receive a small (very small!) stipend, which doesn’t affect the price you pay at all. My goal is to make sourcing the items easy for you. Thank you for your continued support.


Beautiful such a lovely transformation.
Sandy, thank you so much!
It’s the back cushion that takes the chairs to the next level. If I’m going to relax in a chair I’d like to sit back and relax. All my outdoor chairs have back cushions (I make, easy peasy. I include zipper so I can change out for season and reuse actual cushion, ten years now). You back cushion is spot in for chair design.
Karen, the back cushion is so necessary as the metal is uncomfortable without them. Love that you change out your cushions and they’ve lasted 10 years! Thanks for commenting.
What a great find! You definitely made an old into new again..you were so chilled about the spiders….personally I would have been waving bye bye as the refuse truck was hauling it away with that ‘family’ of black widow’s!!! lol very nice job !
Denise, so funny about the spiders! Yes, it did creep me out but I’m happy I carried on~Thanks for the comment.
This is spectacular Mary, and I love a good makeover. And you are right, life is not perfect, nor are our homes. I have so much clean up to do outside. It’s never-ending.
Wendy, you are right, the work is never ending. The goal this year is to get ahead of it as I feel that last year, it got ahead of me. Slowing down and being more deliberate will hopefully allow me to work smarter not harder! That’s the plan anyway. Thank you for commenting.
I can’t believe how fabulous this turned out Mary. I wouldn’t want to part with it either. And that black widow spider would have put me right over the edge. EEEEKKKK!
Kim, I’m not a fan of the black widow spiders either, but unfortunately we do have them on the property. Their webs are SO sticky and lethal. So glad she is no longer living on the underside of the chair!
Wow Mary! This turned out so amazing. You always do things 110%, which I admire. This looks brand new. I love the fabric.
It looks so good mary1 I love how it turned out!!!
Stacy, thank you!
Absolutely wonderful. What a difference! Love the black also.
Harriet, Thank you so much!
What a great idea and fabulous execution! You did a great job, and those little back cushions are brilliant! You always inspire me so much! 🙂 I know your daughter will love them too!
Mary,
This looks adorable. I love the black and white, and I’m sure your daughter is thrilled. I’d like to share a link on my Sunday Dirt Road Adventures.
This is super cute! I would have a very hard time parting with it. Hugs to you.
Wow!! Mary, you could turn a sow’s ear into a silk purse! Job well done!! Your children are very fortunate to have you as their Mother.
Valerie, you are so sweet! I need to have my children read your comment!
What a great set, so Parisian. You’ve done a fabulous job! This was worth repurposing.
Karen, I agree it was worth repurposing. Just wish I did it years ago so I could enjoy it!
Mary,
This looks absolutely amazing. We need to see a follow up photo in the apartment! My guess is shipping/transporting will be tidious. You don’t want to scratch it chip your gorgeous work!
Joanne, fortunately the marble top screws off the base and we were able to transport them easily in the back of two cars. I was hoping to take a picture of them in her apartment, but she is still unpacking and it was hard to get a good picture. Next time I visit I hope to shoot the whole apartment and share it. Glad you like the finished product!
Mary, this is such a beautiful set. And to do everything with mostly items on hand.
Your work is so good and I know your daughter will surely enjoy for years to come.
Hope your broken toe is healing nicely…I’m dealing with a broken ankle and is no fun.
It is a clean break so was fortunate there. I just have to be patient for the healing to take place.
Not easy for me.
Blessings,
Virginia, I am SO sorry to hear about your broken ankle. My chiropractor recommended for me to take an extra Strontium to hasten the bone healing. Thank you for asking about my toe-it is healing nicely but is still a bit tender. Boy, do I feel it when it rains too! Be patient with the healing process…ankles can be tricky.
KUDOS!!! They look “perfect”ly stunning!!! franki
Franki, thank you SO much!
I love this! It turned out beautifully!
Susan, thank you. I think they look more “French” now.