A 1922 Historic Home Restoration is Finished!
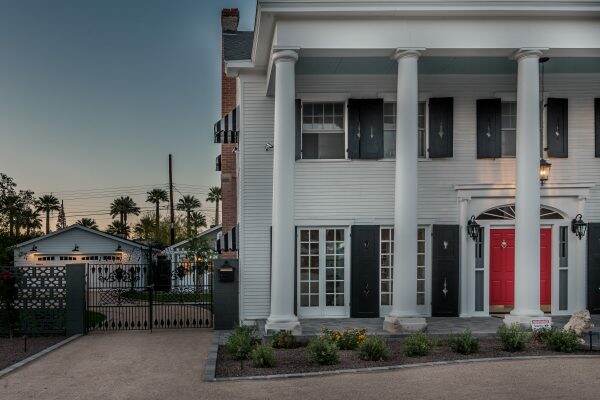
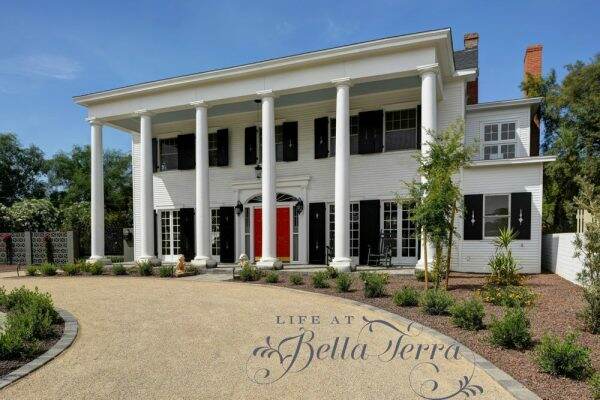
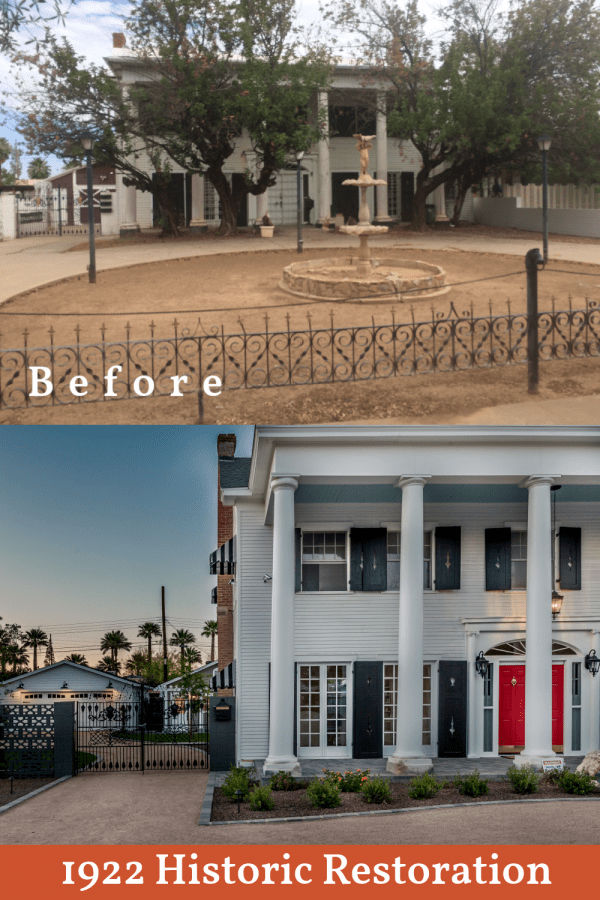
After 8 months of extensive renovation, we are proud to show you the results of the 1922 restoration in one of Phoenix’s most lovely neighborhoods. This Jeffersonian grand dame is worthy of all the time, money and energy it took to make this restoration a reality.
If you would like to see previous posts on this, please click here and here. For some reason, this renovation consumed more energy than I imagined. I’ve been contemplating as to why that is so and I’ve come to the conclusion that this house elicited many emotions for me.
First of all, I find it troubling that someone could let this architectural gem deteriorate so greatly. When it was being built in the early 1920s, it is evident that great care and pride went into every detail. It is obvious that many people have loved this house over the decades. Yet the last 20 years it sat empty and neglected, sad and lonely.
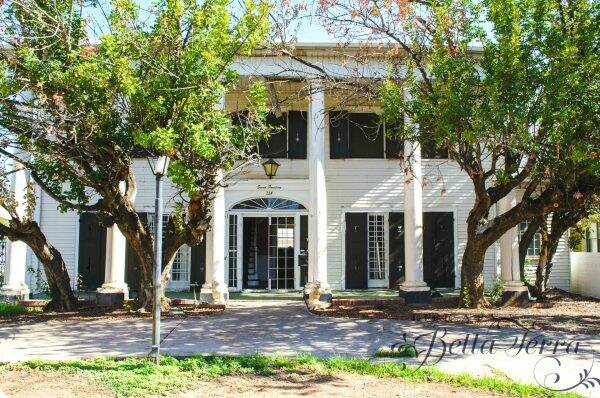
When you let something like this go, the steep slope of decline happens rather quickly. My heart actually hurt when I first walked into the house. I could envision what it was like in its prime~~a home filled with laughter, activity, parties, and celebrations. But when I purchased it in August 2016, it was filled with debris~~depressed and abandoned.
The Exterior
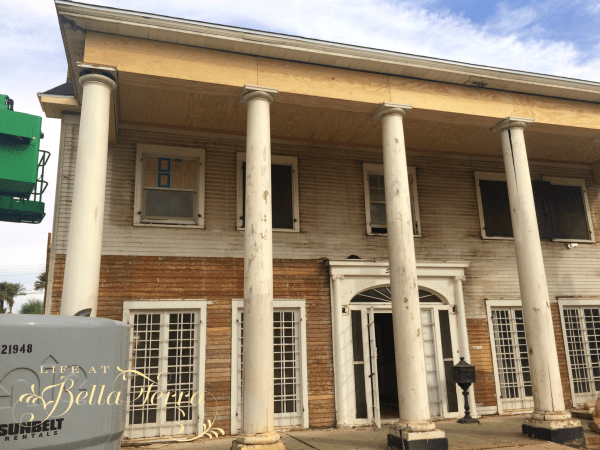
The home was covered in aluminum siding and the only activity involved pigeons who had taken it over as their residence. If you look closely, the aluminum siding is falling off and I held my breath hoping the original clapboard siding is underneath. We stripped all the aluminum siding off (and recycled it). A local company was able to replicate any missing or damaged clapboard.
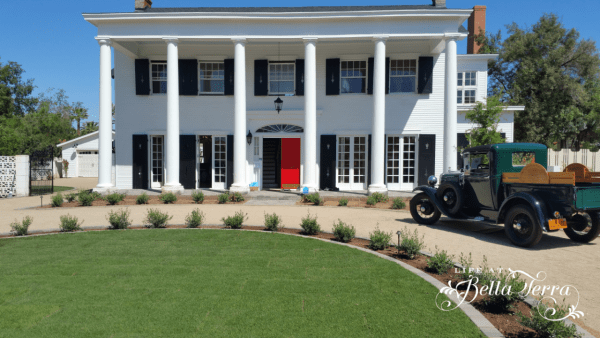
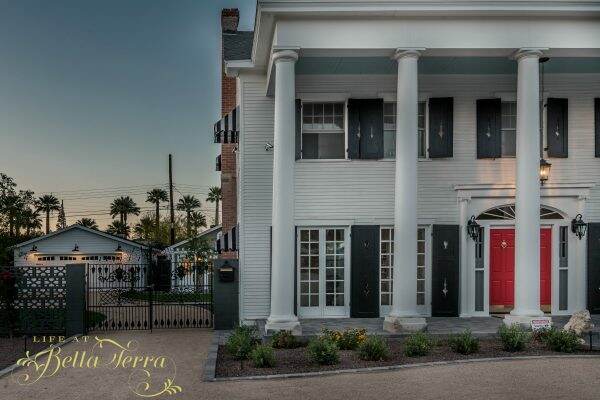
With a fresh coat of paint, a newly rebuilt front terrace and overhang, new roof, light fixtures and all new landscaping, the house is now back to its former glory. How fun that my neighbor, David Stanton, is kind parked his antique car in front for these photos.
The Entry
The entry was painted a hideous pink and the gold plaster curlicues were glued to EVERYTHING. The entry light had plastic, fake crystals, the balustrades were painted gold (more gold!) and the hardwood railing was painted white.
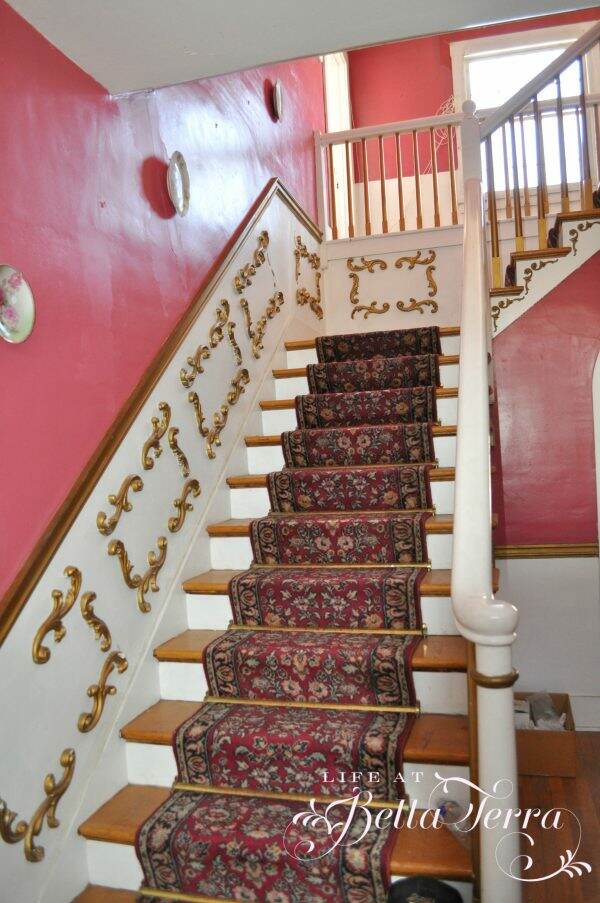
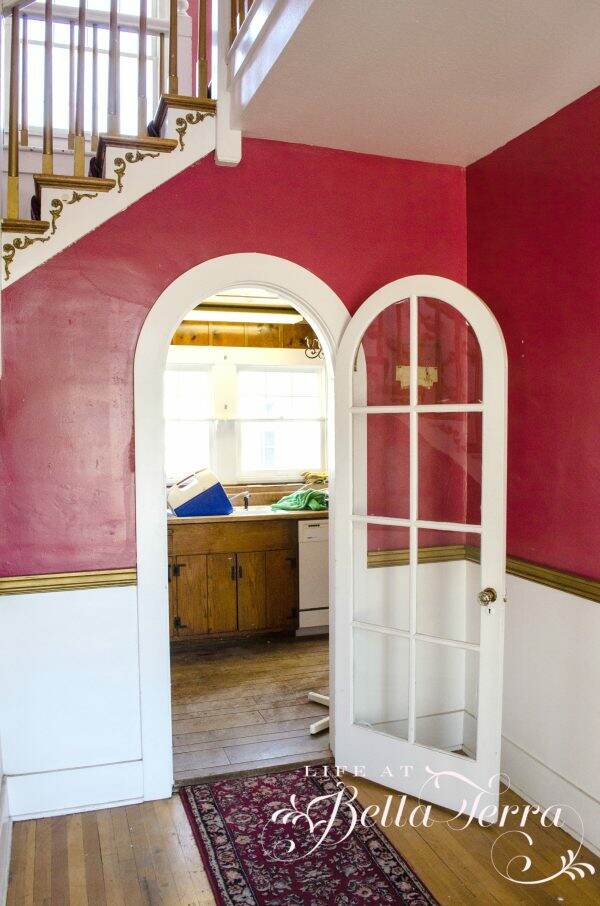
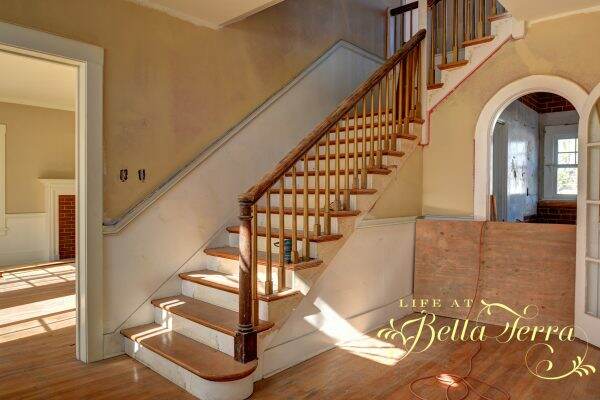
All the original floors are preserved and refinished~~they are gorgeous!
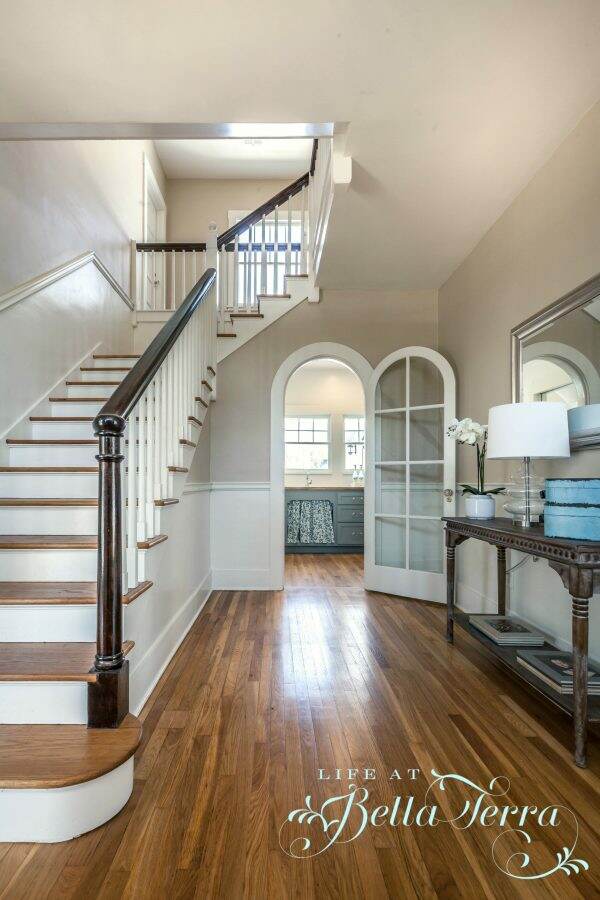
The Living Room
Upon entering the house, the living room is to the left. With gold-flocked wallpaper and what appears to be 2 mantles (?), the original hardwood floors are in tact and the room is a very good size. Thankfully the original chandeliers and plaster medallions are still there.
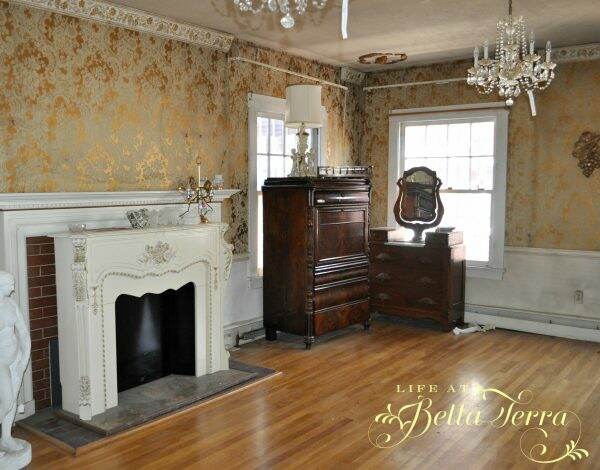
All the windows needed repair as did the many cracks in the plaster walls. We removed the baseboard heating system, as well as the wallpaper. Though you cannot see it in this picture, the electrical conduit to the chandeliers was just tacked onto the walls.
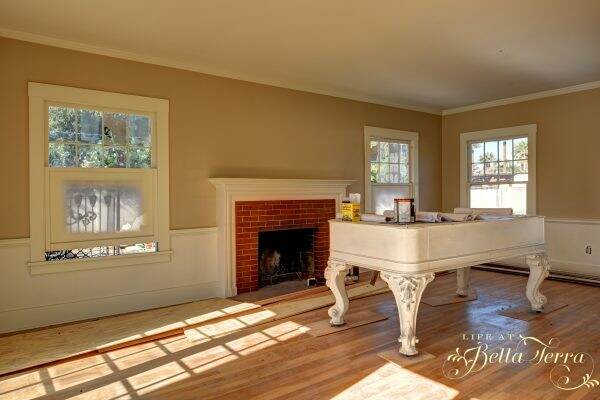
Now you can see the gorgeous bones of this room. The ceiling rosettes, crystal chandeliers, beautiful woodwork and original hardwood floors make this room an elegant space.
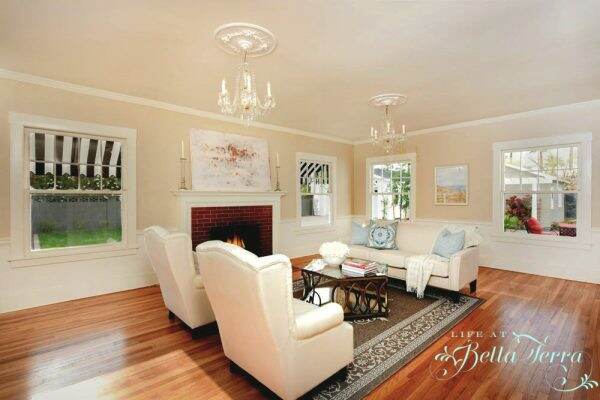
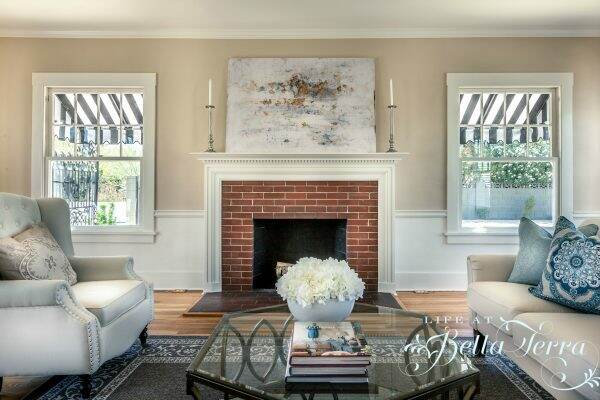
The Dining Room
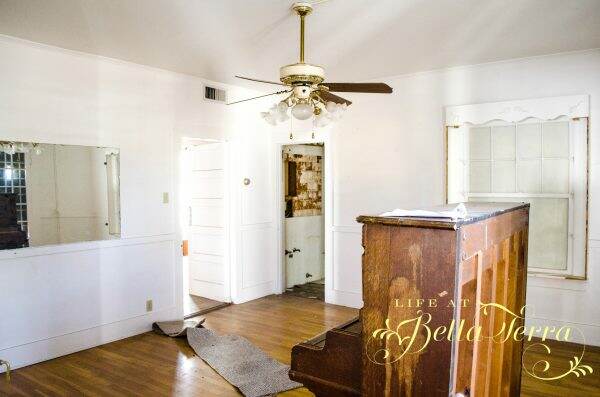
To the right of the entry is the Dining Room. The walls were wallpapered and then painted over, so we removed everything down to the plaster. Yes, behind the piano, that is an exterior window that was used as a bookshelf. Go figure.
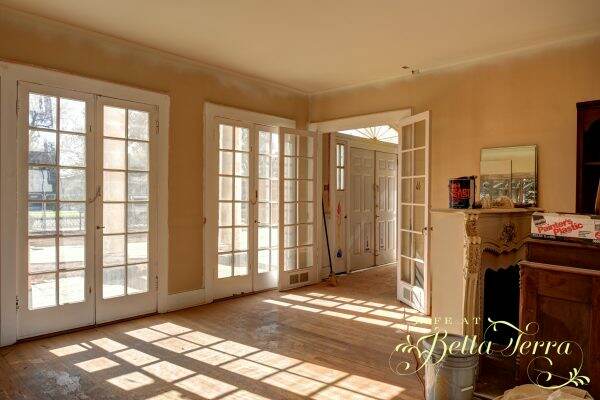
Both the dining room and living room have beautiful French doors that open up to the front terrace.
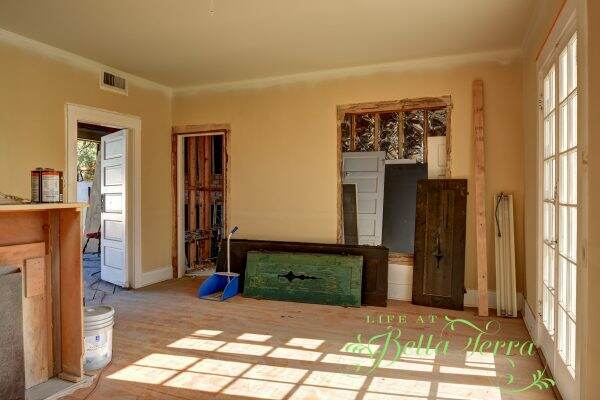
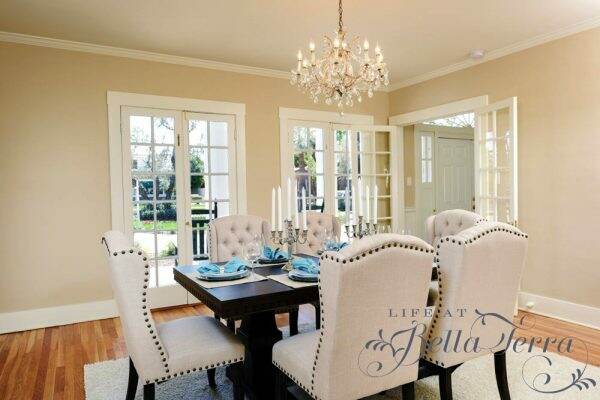
Here is the dining room after from 2 different angles. What was once a storage area, is now a closet for china, silver, linen and crystal. Though you can’t see it well in this photo, the concrete floor is hand-painted. See a previous post regarding that project!
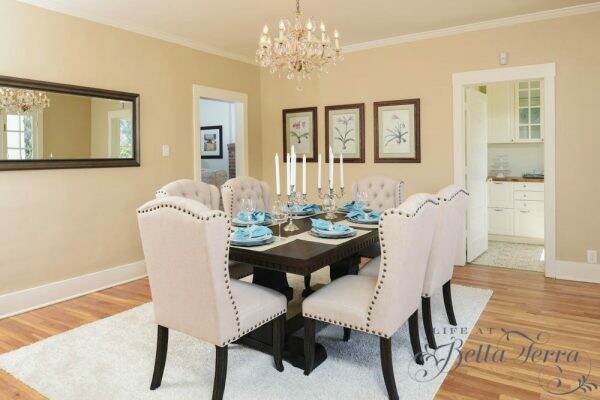
Picture a meal here with all the French doors open to the outside. The original chandelier was missing but I am able to find another crystal one that fits the period of the house.
The Butler’s Pantry
From the entry there is now a Butler’s Pantry where parts of the original kitchen were located. The plastic door to the left is the former laundry room. This is now a completely new powder room with a pocket door added for privacy.
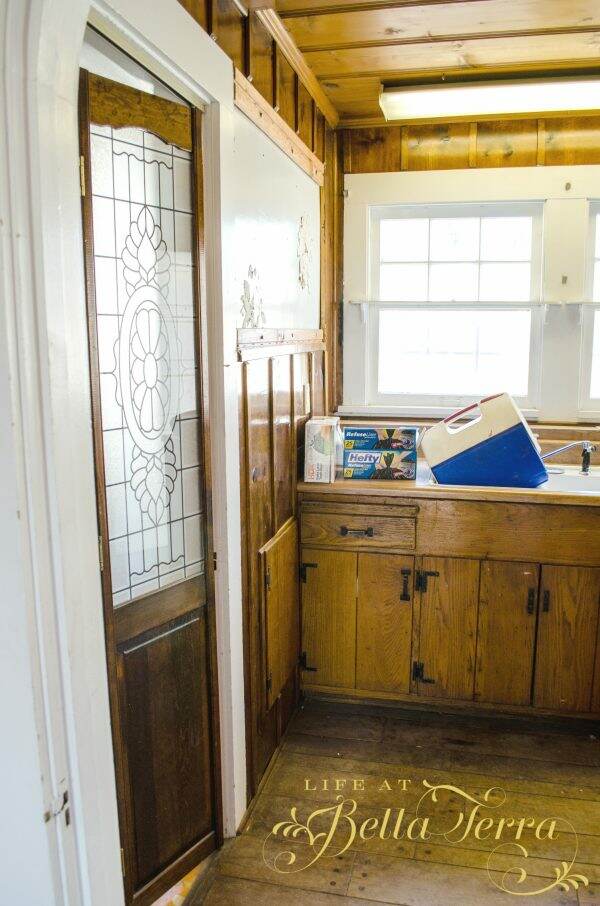
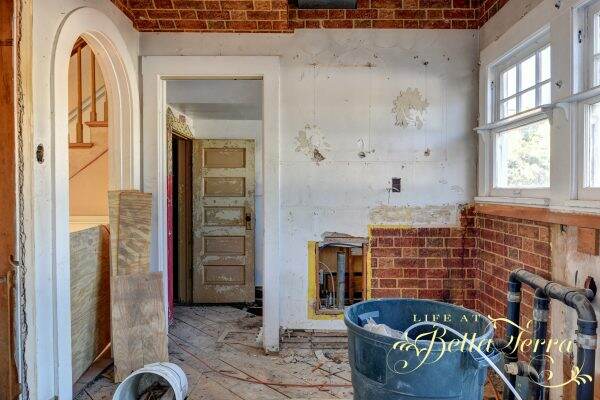
Here we have gutted the room back to the walls. The door in the distance is the entrance to the basement.
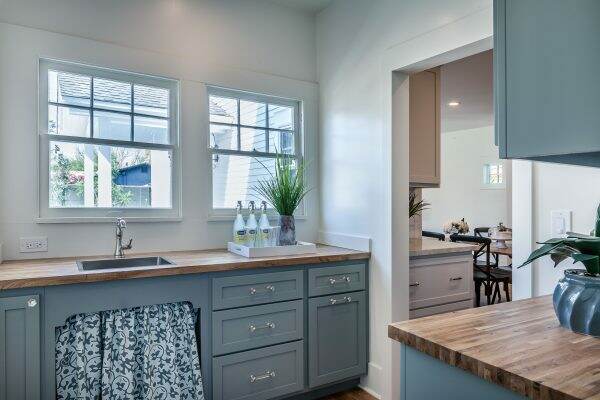
This sweet butler’s pantry has oak countertops, crystal pulls and knobs on the custom cabinetry and a skirted sink.
The Kitchen
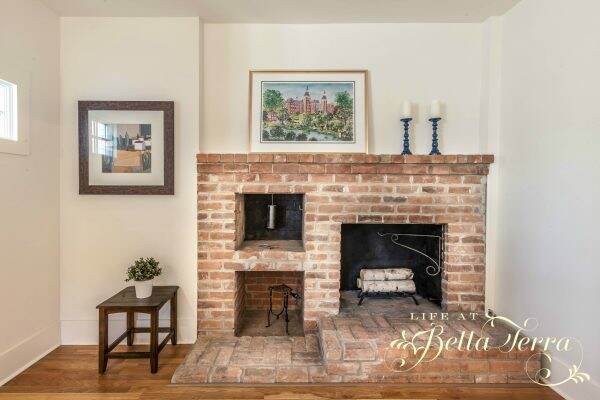
The kitchen was a massive undertaking. It spanned two rooms with the sink, dishwasher and refrigerator in one room with the stove in another. However, there is a lovely, large, brick fireplace which apparently was at one time, used for cooking.
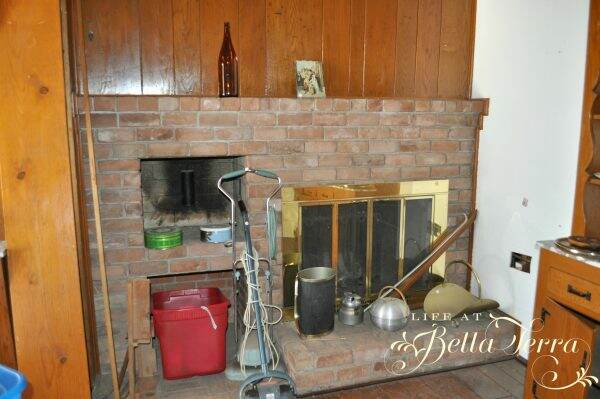
This is now what I am calling the “kitchen cozy”. A perfect place to sit in a very comfortable chair to read the paper or have your coffee.
There was a tacky addition to the back of the house that needed to be removed. After structurally supporting the exterior of the house with a beam, we rebuilt the addition and took this opportunity to add a second story which becomes the master suite.
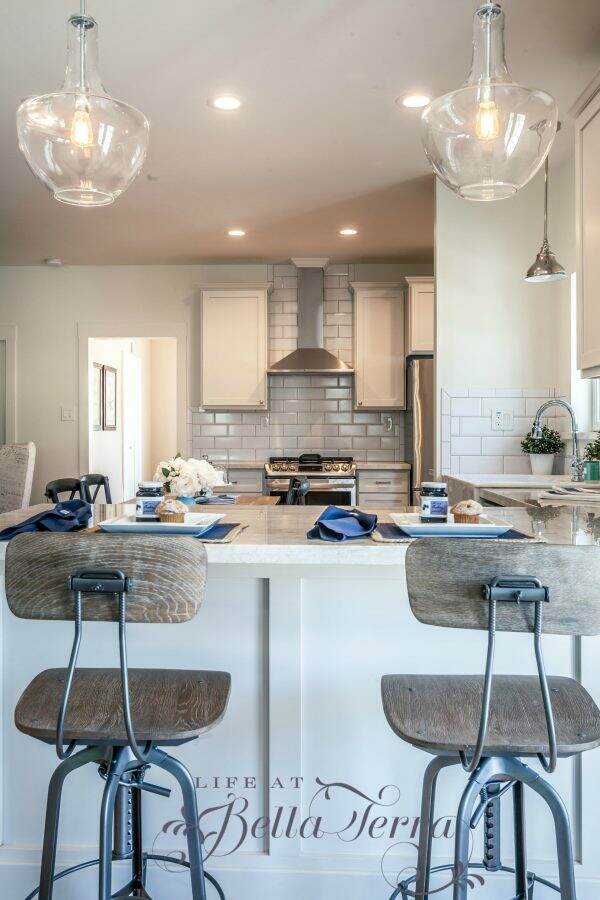
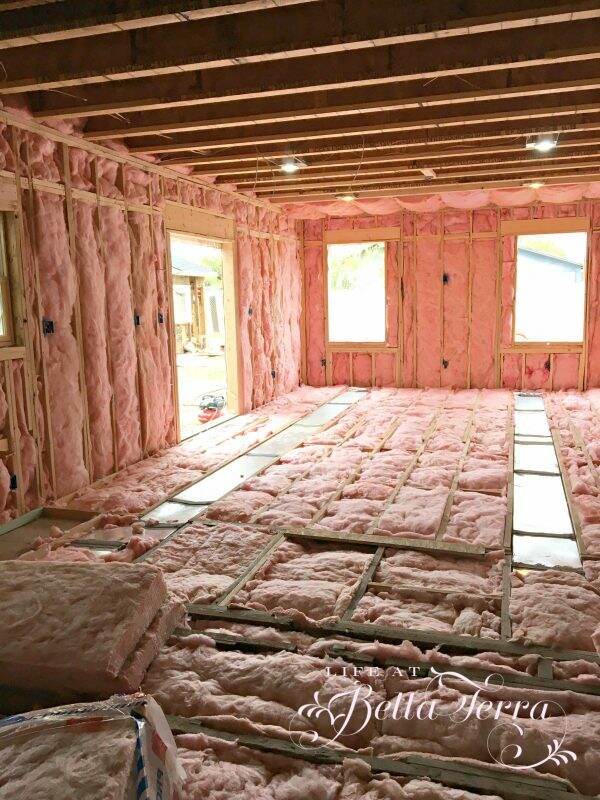
The new flooring is now level with the kitchen and all the air conditioning vents have been submerged in the subfloor. This addition, on the first floor is now the open kitchen/family room.
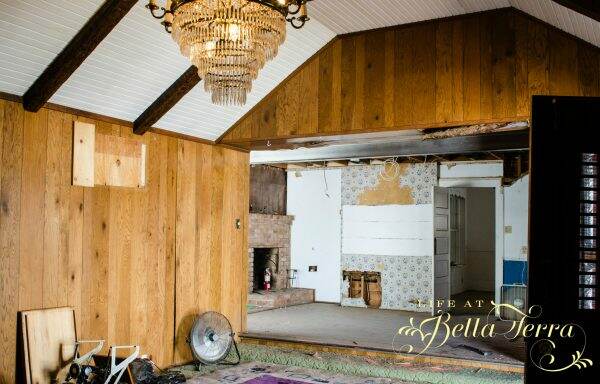
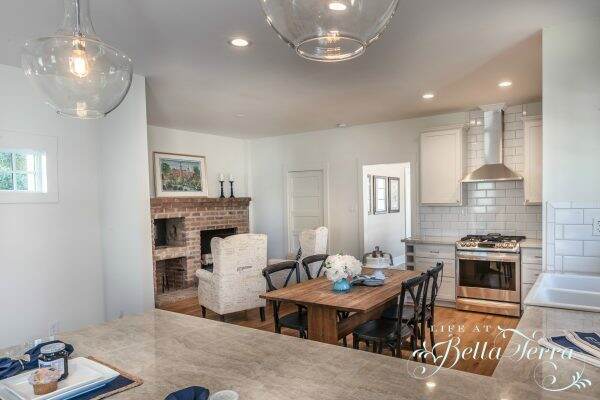
Great care is taken to put all the first floor air-conditioning ducting in the floors. Insulation helps with sound and keeping the house cool in the hot Phoenix summers.
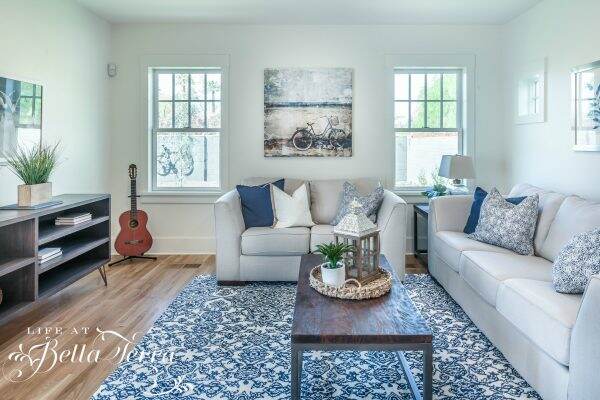
The family room after.
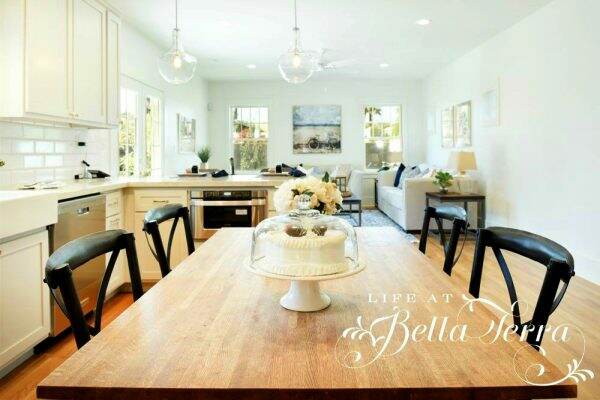
This is the view from one end of the kitchen to the family room.
The Hall Bathroom
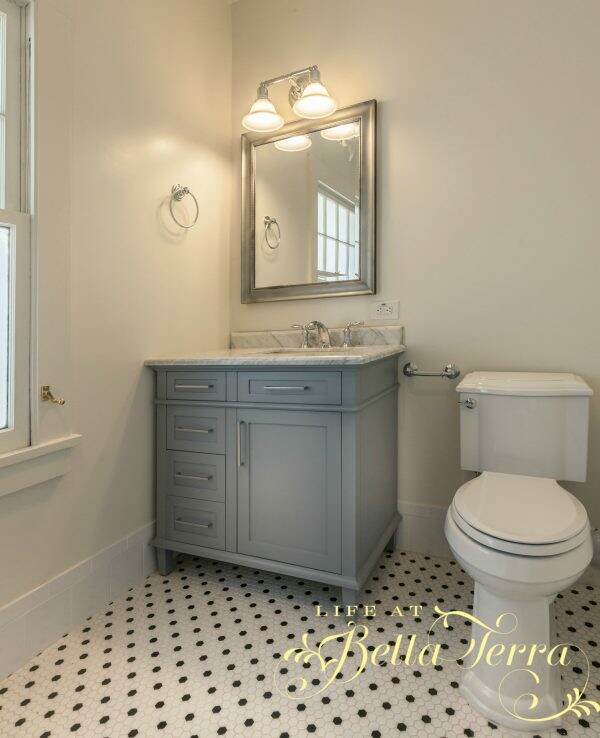
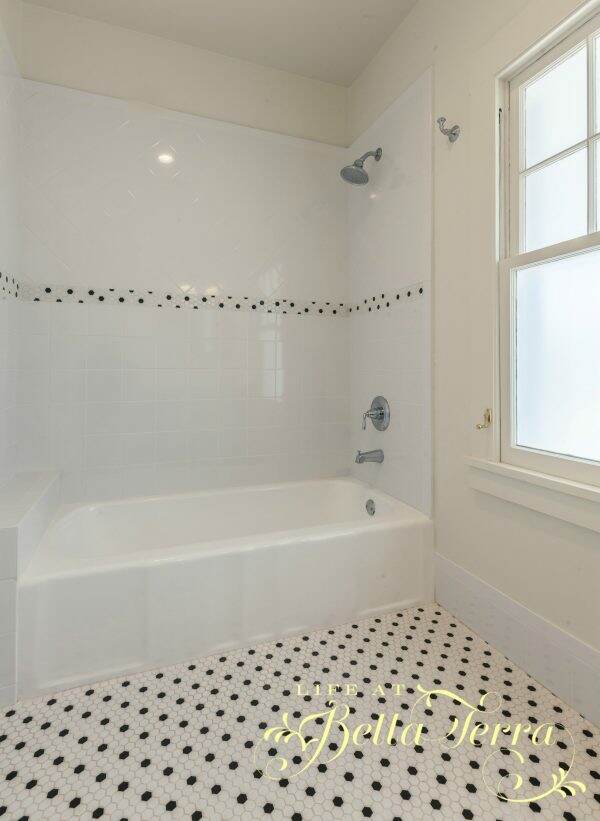
Upstairs, the hall bath was quite a site! Again, lots of gold on the walls and the ceiling!
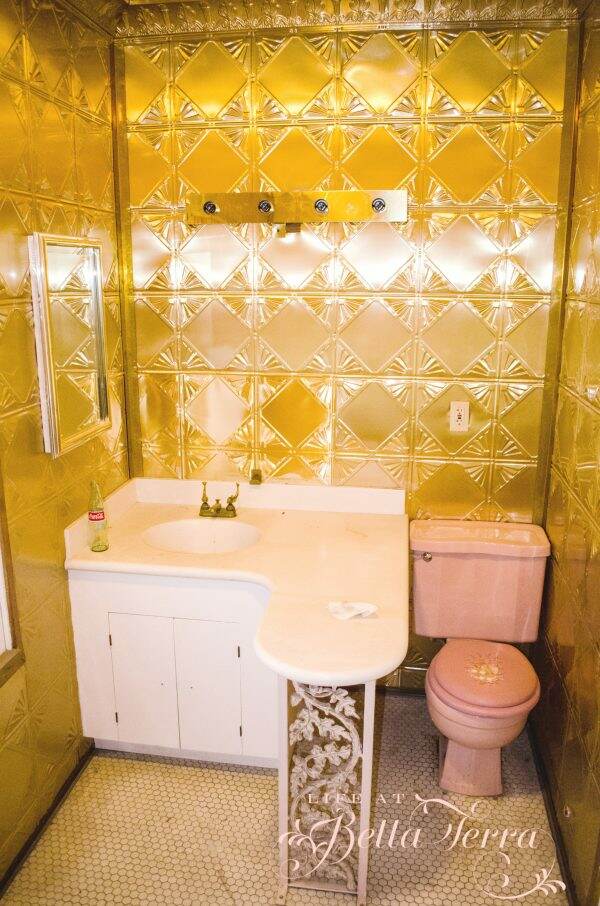
Notice the small brass cranks on the window trim. These cranks allow you to open and close the exterior shutters from the inside.
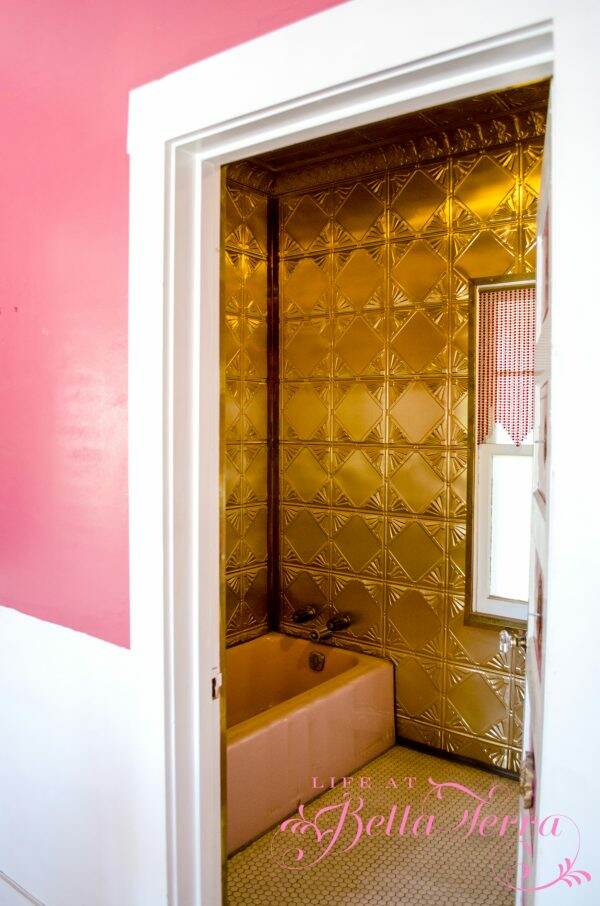
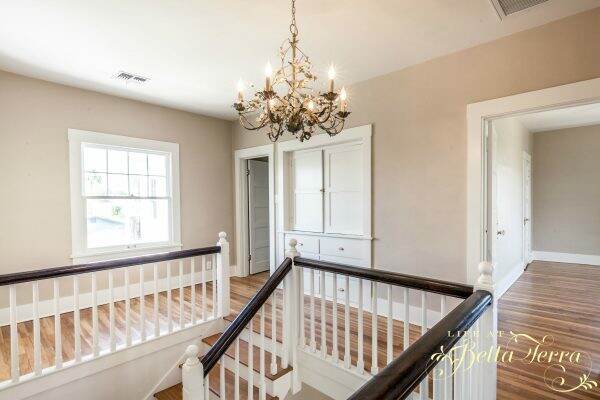
All the bedrooms are off this wonderful upstairs hall. You can see the hall bath in the background with its original beaded curtain.
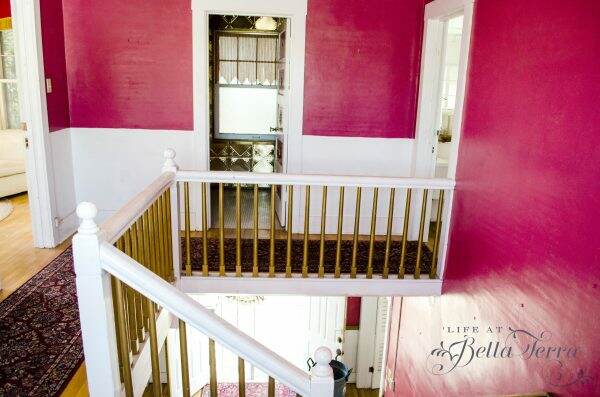
With a fresh coat of paint and refinished floors, it looks so clean and elegant. The light fixture has silk shades and this is a Ballard Designs purchase.
The Bedrooms
The southwest bedroom had the funky bathroom in one corner without any walls. Gotta love the very disgusting fuzzy, pink toilet seat cover!
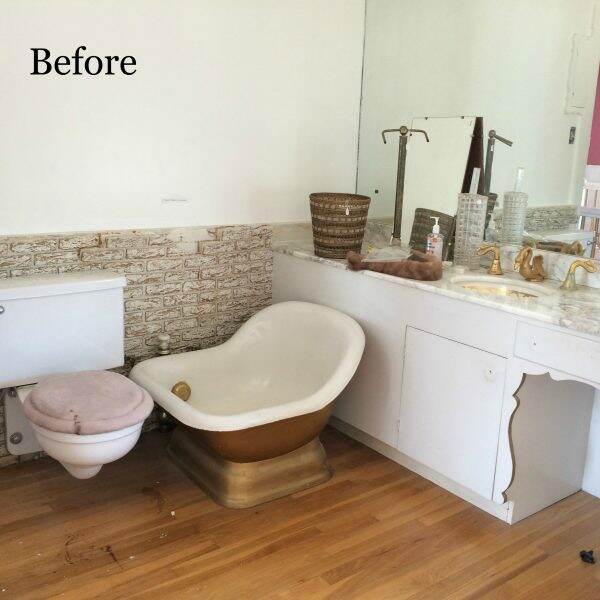
When we took out the vanity and we discovered an original window in tact! Hard to believe the faux brick wallpaper was “in” once.
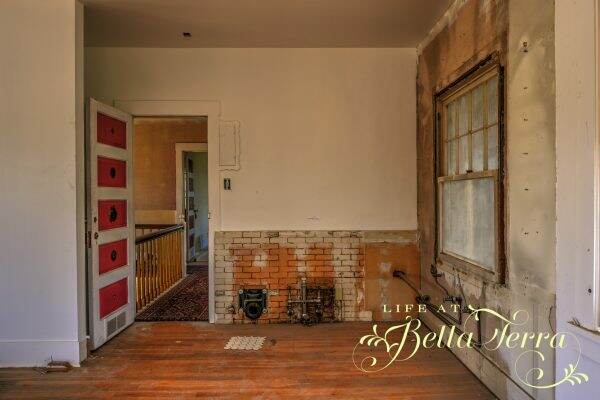
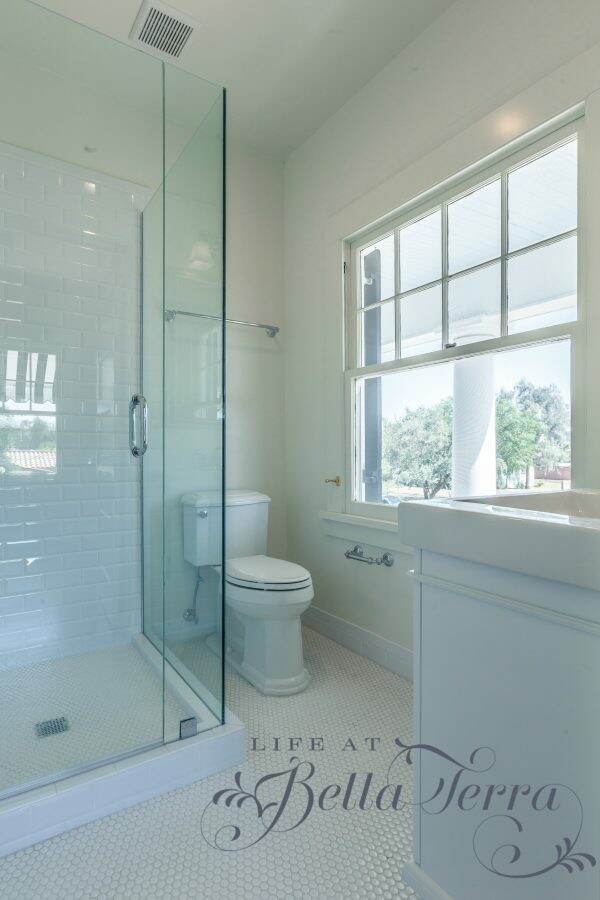
With the addition of walls, this space becomes an actual bathroom.
The Master Bedroom
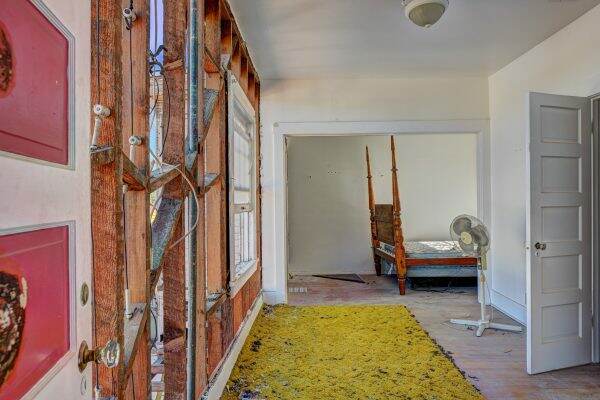
The master bedroom was rather tiny so we created a new master space with the second story addition. Where you see the closet to your right, we walled off a larger section (over the yellow rug), and created a new master walk-in closet. The window, located in the left of the photo is where the opening becomes the new master bedroom addition. Where the bed is located in the background, becomes the master bath.
We build a small deck outside the bedroom~~where there are city lights to be viewed at night.
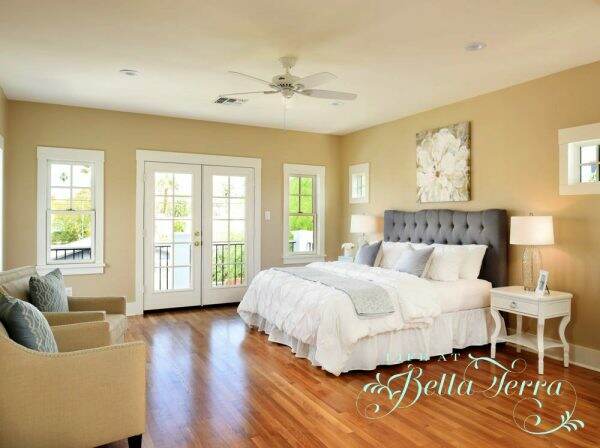
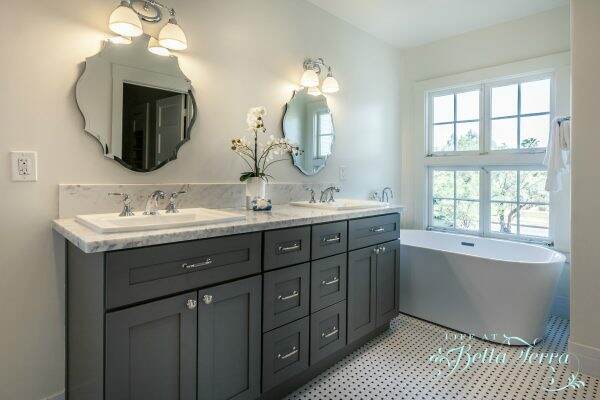
Notice the window behind the bed. This is where the new bathtub is placed.
Demolition and Addition
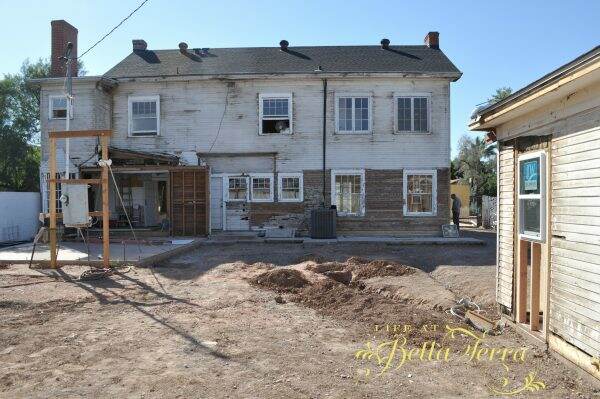
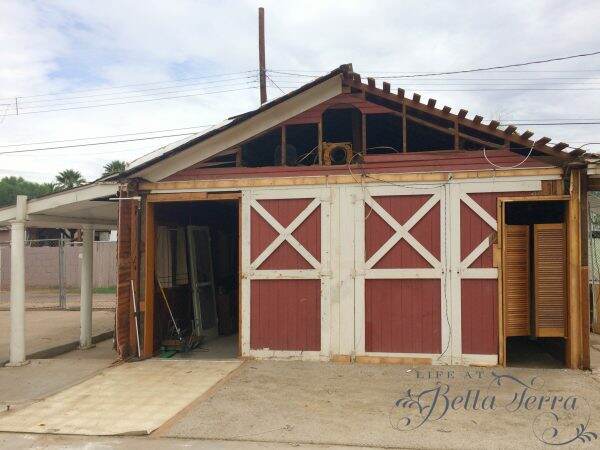
Some of the greatest building transformation took place outside. The backyard was crammed with 3 buildings~~all rentals units that were uninhabitable. We demolished 2 of them and opened up the back yard. We left one cottage and discovered it had been the original garage.
However, we couldn’t salvage the barn-style doors as they had been destroyed. Included in the demolition permit was the removal of the addition off the kitchen which was not built to code. I don’t have any good pictures of the backyard before, however, here is what the house looks like after everything is gone.
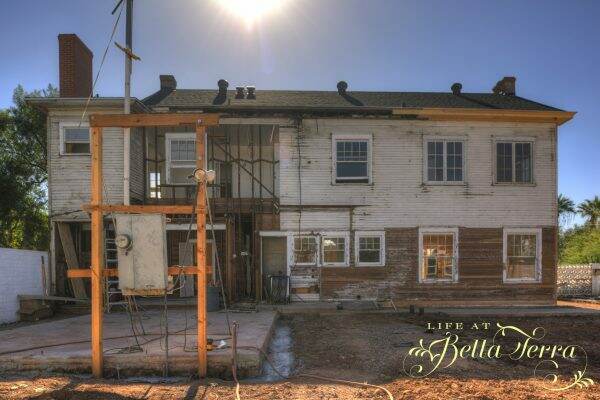
Here you can see the second story demolition of the house and the where the future master suite will be located.
The Guest Cottage
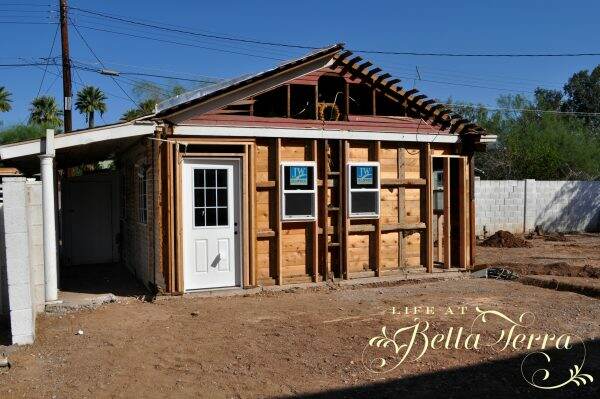
Here is the remaining guest cottage/original garage.
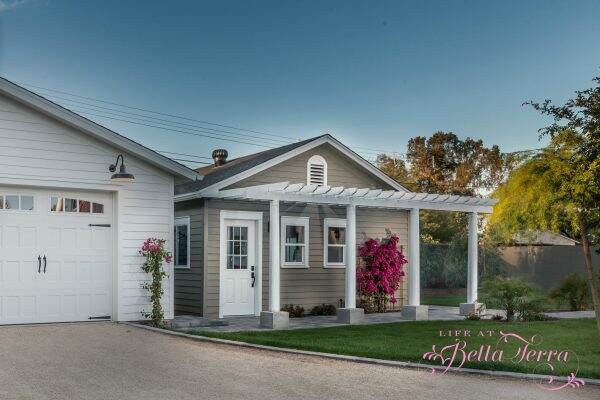
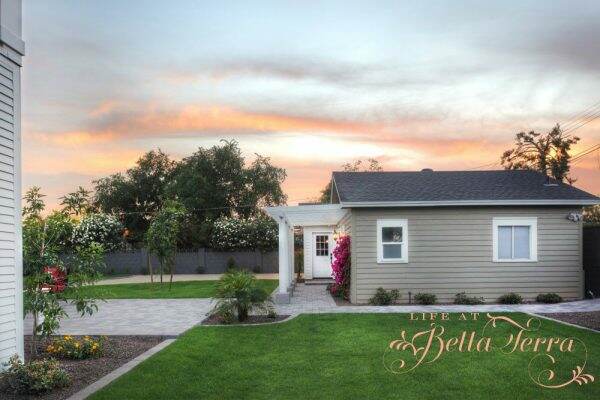
By adding new doors and windows, this original garage becomes a sweet place for guests.
The Garage
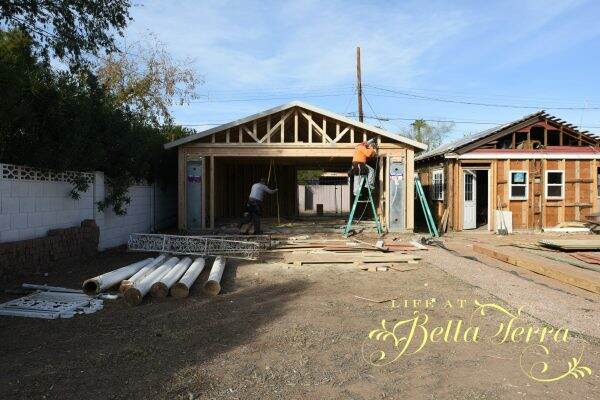
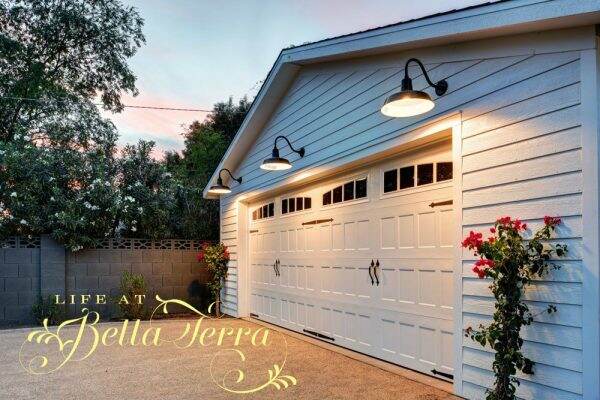
There was no garage so we add 2 two car one next to the guest cottage. There is an 2 – car automatic garage door on one side and a single car garage door which opens out to the alley. This way you can pull you car in one side and drive out the other.
The Yard
I’m not a big fan of block walls, however, they do provide privacy and safety. I always like to do something whimsical and unique at each house I renovate and this section of wall seems to be the perfect place.
I picked up this bike on Craig’s List for $20.00, cut the seat in half; removed one pedal and split the handle bars. The block wall was white and we paint both the wall and the bike a great shade of green/gray from Sherwin Williams.
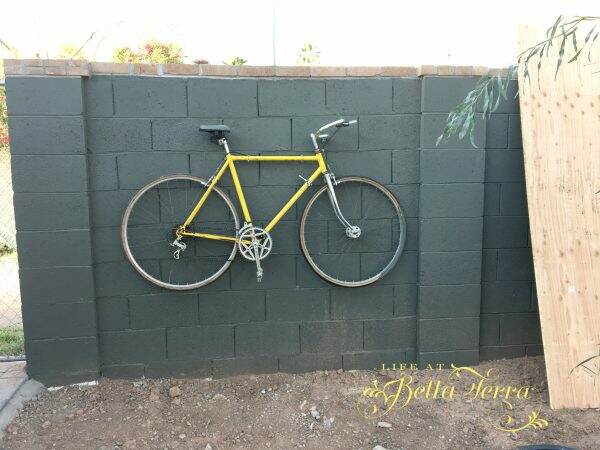
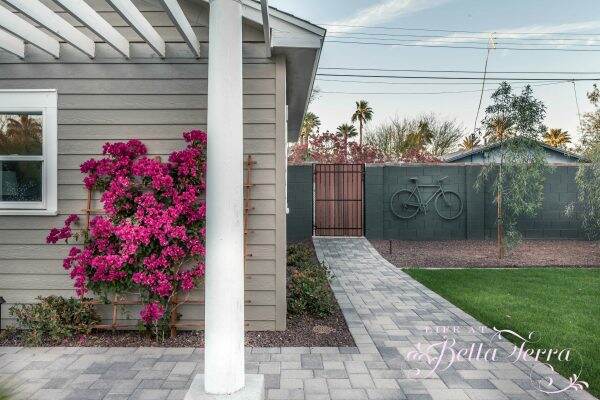
The “bike art” is now a focal point of the back yard. Once the trees fill it, you may not see it but it’s a fun surprise. I wonder what other objects I could use for future wall art projects??
The Details
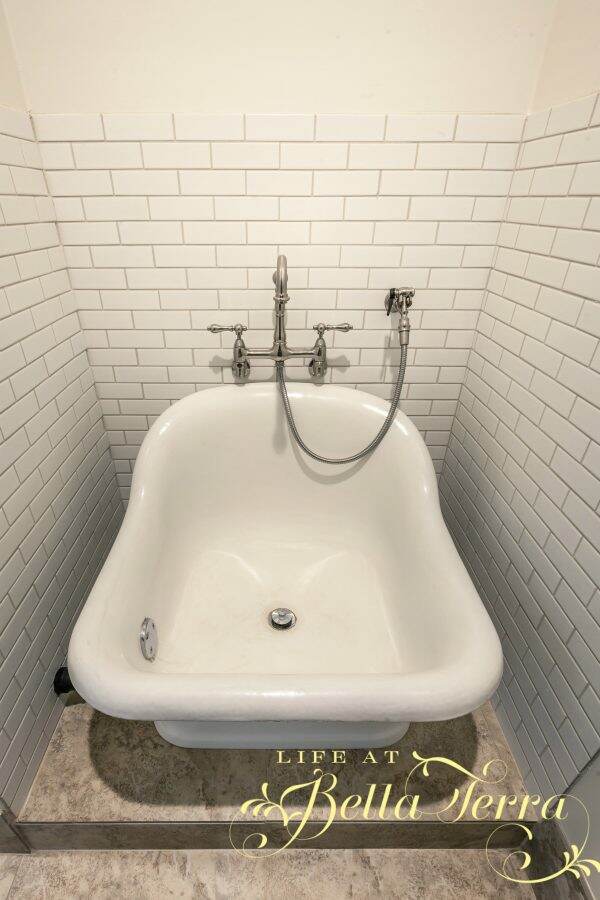
The French tub was a keeper and it is repurposed as a dog bath in the new laundry room. I had the exterior of the tub (which was gold, no surprise there) professionally coated.
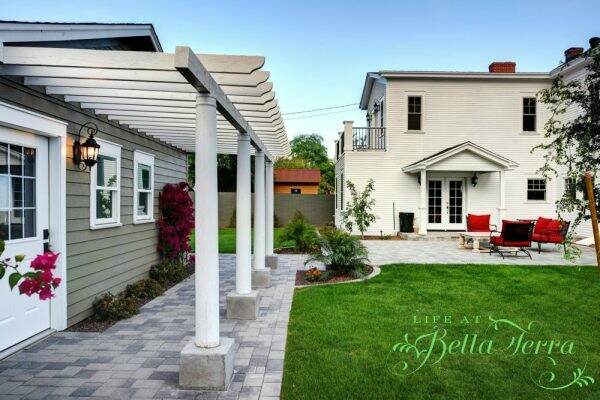
Here are some additional photos of the exterior.
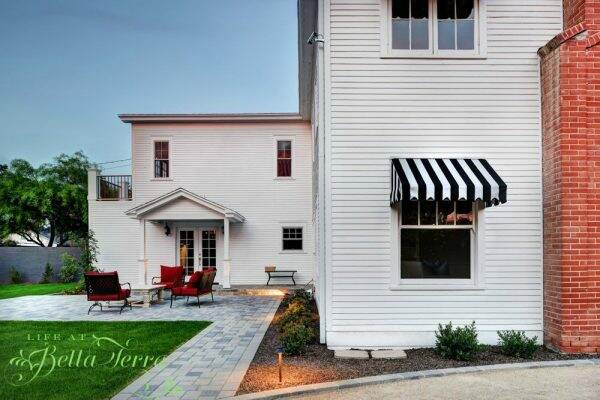
Since I retained the original windows on the existing house, I add Sunbrella awnings over the windows facing west to reduce the sun exposure.
Finishing this project
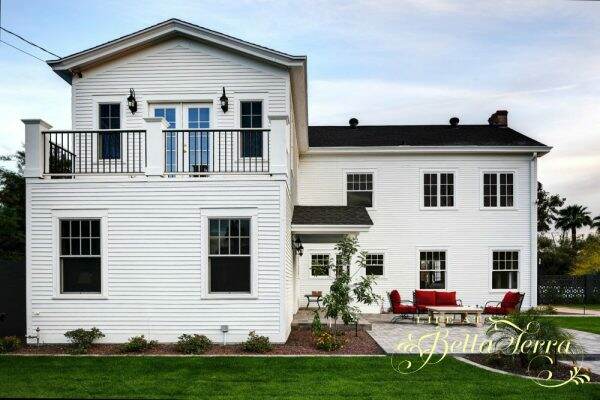
This is a great shot showing the original house and the newly added (and structurally correct) 2 story addition. You may note that 3 windows in the upper story don’t match the rest of the house. I assume this section may have been an old sleeping porch and then enclosed at some point later. Nearly all the windows are double hung, but these three are casement windows.
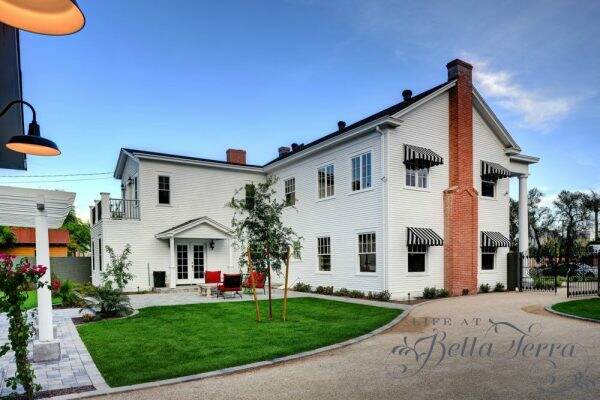
I find it interesting that the shutters are only on the front of the house~~which is historically correct. The shutters actually serve a purpose since the front is south facing. The upper shutters close via an interior brass handled crank and the lower, larger shutters actually work and cover the French doors. Very innovative back in 1922 when air conditioning didn’t exist.
I hope you enjoy the restoration journey of this magnificent home. My work is done and now it is up to my realtor, Madison Hallock to find the perfect person/family for this house. You can see more photos and real estate details here.
This project could not have been done with the right people working on it. I am blessed with the absolute best crew, who manage to keep the laughter going even in times of despair. Everyone left a little bit of the heart and soul here and we are so proud to breathe new life into a historical home of this caliber.
Many thanks to the following people for helping me: some before and after shots by photographer, Adam Peter; after photos by photographer, Jesse Fitton; Lola Castle with Castle Designs for her wonderful staging. I’ve never used a staging company before and Lola was calm, cool and professional even as I was anxiously hovering over her. I would definitely use her again! And a big thank you for all the neighbors who tolerated our presence in their neighborhood. Their words of support and encouragement are so appreciated and welcomed!
Will I do another?
Everyone keeps asking when I will do another one, but I can honestly say, I’m pooped. I hope to take the summer to recuperate. Unlike some profit-driven flippers, I do this out of love and respect for older homes and their architecture. I take this responsibility seriously and feel that renovating and restoring is a way of care giving. And if you have ever taken care of someone, you know how rewarding and draining it can be at the same time. As with most things in life, I always try to leave the campsite better than I found it. I think we hit this one out of the park!

If you enjoy this post, please feel free to share it on Pinterest.
Just a reminder that any words that are italicized bring you to the source. If it is a product on Amazon, please note that I am an Amazon Affiliate. If you purchase something through my website, I receive a small (very small!) stipend, which doesn’t affect the price you pay at all. My goal is to make sourcing the items easy for you. Thank you for your continued support.



This is the most amazing project, Mary! I can’t believe the original bathrooms, as well as the gold and pink paint throughout. You did such an incredible job! It was so fun to go through the before and afters.
More fun than Alameda? You really did a fantastic job. Do people currently live in it?
The fun you have is indescribable .
Yes I sold it to a wonderful family! Well, it took less time than Alameda, but a huge restoration. Different when you hire someone vs. doing it yourself!
Fantastic! And thank you for saving a piece of Phoenix’s history for future generations. Quite an extraordinary restoration.